Building a Makeup Kit and Details about the Sephora Savings Event!

I love makeup. I genuinely look forward to sitting down at my vanity and doing my makeup, from quick basics (brows, concealer, blush) for a Saturday morning, to a full face of makeup using long time loves or brand new products I’m testing out.

It just thrills me. I remember playing with my mom’s makeup as a kid, specifically her bolder lipsticks. I would also raid her nail polish collection and I remember using a deep grape color on my fingernails very regularly.

The combination of my natural interest, as well as being influenced by how my mom approached beauty, led to my knowledge and experience in developing a few different makeup routines that I feel confident in!

I can imagine, with ease, how overwhelming it could feel to build a makeup kit if you don’t know how to start. Maybe you don’t really love trying new products? Or perhaps you didn’t have anyone in your life to teach you some makeup basics? While I’ve shared a slew of tutorials, demos, product testing, and beauty favorites videos on the internet for 10 years, I wanted to spend a bit of time today discussing some essential products for a makeup kit and how to build out from the basics.

Sephora, one of my very very favorite places to shop for all things beauty is running an event with savings between 8/14-8/23/2020. You have to be a Beauty Insider (it’s totally free to sign up!) and you’ll get access to $15 off of $75 OR $20 off of $100! The code is “WELCOMEBACK” which you can enter online at check out, or use in-store if your nearest Sephora store is open (click here to find a store near you and see it’s open!). The code can be used once online, and multiple times in store!

Makeup should make you feel great, it should highlight your natural beauty, and tap into your creativity as well.

The person I have in mind when writing this post is someone who is interested in makeup, enjoys the process, and is looking to have some solid foundational products off which to build a solid kit. Someone with a more minimalist approach to beauty may find this to be too many products, so know that I would approach a minimalist or “clean” kit from a completely different angle!

Essential Makeup Products for a Classic Makeup Kit:

Foundational Products: foundation, concealer, blush, mascara

Essential Additions: brow products, eyeshadow, bronzer, lip color

Extras: setting powder (or spray), contour, highlight, eyeliner, lip gloss, mascara primer

Below are a few specific recommendations for each category:

Foundation: I prefer a liquid but there are certainly plenty of options out there! From loose powders to creams, look for a foundation that gives you the coverage and final effect you desire. Generally, I prefer a medium coverage because I can apply two layers if I want more coverage, but my daily go-to choice is usually one layer to even out my skin but still allow my freckles to show through.

Concealer: Try to stick fairly close to your skin color for concealer, instead of going too light in an effort to counteract skin darkness. You’d be better off using a corrector instead of choosing a concealer color that is too light. Something with a natural finish is going to look more natural under the eyes instead of something with a matte finish.

Blush: Cream blush is my very favorite at the moment because of how natural and radiant it looks on the skin. Powder can certainly be a beautiful choice, but more often than not I’m reaching for my cream blushes.

Mascara: I like a clean finish, extra length, and a really dark black color.

Brow products: This could be anything from a clear gel to a pencil. I prefer using a pencil to fill in my brows as I have very little to work with on their own.

Eyeshadow: Like blush, I’m loving cream eyeshadow. Anything from a crayon applicator is easy to apply and can be blended in simply with your finger.

Bronzer: Using a bronzer is the quickest way to add warmth and glow to your face.

Lip color: A simple balm with a touch of color or even a fully pigmented lipstick goes a long way in your face looking complete!

Setting Powder: Either powder or a setting spray is essential to “preserving” all your hard makeup work!

Contour & Highlight: This is something that I do every day and goes a really long way in restoring the angles and variation in the planes on my face instead of it looking flattened out by foundation.

Eyeliner: Adds depth and definition to your eyes, can be used to minimize large eyes, or add definition and width to smaller eyes!

Lip Gloss: This is a product I could live without, but it’s a nice option for fuller-looking lips!

Mascara Primer: This is definitely in the extra category, but I have to say it’s slowly becoming essential for me! It helps add thickness and length to your eyelashes, and that goes a long way!

I shot a step-by-step of my go-to makeup routine lately. I thought it may be helpful to see how each of the products transforms my face! You can find links to everything at the very bottom of this post.

To begin: Here is my face with Ole Henricksen Banana Bright Vitamin C Serum, Biossance Squalane + Marine Algae Eye Cream, and Bobbi Brown Extra Repair Moisture Cream.

Next up is Laura Mercier Hydrating Foundation Primer.

I’ve been loving Giorgio Armani Luminous Silk for a medium, natural-looking foundation. I prefer to apply with a brush.

Charlotte Tilbury’s Magic Away Concealer in shade 3 is the best match, but I’m using up the rest of shade 2 in this demo.

I always set my under eye concealer with Laura Mercier Secret Brightening Powder for Under Eyes. It keeps creases at bay and prevents dark smearing from mascara or eyeliner.

I love the Anastasia Beverly Hills Brow Wiz pencil in Taupe or Blonde.

One of my favorite cream eyeshadows is Laura Mercier Caviar Stick Eyeshadow in Au Natural. I used a light hand for this application but it could easily be applied more heavily for a deeper color pay off.

For the crease, the Laura Mercier matte eyeshadow in Cashmere.

My favorite dark black eyeliner is Charlotte Tilbury Rock N’ Kohl eyeliner in Bedroom Black.

This pre-mascara Lengthener and Thickener by Grande Lash makes a huge difference in how my mascara wears! Game-changer!

I’ve been loving the impact of Hourglass’s new Unlocked Mascara. I mean, one swipe and you have thickness and length! It doesn’t smudge, and it adds some serious definition to your lashes.

For contour, I’ve been testing the Fenty Beauty Match Stix Matte Contour stick in Amber. It’s a true matte with a neutral undertone and it adds the perfect shadow under my cheekbones. I use contour sparingly and with a light hand.

A new bronzer I’m enjoying is the Marc Jacobs O!Mega Bronzer in Coconut Perfect Tan. I love that it is matte and shade 104 is a nice tan color for lighter skin tones.

The Charlotte Tilbury Airbrush Flawless Finish Setting Powder in Medium (2) is a beautiful powder to set my makeup. It blurs any imperfections before my very eyes and evens out my face nicely.

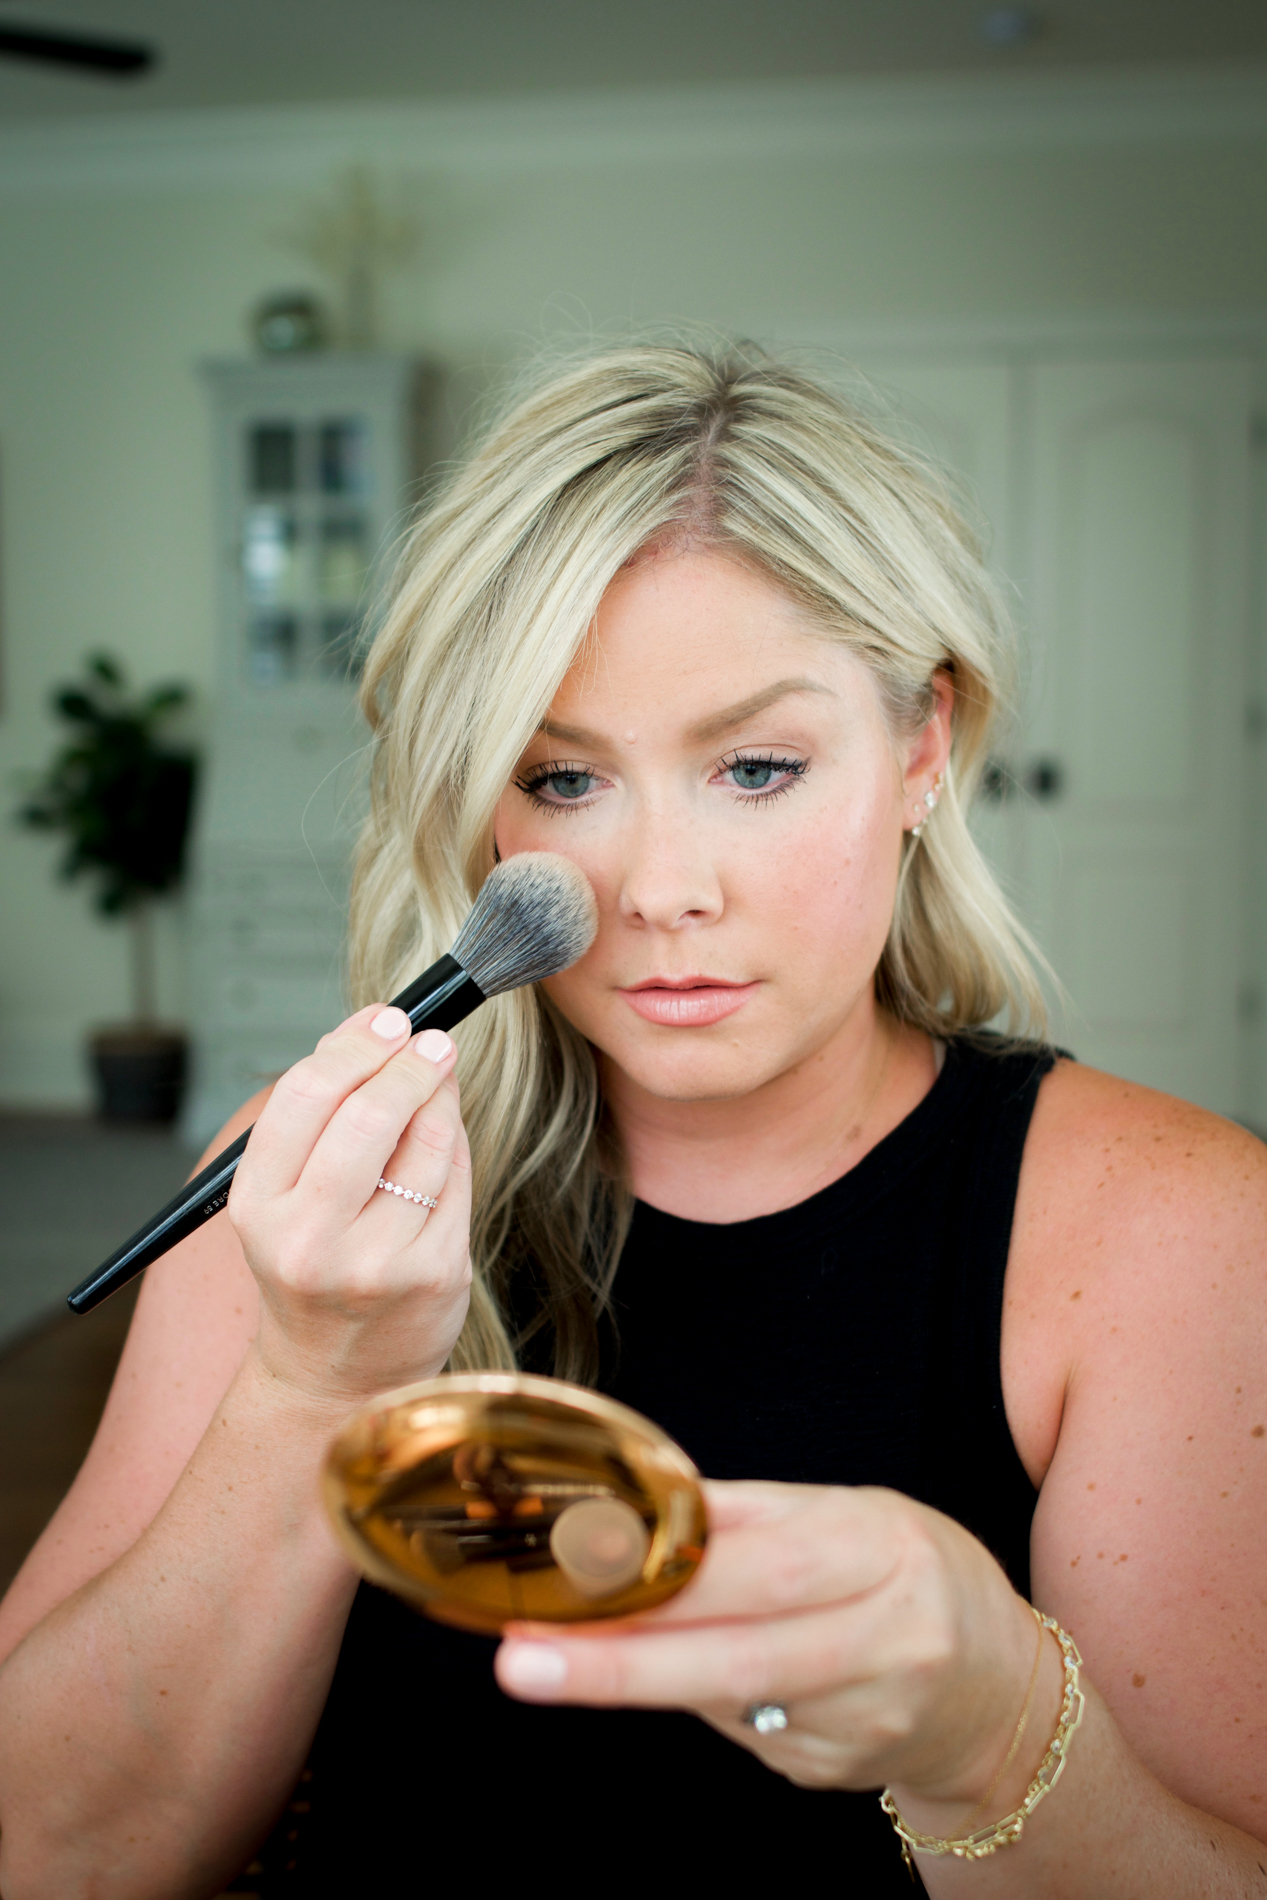
The Patrick Ta Major Beauty Headlines Double Take Creme & Powder Blush is the best of both worlds in one single compact! I love each of the products individually, but together the blush is long-lasting and the prettiest pink!

It’s hot and humid where I live so it’s vital to set my makeup with Urban Decay All Nighter Setting Spray. This spray works so well to fight against makeup smudging or melting off in extreme heat and humidity.

And finally, I finish with a pink nude lipstick by Bobbi Brown (since the blush was strong I didn’t want too pink of a color on my lips!).

This routine is my go-to for workdays or anytime I want to apply makeup “on autopilot”. I know the colors that work for me, and I know I’m going to like the final result!

Like I mentioned earlier, now is a great time to either stock up on favorites or expand your makeup kit during this Sephora event! The code is “WELCOMEBACK” in honor of some stores being open (again click here to see if yours is!) and it can be used online or in-store.

Click on any of the images below to shop the products I mentioned!

This post was sponsored by Sephora.

Dreamy Cream Blushes

Nothing excites me more on the makeup front these days than a cream blush. I’ve been singing the praises of cream blush for months (years maybe?) because it just lasts so much longer on the skin and looks like a natural flush. I tend to be heavy-handed with my blush and cream blush allows me to get the depth of pigment I want with a finish that matches a medium coverage, natural finish foundation.

To break it down, since I prefer lightweight foundations these days, I like a blush that blends well with the finish of a natural-looking foundation. Conversely, when I used to prefer a full coverage makeup look, powder blush was able to give me the color I wanted with a flawless, matte finish!

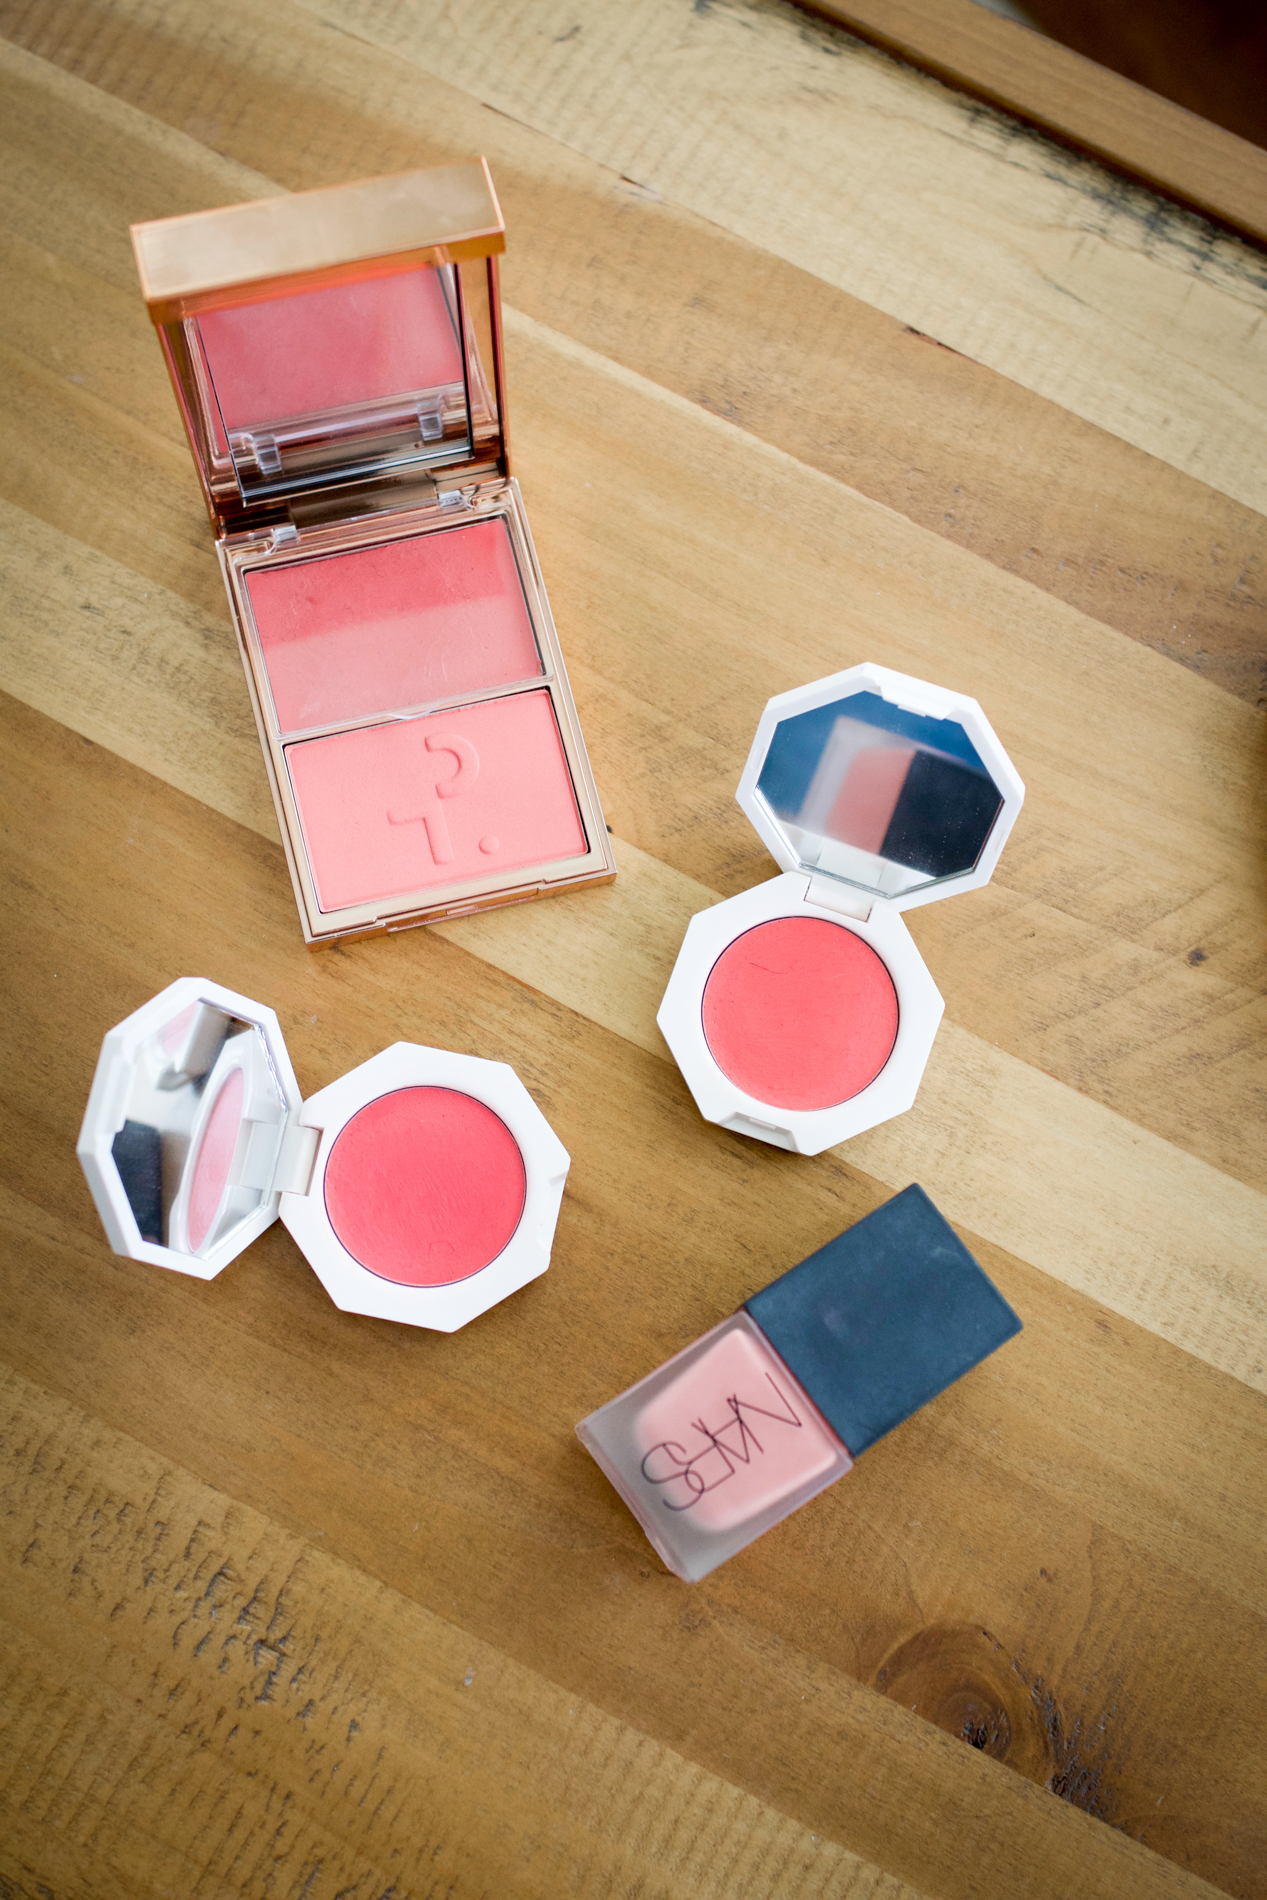
My most used blushes these days are pictured above, with the Patrick Ta duo being one of my very favorites.

NARS Liquid Blush in Orgasm. This is liquid, not cream, but since it isn’t a powder, I thought I’d include it in here anyway. I like to dot a little bit of it onto the back of my hand, then press a brush into the liquid. I’ll blend it onto my cheeks with a brush. I’ve used my fingers to apply as well, but I prefer the finish of a brush!

FENTY BEAUTY Cheeks Out Cream Blush in Strawberry Drip and Crush on Cupid. These were a discovery after seeing them on a beauty YouTuber. I love the formula and at $20 each, I find them to be a good price compared to the other two brands I have in the photo. I use a brush to apply with these blushes as well! They are pigmented and bright, and truly a great option, especially if you have a darker complexion or skin tone.

Patrick Ta Double Take Creme and Powder Blush. This has been my go-to since I received it in a mailer from Sephora (since I’m a part of the #SephoraSquad, I sometimes receive gifted products). I have the shade “That Girl” which is what I certainly would have chosen if I bought it for myself. The creme part of the duo is easy to apply, and similar in texture to the Fenty Cheeks Out blushes, and the powder blush is pigmented and sets so nicely into the creme. I like to use the same brush for applying both. It’s easy to get a great amount of color and pigment from this blush duo, and I love that you can also use each side individually.


Curious about makeup brushes? Read this post!

5 Reasons you Can Gain Weight Back After you Stop Dieting

People often complain that they tend to gain back all the weight that they have lost once they come off their diet plan and research has proven that it happens to 90% of the people who successfully managed to get lean through dieting. So, is there no point in dieting to lose weight? Yes, diet and exercise would help you lose weight but the real issue – are you following the right kind of diet? In this post, we will try to explore various factors that contribute to bouncing back of weight and find answers to this question, “why do you gain weight back after you stop dieting.?” So, without further ado, let us get started:

Gain weight back after stoping dieting

1. Being on a Unsustainable Diet: Fad diets that take you off almost every kind of food are not sustainable and though get you results, you would most probably gain all the extra pounds back too quickly. There are some diets that are totally unsustainable and unrealistic, and most of the extra baggage you lose is water weight. Severe food restrictions, food deprivation can all create cravings and once you are off the diet, you would gain a lot more weight than before. So, to lose weight and keep it off, you need to follow a good diet program such as the Rati Beauty diet, which keeps you on the right kind of food and helps you make lifestyle changes, without starving or food deprivation, so that you can stay lean forever. Download the Rati Beauty app for more details.

2. Living a Sedentary Lifestyle: Dieting won’t do you much good if you lead a lazy and sedentary lifestyle. And by sedentary lifestyle, we mean physical inactivity for most part of the day. It is not at all healthy or advisable nor should it be in practice. Working out in the gym for one hour and then sitting at the work desk for the rest of the day, will undo all your efforts. Once you have lost weight, you should increase your exercise routine and activity level to maintain the current weight. Jogging and morning walks come highly recommended. Yoga and aerobic exercises also help to keep off the weight. Surya namaskar, which is a cluster of several yogasanas, boost metabolism and keep your whole body active.

3. Count Macros: This is a really effective and scientifically approved method of ensuring that one does not gain excessive weight, especially after suspension of a strict dietary regime. It ensures that the body gets the full nourishment it needs to function properly while at the same time, guaranteeing the body does not bounce to its original weight. Always practice portion control and make mindful eating a part of your lifestyle.

4. Stress is the Villain: Stress can prevent you from losing weight and accelerate the speed at which you can gain back weight. If you do not reduce stress levels, you always run the risk of gaining extra pounds and the leading reason behind that is – post suspension of diet – you become a victim of stress eating. Stress eating is a strict no no if one is serious about staying fit and slim. Stress also increases the level of cortisol. The disruption of cortisol not only aids in weight gain, it also encourages the body to store fat around the abdominal area. Read about “10 Tips to Lower Stress in order to Lose Weight.”

5. Lack of proper sleep: Insufficient sleep is one of the leading reasons for weight gain. And it might come as a surprise but for those who have been on a weight loss diet, post suspension of the diet, they are far more prone to regain the lost kilos if they are sleep deprived. Importantly, it’s really difficult to lose weight without 8 hours of proper sleep. Sleep deprivation lowers our metabolic rate to such a great degree that almost anything we eat gets stored up as fat in our body and that compounds to added weight. So, it is advisable to get good sleep especially after one stops dieting if one wishes not to regain those lost pounds.

So, these were the 5 most common factors that lead to weight gain post dieting.

10 Tips to Lower Stress in order to Lose Weight
15 Surprising Reasons How Your Home is Making you Gain Weight

The post 5 Reasons you Can Gain Weight Back After you Stop Dieting appeared first on Makeupandbeauty.com.

5 Beauty Tips To Steal From Kareena Kapoor

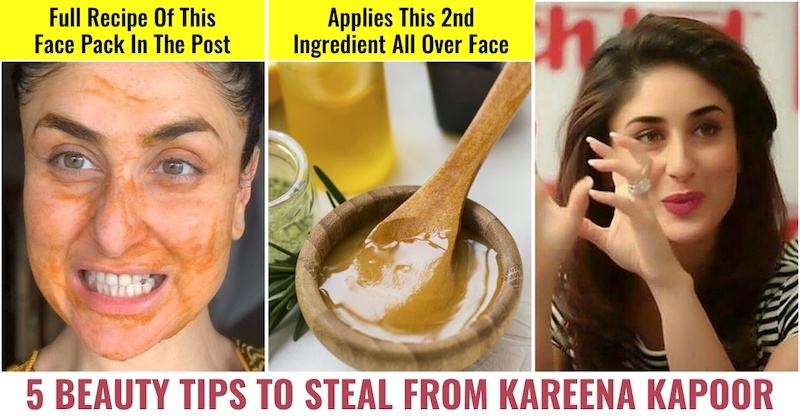
Kareena Kapoor is considered as an epitome of style and beauty. Although she comes from a well-known Bollywood family, she proved her mettle as an actress and has done some really good films, and won many awards for her performances. It is an inspiration how successfully she manages both career and home, and two kids. Accept it or not, whenever you look at her, you cannot stop admiring this mesmerizing beauty. This 40-year-old actress loves to post her “no makeup” selfies and we can’t help but admire her flawless and glowing skin. Excited to know about her little secrets that she follows to look pretty and beautiful? So, here are 5 Beauty Tips To Steal From Kareena Kapoor right now!

Beauty tips from Kareena Kapoor

1. She loves homemade face packs just like the rest of us. She loves using a homemade pack of sandalwood, with two drops of vitamin E oil, and a pinch of turmeric. While turmeric has brightening and anti-acne properties, sandalwood soothes inflammation, and vitamin E nourishes the skin.

2. This tip has been passed on to her by her grandmother and that is to apply almond oil to her skin and hair whenever possible. Almond oil makes hair frizz-free, shiny, and it adds a radiant glow to the skin. You can also leave almond oil overnight on the skin.

3. Kareena massages her scalp with a mixture of oils – she makes her own oil by mixing coconut oil+almond oil+olive oil+castor oil.

4. She eats a lot of leafy and crunchy vegetables, either in the form of salads or directly with her meals.

5. She massages raw honey on the face rather than using facial products. She takes a little bit of glazing honey and massages it on the skin as it is anti-bacterial also and helps to make skin soft and smooth.

10 Secretive Beauty Secrets of Bollywood Celebrities
12 Incredible Head to Toe Uses of Almond Oil

The post 5 Beauty Tips To Steal From Kareena Kapoor appeared first on Makeupandbeauty.com.

7 Best Home Remedies For Split Ends

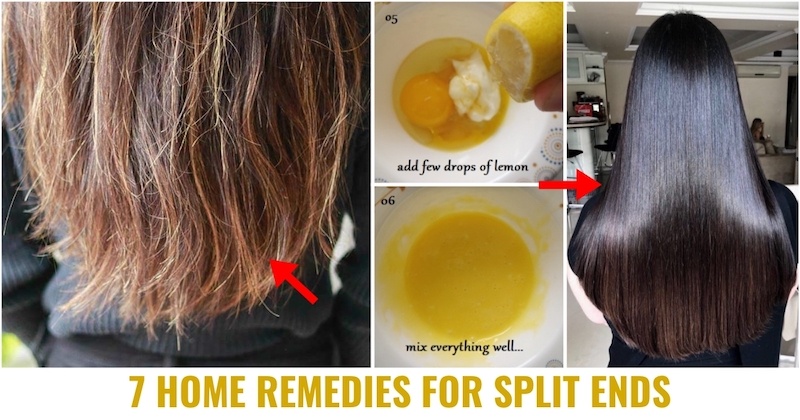
Split ends is a common hair problem and we all agree that hair tends to spilt when the hair shaft loses its natural moisture. To avoid split ends, avoid harsh shampoos and hair cleansers and reduce the use of hairstyling tools. Though there is no cure for split ends apart from getting your hair trimmed at regular intervals, there are of course many ways to prevent them. As hair grows from the roots, we constantly give attention to the roots and the hair ends are left ignored, in fact, hair ends require a lot of attention to prevent split ends. Read about 7 Home Remedies For Split Ends below.

Remedies for split ends

1. Mix a small amount of castor oil/ olive oil /almond oil with coconut oil. You can add 2tbsps of castor oil into 250 ml of coconut oil. If you wish to add all three oils, you could do that as well. Mix equal proportions of these oils (1 teaspoon each) to the regular oil you use. Make sure you oil your hair-ends well. Generally hair ends that have split appear lightly colored than the rest of the hair. This mixture not only helps your hair grow but it prevents your hair ends from going rough. Use this mixture to oil your hair at least twice a week. Massage your hair and scalp with warm oil and wrap head with shower cap and leave for overnight or for 8-10 hours if you have time. Rinse off with a mild shampoo.

2. Take ½ cup oil in ½ cup boiling water in a bottle and close it tightly. Shake vigorously. Massage this mixture thoroughly into your hair from root to tip and cover with shower cap. Leave for ½ hour, then wash. Just be careful with your hands and head as the water is hot.

3. Make a hair pack by beating 1 egg yolk in a mixture of 2 Tbsp olive oil and 1 tsp honey. Massage on hair in thoroughly and then wrap head with shower cap for half an hour.  Rinse off with normal tap water.

4. A papaya pack is a great natural care of hair split ends. Take 2 big slices (2 small/medium slices) of ripe papaya. Remove the skin and the seeds of the ripe papaya and blend it in a blender. Add to it half a cup of yogurt and apply thoroughly to your scalp and hair. Wash after 30 minutes with warm water. If you don’t have papaya, you can used a ripe banana instead.1 ripe banana would do.

5. Grind 1 tbsp of methi (fenugreek) seeds with half a cup of urad dal to a coarse powder. Add half a cup of yogurt and mix well. Apply generously all over the scalp. Apply thoroughly to your scalp and hair. Wash after 2-3 hours with warm water.

6. Take 4 cups warm water and add 1 tbsp of honey into it and mix well. After you are done with shampoo and conditioning and rinsing, apply this mixture all through your hair. Do not rinse again. This mixture not only makes your hair soft and gives a shine to them; it also retains the moisture content in your hair so that your hair does not look dry or frizzy. This is a home-made leave in serum/conditioner for your hair.

7. You get many leave in creams/conditioners/serums in market these days like L’oreal Professional, Garnier, Pantene, etc. Additionally, always use lukewarm water to wash your hair. Do not use hot water. Hot water depletes the moisture content of the hair.

Also, it is always better to keep the split ends trimmed; otherwise, they may split further up the hair.

Hope you try these wonderful home remedies to flaunt gorgeous hair.

8 Ways To Get Rid of Split Ends
Effective Hair Mask For Split Ends: Do It Yourself

The post 7 Best Home Remedies For Split Ends appeared first on Makeupandbeauty.com.