


How to Make a Carousel in Photoshop
Throughout the photography community, Instagram carousels are one of the biggest trends that everyone raves about. Carousels are a great and easy way for creative individuals to showcase MORE than 10 photos across the allowed ten swipes of an individual IG post in a very artistically pleasing way.
Today, I will be showing you how to create a carousel in Photoshop that will give you both easier control over your image layout and improve the quality of your showcased images too.
Read below to get started:

Step 1. Create Your Base Layer
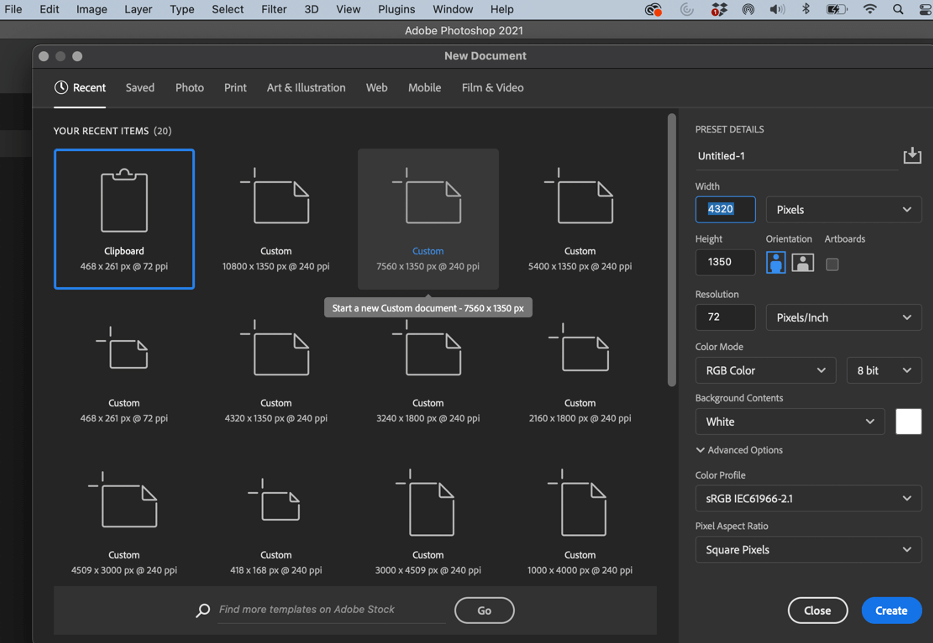
When your Photoshop is up and running, go to the top menu bar and select File>New to open a new document.
An Instagram post has a maximum height of 1350 pixels by 1080 pixels, so go ahead and enter 1350 into Height. Then, depending on how many swipes you want your carousel to be, multiply that number (i.e. your swipes) by 1080 and enter that number into Width. For this example, I want 4 swipes, so I will multiply 4 by 1080 which equals 4320.
Make sure next to “Width” the drop-down box says “Pixels”. Once you are ready to continue, click “Create”.
Step 2. Open Your Images
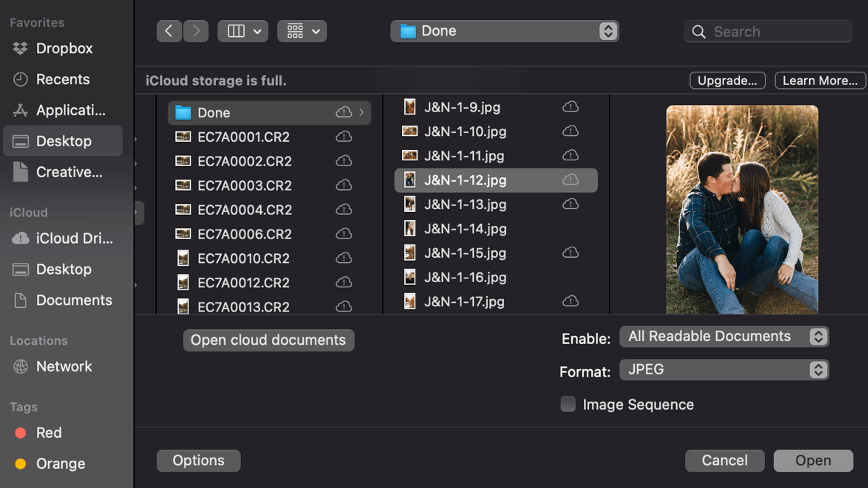
Next, open all the images you want to include in your carousel. To open your images, go back to the menu bar, and choose File>Open. Select your photo and hit Open. Repeat for each of the photos you want to include.
Step 3: Bring Images to the Base Layer
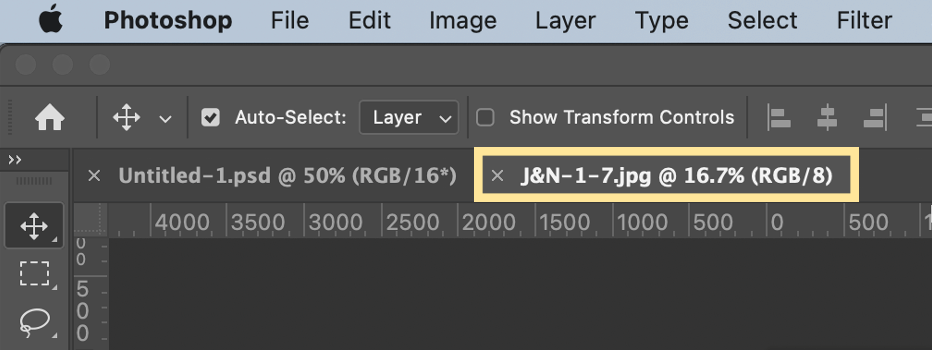
Notice that you now have your base layer as the first tab and your other images will show in the following tabs. In the tabs, click on the first image you opened up.
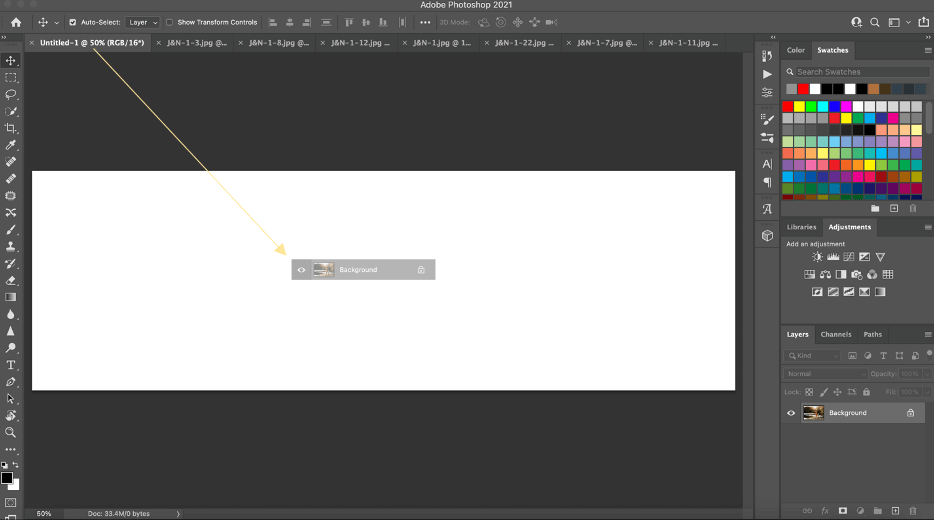
At the bottom right hand side of this photo, hover your cursor over the background layer, click and hold down, and then drag the photo to hover over your base layer.

When you hover over the base layer, it will bring the carousel document to the forefront. Drop the background layer onto the base layer.
Next, you will have to resize the image to fit the layer. To resize your image, press CTRL + T (for PC) or CMD + T (for Mac). Grab the white squares at the corner of your image and drag to resize and make smaller. Once you are happy with your image size, click enter to confirm.
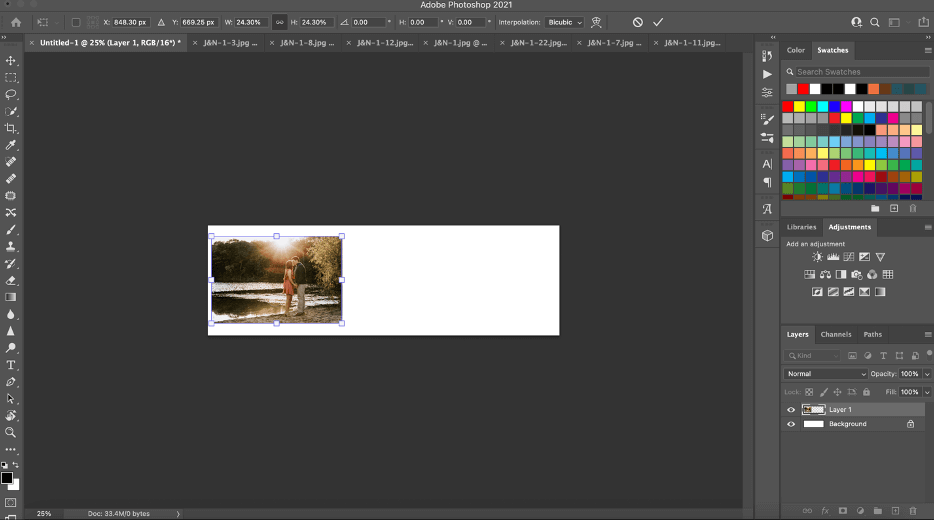
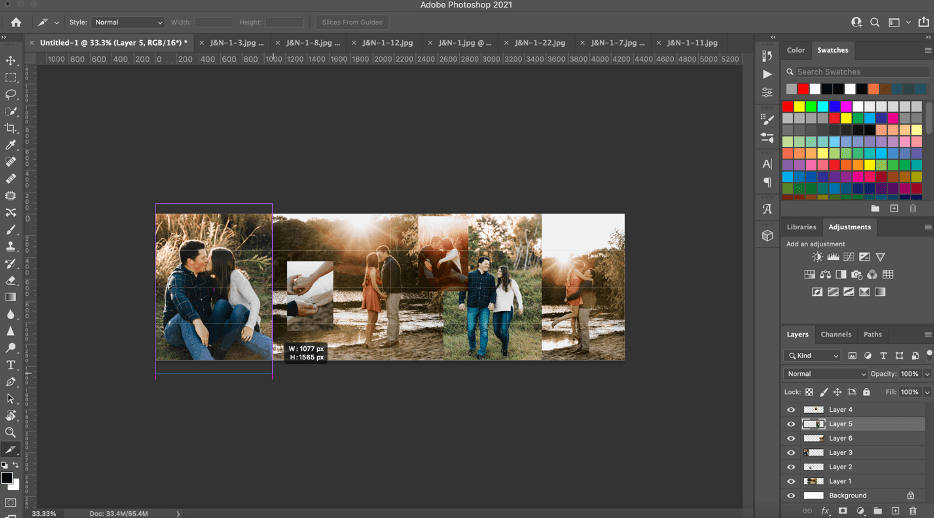
Go ahead and repeat these steps for ALL OF YOUR IMAGES until your base layer looks something like the image below (with all images sized down to fit across the white background).

Step 4: Create Your Grid
Now that you have all of your images on the Base Layer, you will want to turn on the Photoshop grid to see WHERE Instagram will cut off your carousel document with each swipe. To turn on the grid, press CTRL + apostrophe (‘)(for PC) or CMD + apostrophe (‘)(for Mac).

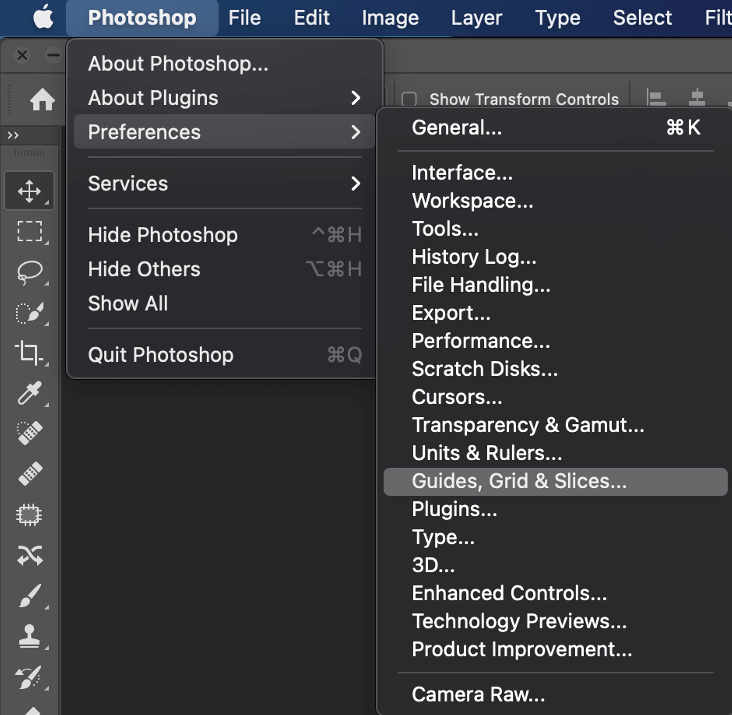
Next, in the top menu go to Photoshop, Preferences, and select “Guides, Grids, & Slices”.
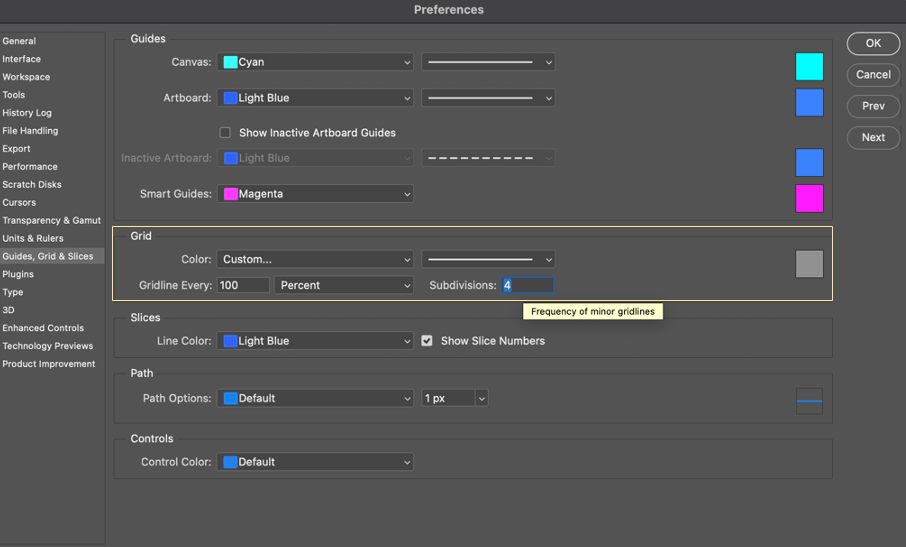
This will open your Preferences screen. In the Grid section, confirt that your “Gridline Every” is set to 100 and Percent. Now, remember how many swipes you initially chose. Enter that number into the “Subdivisions” box and then click OK.
For my example, I entered four because I want my carousel to have 4 swipes.
Step 5: Snap Your Grid
As you rearrange the photos on your Base Layer you will want them to “snap” to the grid you just created.
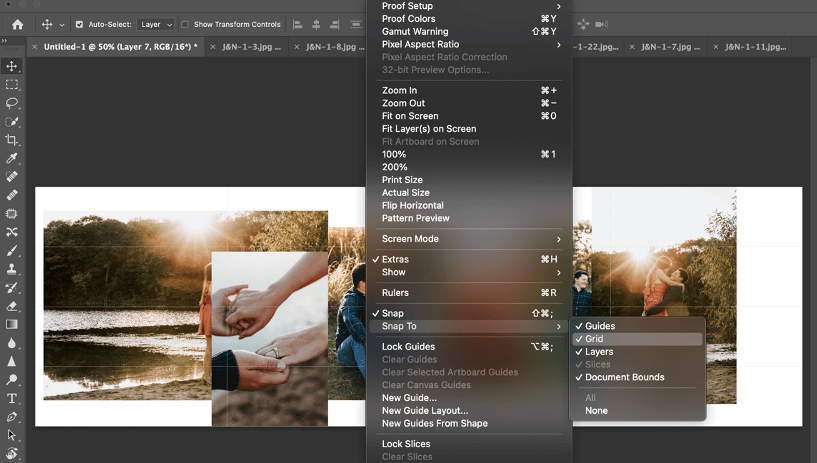
Snapping will help you see where the end of EACH photo in your carousel will be. To turn snapping on, go to the main menu and select View>Snap To. Make sure there is check mark next to Grid.
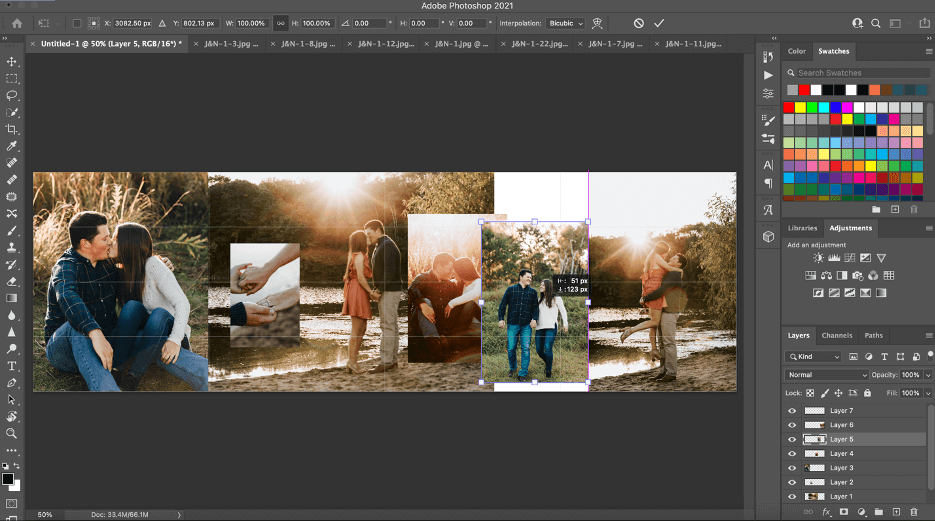
Step 6: Create Your Desired Layout
Now you are ready to play around with the layout of your Instagram carousel. To move your images around, click on the photo you want to move and drag it where you want. To change the image size, press CTRL + T (for PC) or CMD + T (for Mac) as I mentioned previously. Grab the white square at the corner of your image and drag to resize.
Make sure to take note of where your grid (or swipe) will be cut off when you post your carousel in Instagram. This is a good place to start if you don’t know how you want your carousel to look.
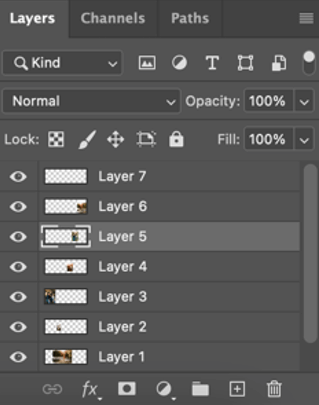
If there’s a photo you want to move but another image is on top of it or the other image is cutting off part of what you want to have shown: go to the layers channel at the bottom left side of your screen and click on the layer of the photo you want to move to the top.
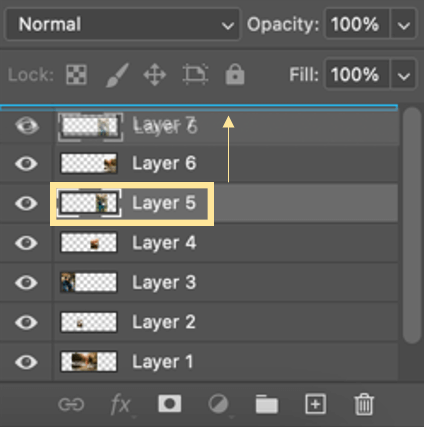
Now, click and hold that image layer and drag it upwards until a blue line appears above the image layer of the photo that was cutting off your other image. The blue line will show you where your layer will be dropped.
That particular photo layer will now be above the other one and image will no longer be hiding underneath.
Step 7: Slice Your Grid
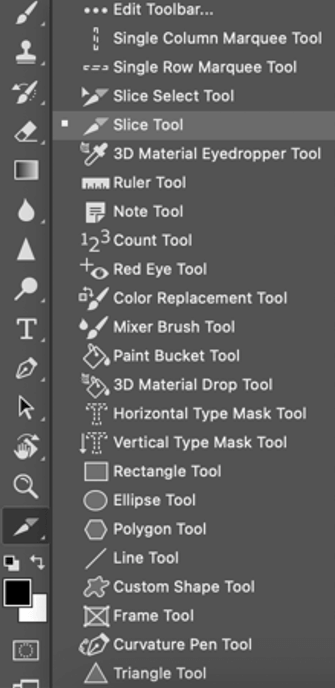
Next, to prepare you document for Instagram, you will need to slice your grid. On the left side tool bar, choose the three dots at the bottom of your choices. Click and hold down on the triangle below the three dots until a new tool bar opens.

When the new toolbar opens, click on the Slice Tool:
Now click above the top left side of your carousel and drag across your first grid section until it snaps at your grid mark. Repeat this slicing process for all the grid sections you already created.
Your carousel document should now look something like this. Note: there will be a blue box above the starting point of each slice.

You can double check that you sliced at the right spots by clicking on the sliced lines and attempt to drag them. When you do this, it will tell you the width of each particular slice, which should be 1080 pixels.

Step 8: Save Your Carousel
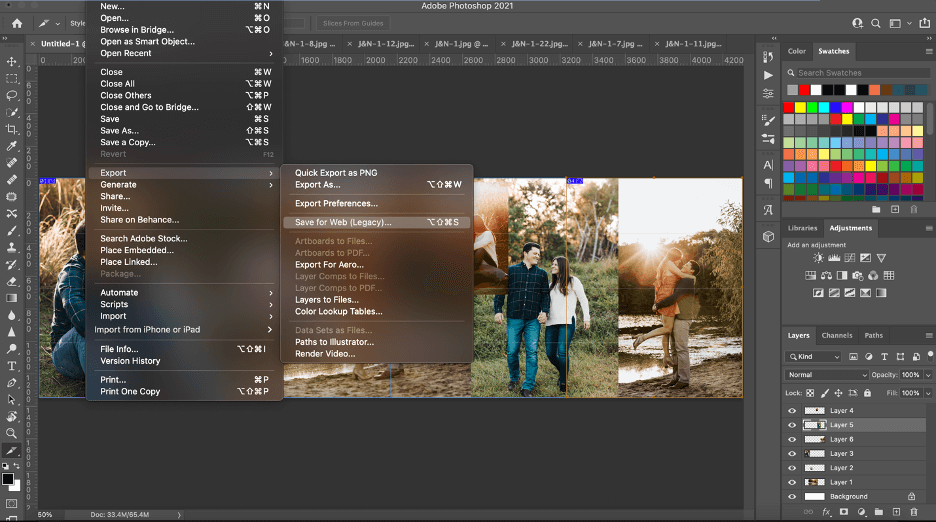
Next, you will want to save your carousel by going to the main menu and selecting File>Export>Save for Web (Legacy).
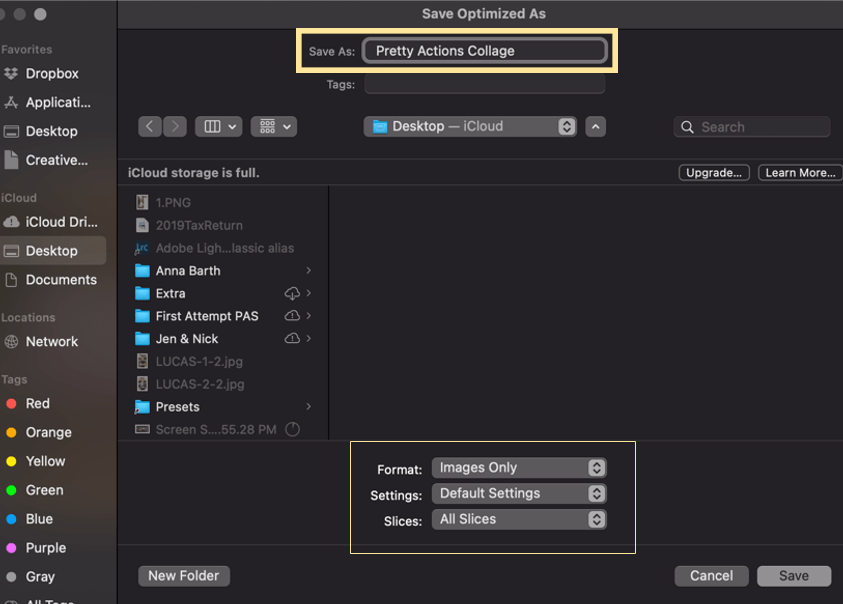
Name your carousel in Save As. Choose from the far right where the photos will be saved too. Then double check in the bottom part each section to make sure the following options are selected:
- Format is set to “Images Only”.
- Settings is set to “Default Settings”.
- Slices is set to “All Slices”.
Once that is done, click Save to save each slice as its own image.
You are now ready to post your carousel to Instagram! Within Instagram, use their multiple photo option to select and display the carousel images you created.
To further inspire you, I’ve include some examples of visually appealing and successful carousels that I created for my own Instagram.
HAPPY CAROUSEL CREATING!
Additional Reading Just For You:
1. How to Edit Instragram Photos in Lightroom
2. Instagram Marketing Tips for Photographers
Do you have any questions or comments about Creating an Instagram Carousel in Photoshop? Just leave us a comment below – we would LOVE to hear from you! And PLEASE SHARE this post using the social sharing buttons (we really appreciate it)!
