3 Ways to Enhance Color in Photoshop
“Color! What a deep and mysterious language, the language of dreams.” —Paul Gauguin
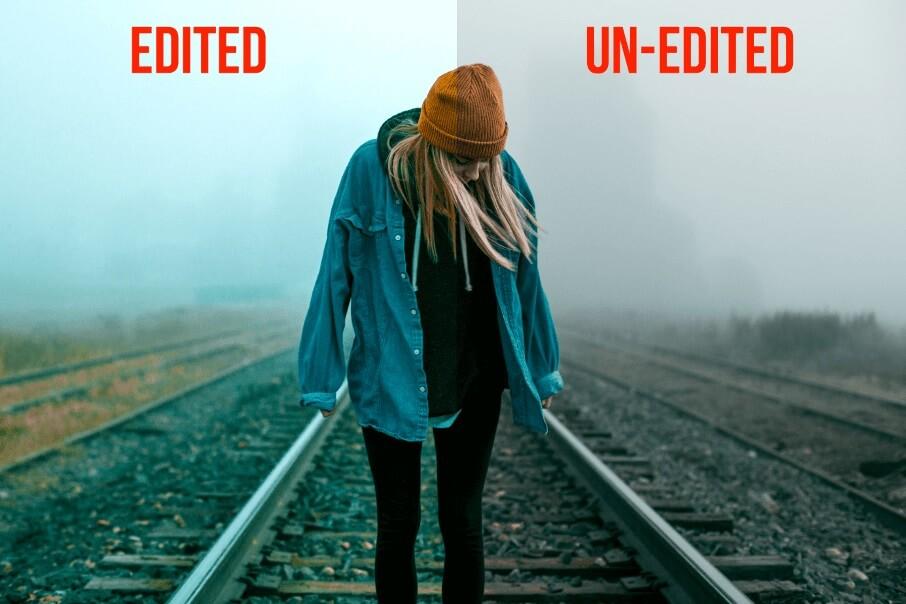
If a photo is worth a thousand words, then color might be priceless. Objects in photographs can be accentuated or toned down through the clever use of color. Communicating the message and mood of a photo is quickly done through color – or lack of color. Color creates a natural contrast in neutral scenes, which organically brings depth into a shot. Viewers’ eyes are immediately drawn towards bright colors and color stories, MAKING COLOR A POWERFUL VISUAL EFFECT.
Despite color being of utmost importance in photography, the camera may not always capture it well. However, all hope is not lost – image editing software like Photoshop can bring a photo back to life through simple color enhancements.
Say goodbye to dull shots, and try these Photoshop tricks to enhance the color of your photos in a snap:

1. Using a Vibrance Adjustment Layer
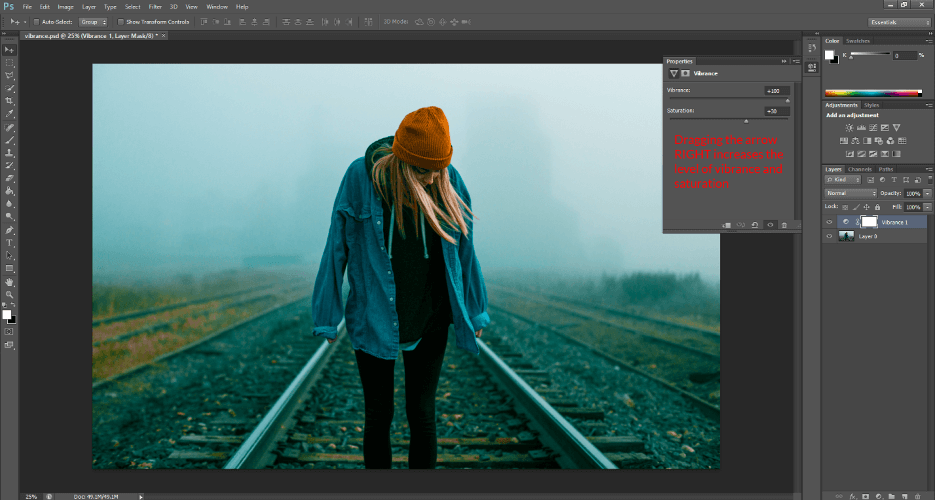
The simplest way to brighten up the colors in a photo is by creating a “Vibrance” adjustment layer. First, locate the half-shaded circle icon on the bottom right of the “Layers” panel.
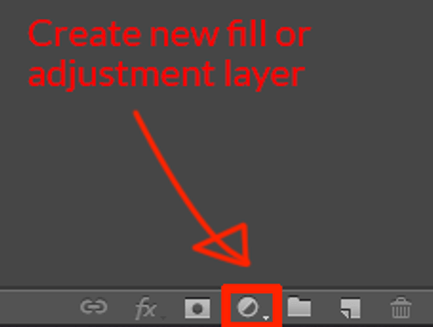
Click the “New Adjustment Layer” icon and select “Vibrance” from the pop-up tab.
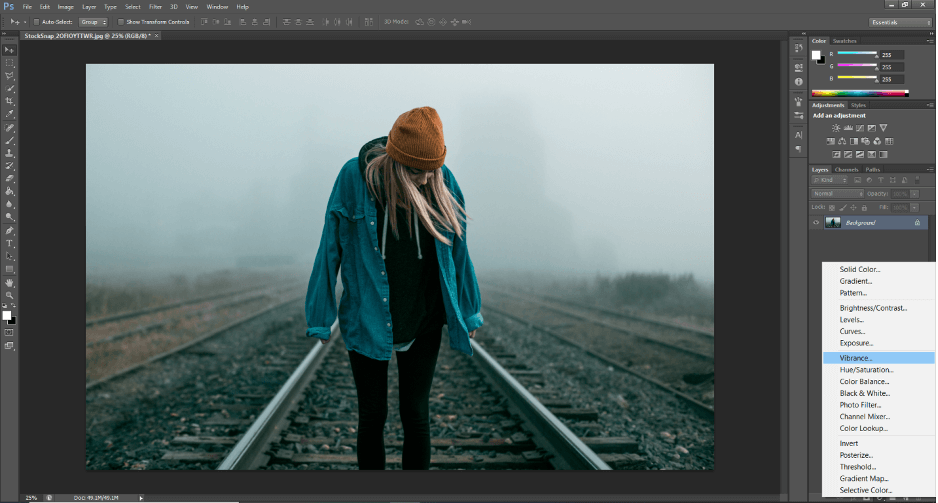
A grey box will open on the right and show the properties of this adjustment layer. Drag the “Vibrance” to the right to increase the vibrancy. The “Saturation” arrow functions in a similar way; drag it to the right to increase the saturation and drag it to the left to reduce the saturation.
After achieving the desired color, you may want to increase the lighting of your image. One way to do this is to add a “Levels” adjustment layer. Choose Layer > New Adjustment Layer > Levels. Alternatively, hit [Ctrl+L] on PC or [Command+L] on Mac.
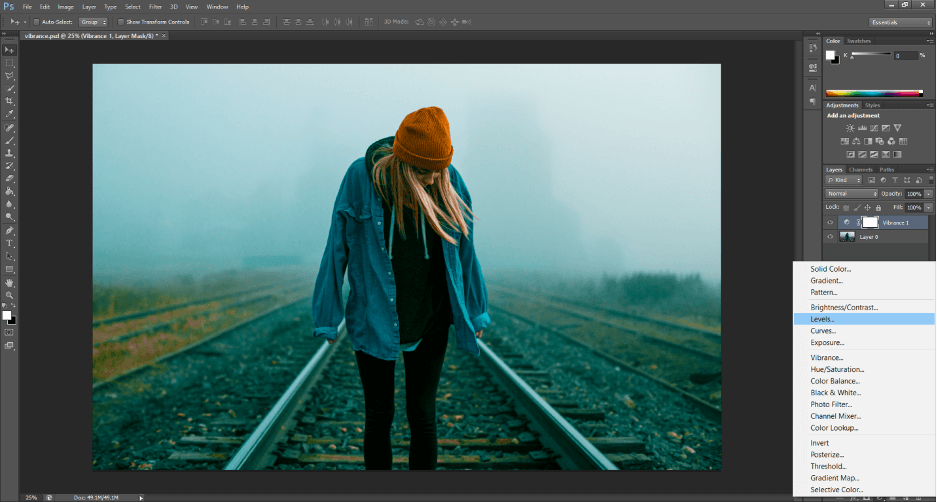
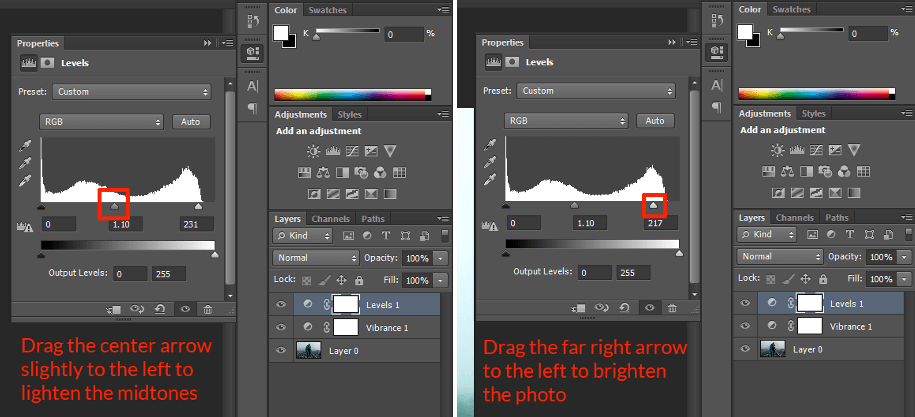
Another grey box will appear from the right and display the properties of the “Levels” layer. Drag the left arrow to the right to darken the shadows, the center arrow to the left or right to adjust the mid-tones, and the right arrow to the left to brighten highlights in the photo.
If the image is too dark, slide the middle arrow left, to lighten mid-tones, and the right arrow left, to brighten highlights.
That’s all there is to enchancing color with a vibrance adjustment.
2. Using a Hue & Saturation Adjustment Layer
Another great way to enhance color in Photoshop is using a “Hue & Saturation” adjustment layer. Similar to the “Vibrance” adjustment layer, choose Layer > New Adjustment Layer > Hue/Saturation.
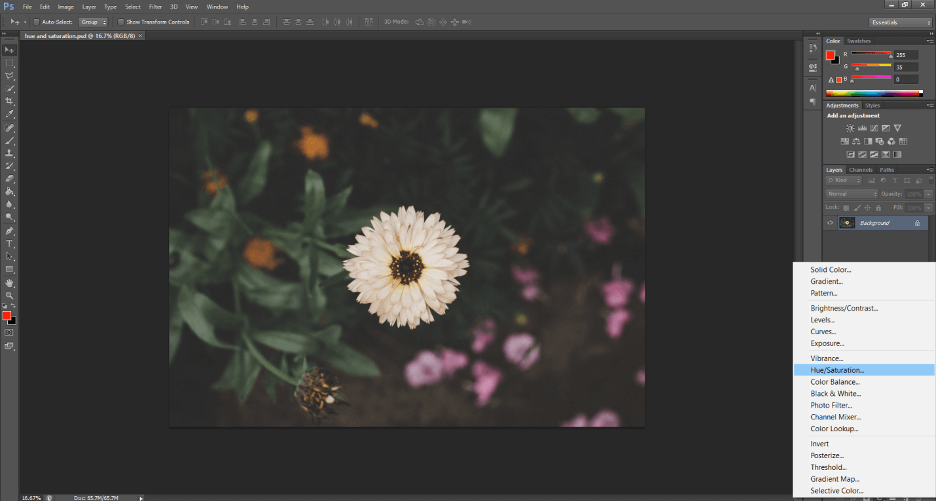
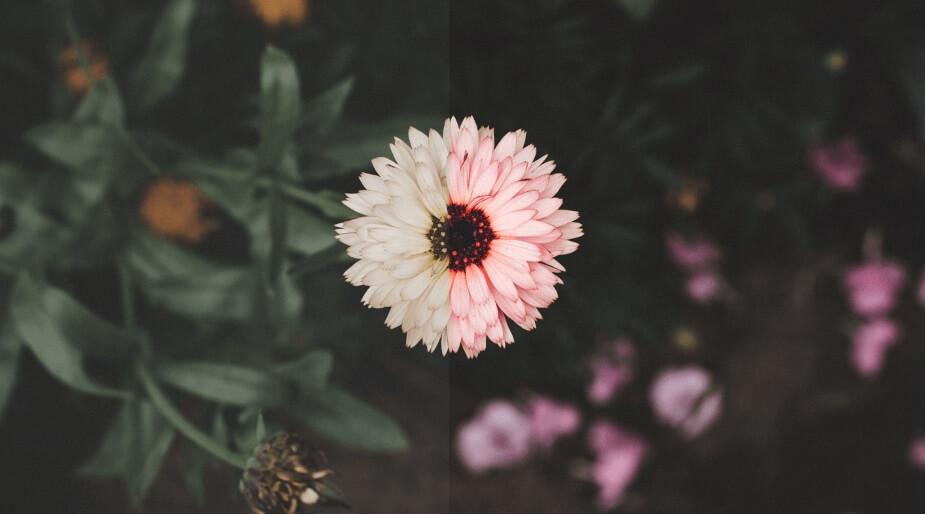
To isolate and make adjustments to the center flower, use a “Layer Mask”. Select Hue/Saturation Layer > Layer Mask.
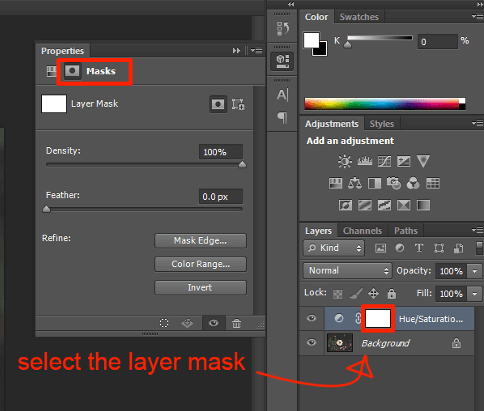
Ensure that that the foreground color is black. Note: you can easily toggle the foreground and background color by pressing [X].

Select the “Brush” tool [B] on the left sidebar, and choose a soft-round brush from the “Brush Picker”.
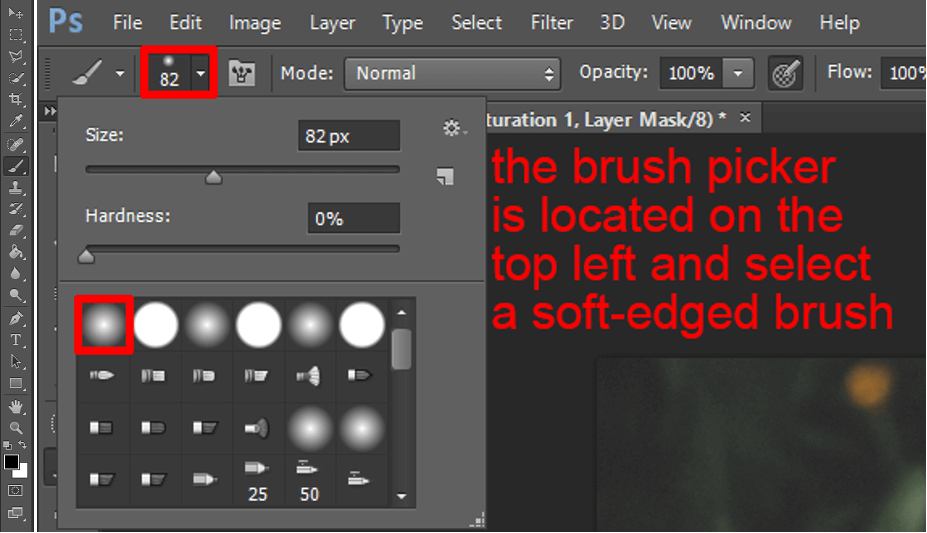
Paint on the white layer mask in black over areas that will be unaffected by the adjustment layer. In this photo, the center flower will be the only object affected by the “Hue/Saturation” adjustment layer because it is left white on the layer mask.
Do not worry about making mistakes—simply change the foreground color to white and paint over the black. Reselect the “Hues/Saturation” properties tab left of the layer mask.

Drag the “Hue” arrow right to shift the colors clockwise around the color wheel, or drag the arrow left to move counterclockwise. Below is a color wheel for reference.
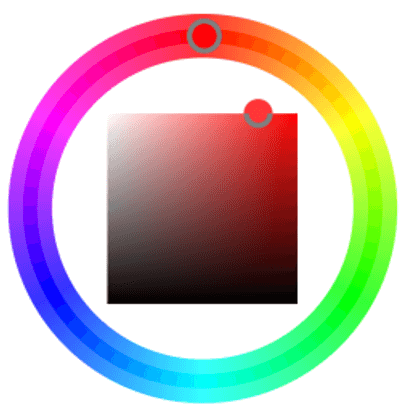
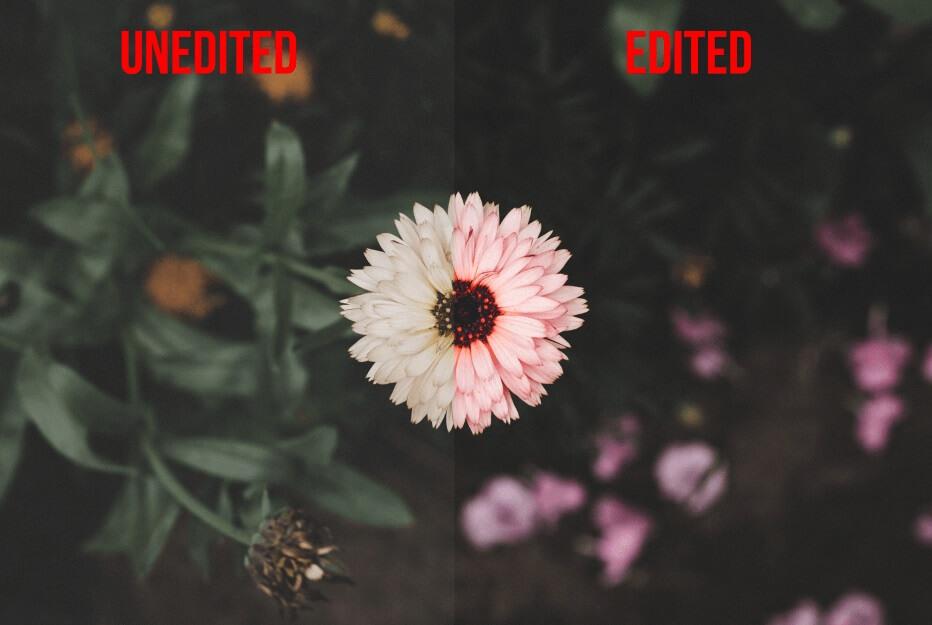
To make the flower “pinker”, drag the “Hue” arrow to the left.
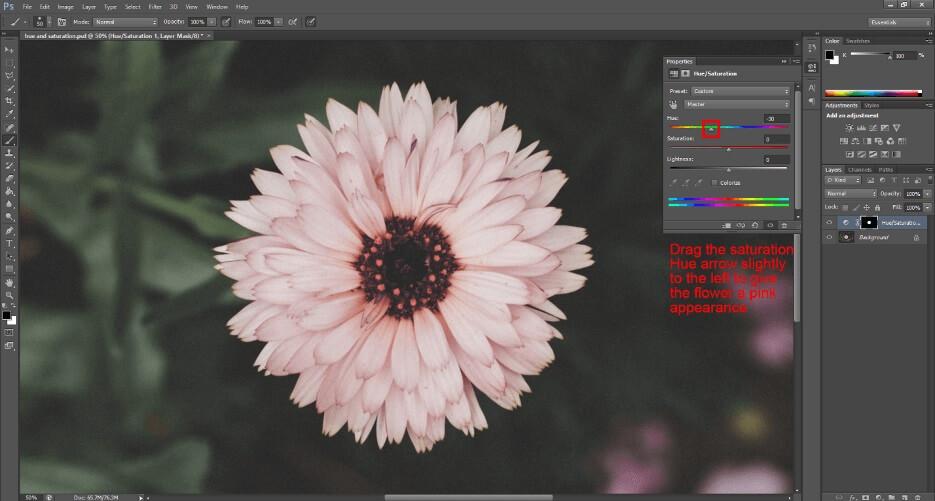
Drag the “Saturation” arrow to the right to increase saturation.
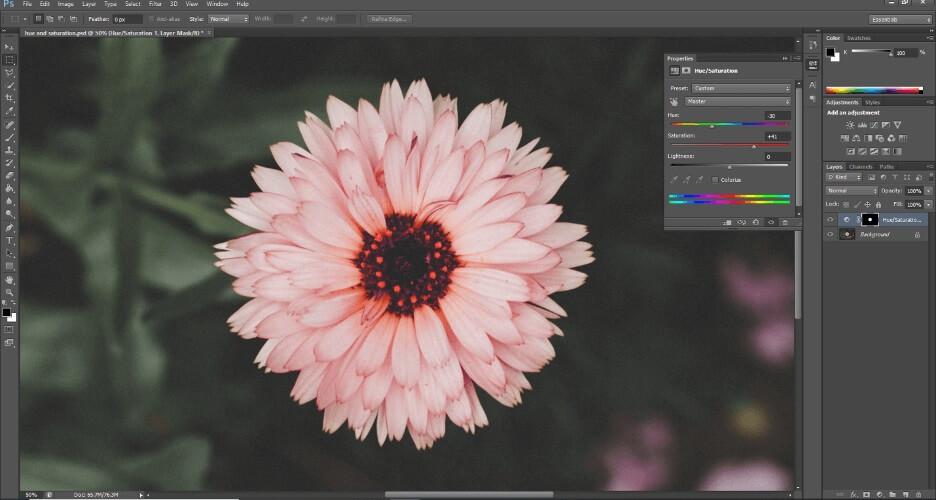
Just like the previous edit, I will finish the photo off with a level adjustment layer to increase brightness.
3. Using a Selective Color Adjustment Layer
The third way to enhance color in Photoshop is using a “Selective Color” adjustment layer, which is a bit more complex and isolates SPECIFIC TARGET COLORS in a photo to saturate or desaturate.
To use this type of adjustment, choose Layer > New Adjustment Layer > Selective Color.
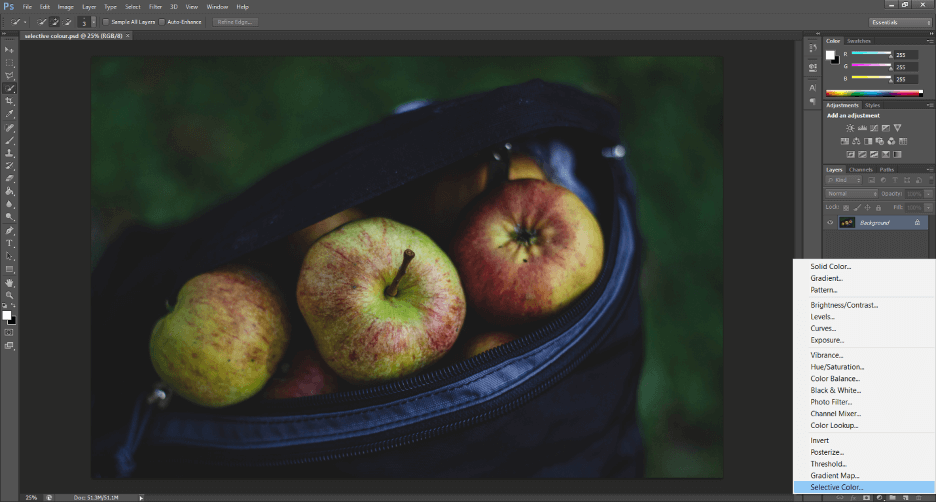
Open the “Colors” tab to select a color that you want to isolate and adjust. In this photo, the subjects are red apples, so check “Reds” to enhance that particular color.
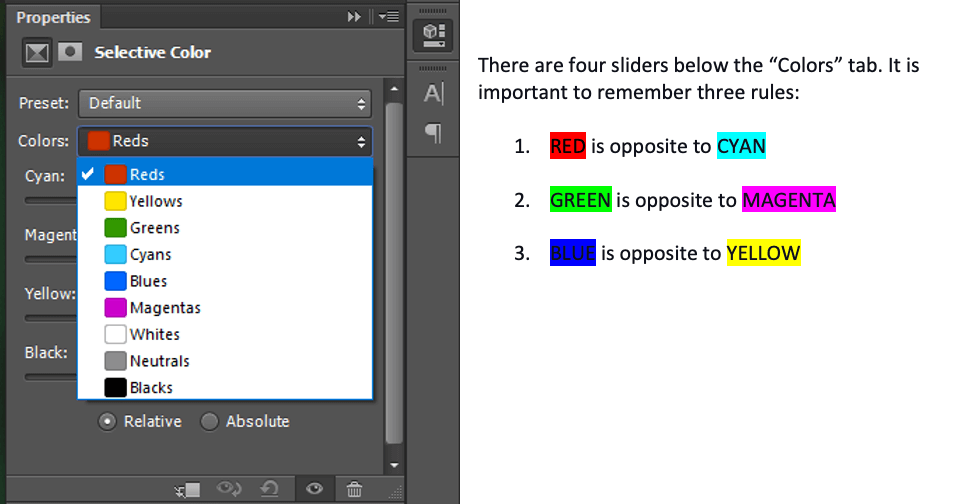
Notice that there is no sliders labeled “Red”, “Green”, or “Blue”. This is because the “Cyan”, “Magenta”, and “Yellow” sliders are correlated.
With “Reds” selected in the “Colors” tab, sliding the CYAN arrow to the LEFT will decrease the cyan in the photo which will enhance the red.
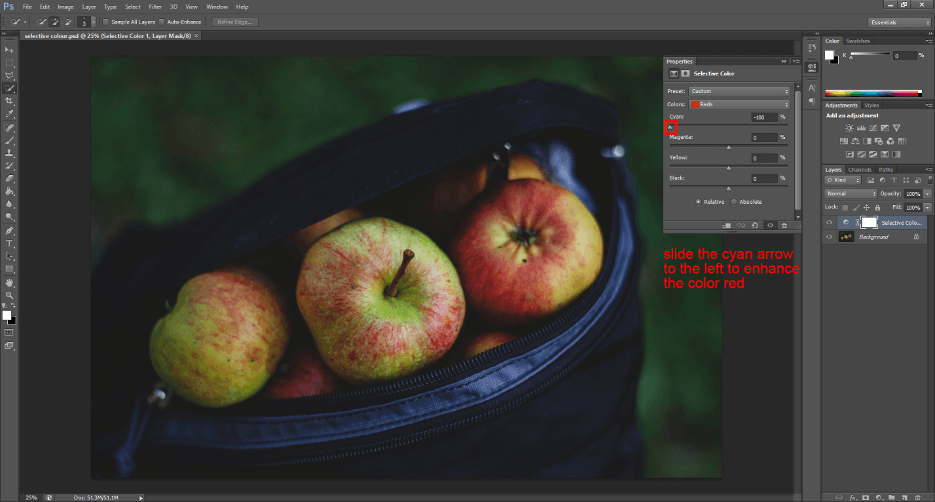
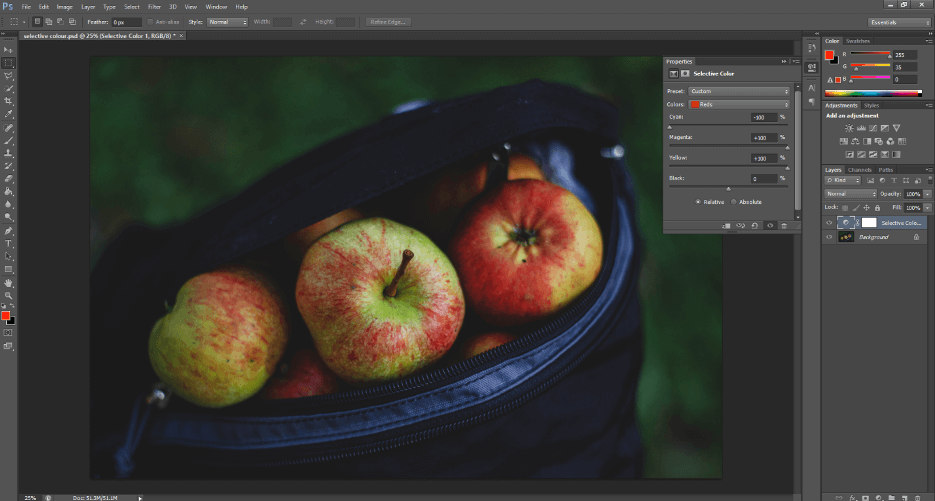
Now, the apples are looking a little TOO green, so I want to take the color opposite to green, and enhance it. This is the MAGENTA slider, which I will move to the RIGHT.
The apples stiil have a cool tone to them that I want to warm up, so I want to decrease the amount of blue in the red apples. To do that, locate the YELLOW slider and move the arrow to the RIGHT.
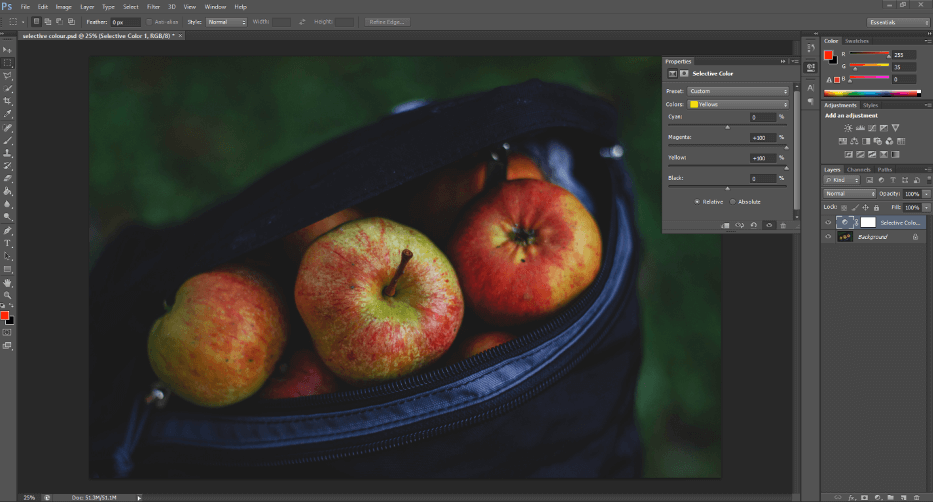
There is STILL a significant amount of green in the apples that I want to tone down. To do that, choose the Colors Tab > Yellows to alter the yellow color in the apples. Slide the MAGENTA arrow to the RIGHT to decrease the amount of green in the yellow and slide the YELLOW arrow to the RIGHT to increase the saturation of yellow.
Finally, choose the Colors Tab > Greens to alter the green color in the apples. Slide the CYAN arrow to the LEFT to increase the amount of red in the green and slide the MAGENTA arrow to the RIGHT to increase the saturation of magenta.
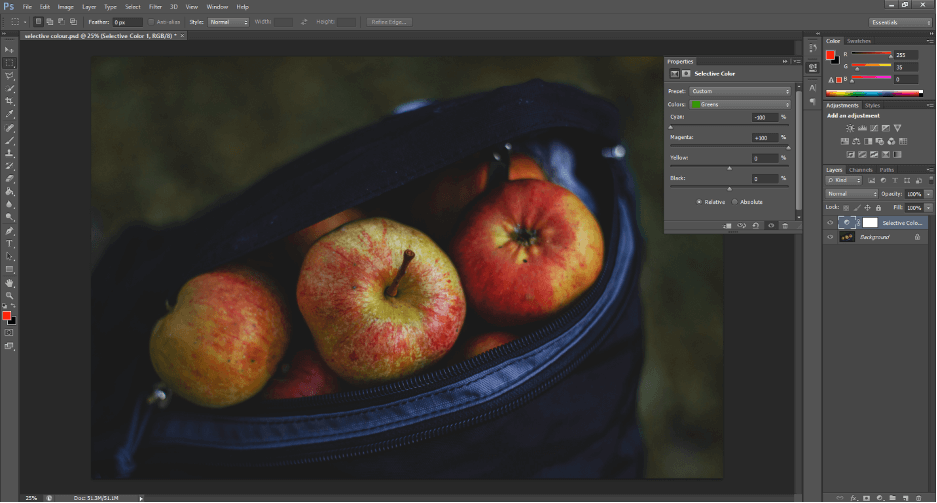
As before, I will finish the photo off with a level adjustment layer.

Conclusion
Congratulations! You now have everything you need to enhance the color of your photos using only two adjustment layers.
Now that you have an arsenal of ways to edit color in Photoshop, feel free to experiment and combine these techniques. You can even create a “Photoshop Action” to save and replicate your specific color enhancement settings.
You can also purchase professional-quality Photoshop Action Collections from Pretty Presets and Actions that will take care of all the color enhancements for you!
These tips are just scratching the surface of what you can do in Photoshop; there are infinite ways to edit a photo to suit your purpose. Have fun editing; be cheeky and try changing your eyes to a different hue, or reveal a radiant rainbow on a rainy morning.
Colors are meant to be seen, so let yours shine.
Do you have any questions or comments about Enhancing Color in Photoshop? Leave us a comment below – we would LOVE to hear from you! And PLEASE SHARE this post using the social sharing buttons (we really appreciate it)!

