Clipping paths are powerful tools that allow you to remove or “clip” an item or product from its background when other methods won’t work. This method is particularly useful when you have a product featured against a complex or multicolored background.
How do you create a clipping path in Photoshop?
- Set up your Pen tool
- Draw a path around your product
- Save your path
- Create a clipping path
- Create a selection from your clipping patha>
- Create a clipping mask
Step 1: Set up your Pen tool
You’ll need to use the Photoshop Pen tool to create your clipping path. If you’ve ever used the Pen tool in Adobe Illustrator, you’ll notice that Photoshop’s Pen tool is almost the same.
Before you can start to use the tool, however, you’ll need to ensure your settings are correct so you actually create a clipping path and not a shape.
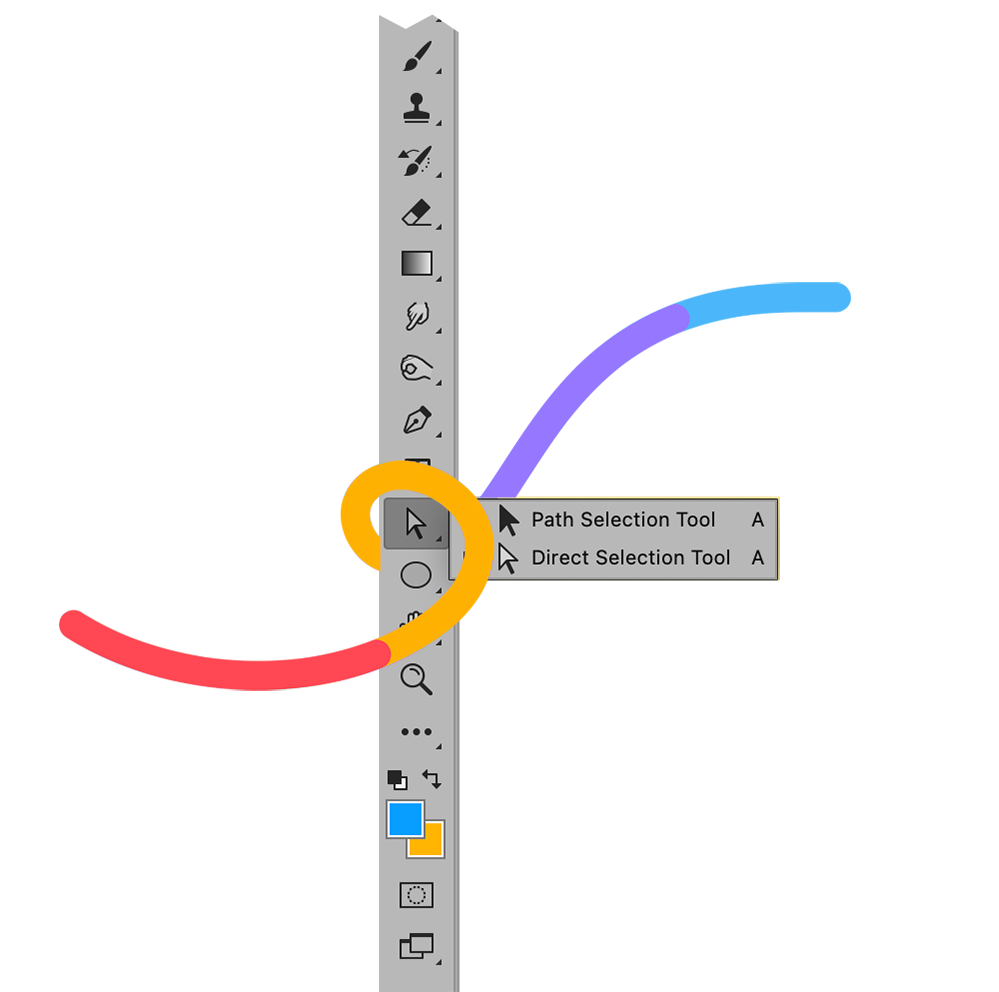
In your image document, select the Pen Tool. You can find it in the Toolbar, or you can type “p” to select it automatically. If you don’t see the Pen Tool, it may be hiding behind the Freeform Pen Tool, the Curvature Pen Tool, the Add Anchor Point Tool, the Delete Vector Point Tool, or the Convert Point Tool.

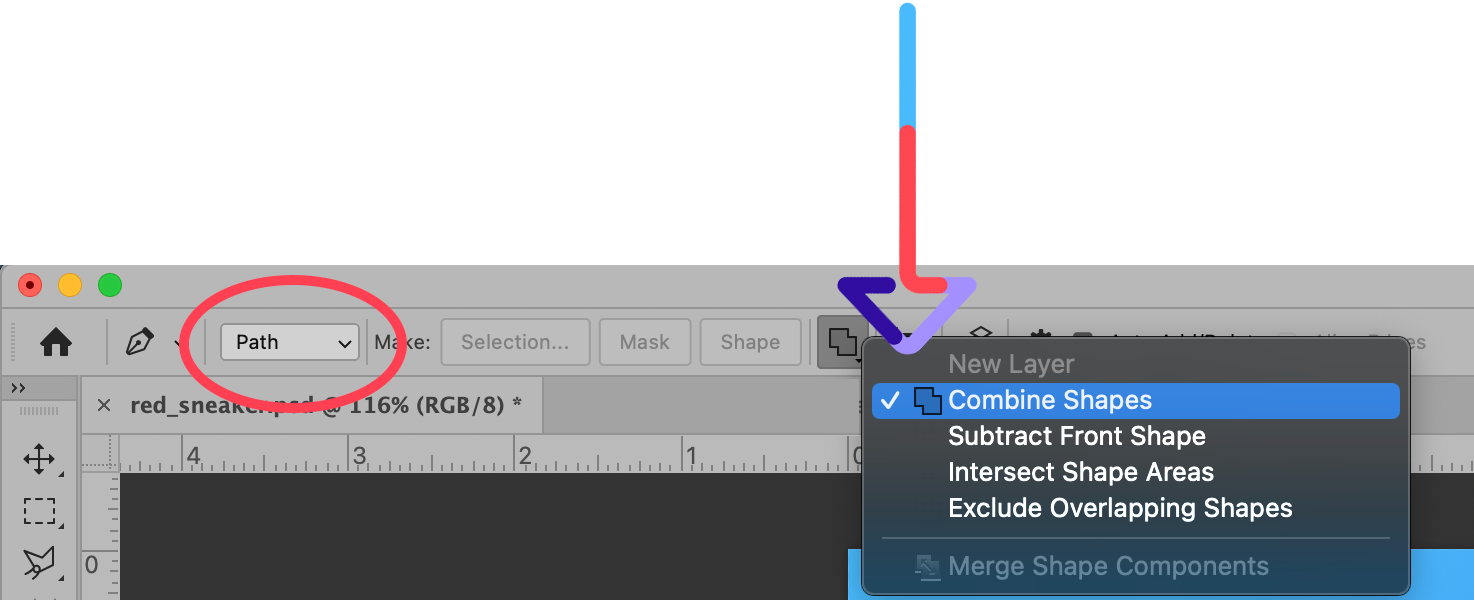
At the top of the application window, in the Options Bar, you’ll see settings for the Pen Tool. Select “Path” and choose “Combine Shapes.” See the image below for reference.

Step 2: Draw a path around your product
If you’re familiar with how the Pen Tool works, drawing a path around your shape should be pretty straightforward. If you’re new to the Pen Tool, we’ll give you the basics to get you started with this powerful tool.
[cta text=”Pen Tool Tutorial | Photoshop for Ecommerce Brands” button=”Learn more” link=”https://pathedits.com/blogs/tips/how-use-pen-tool-photoshop-beginner-tutorial”]
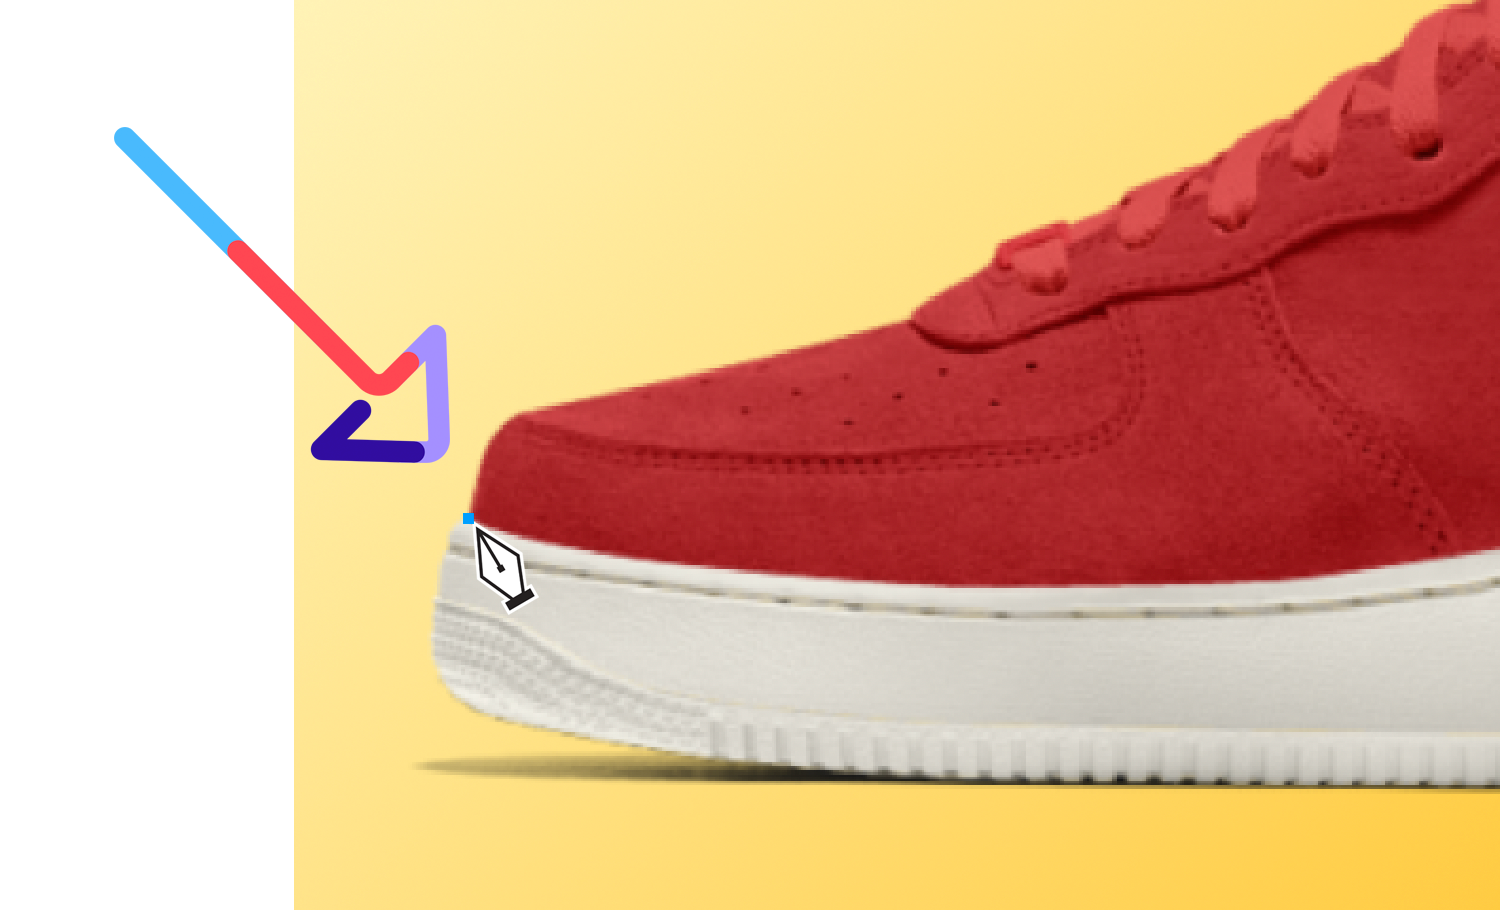
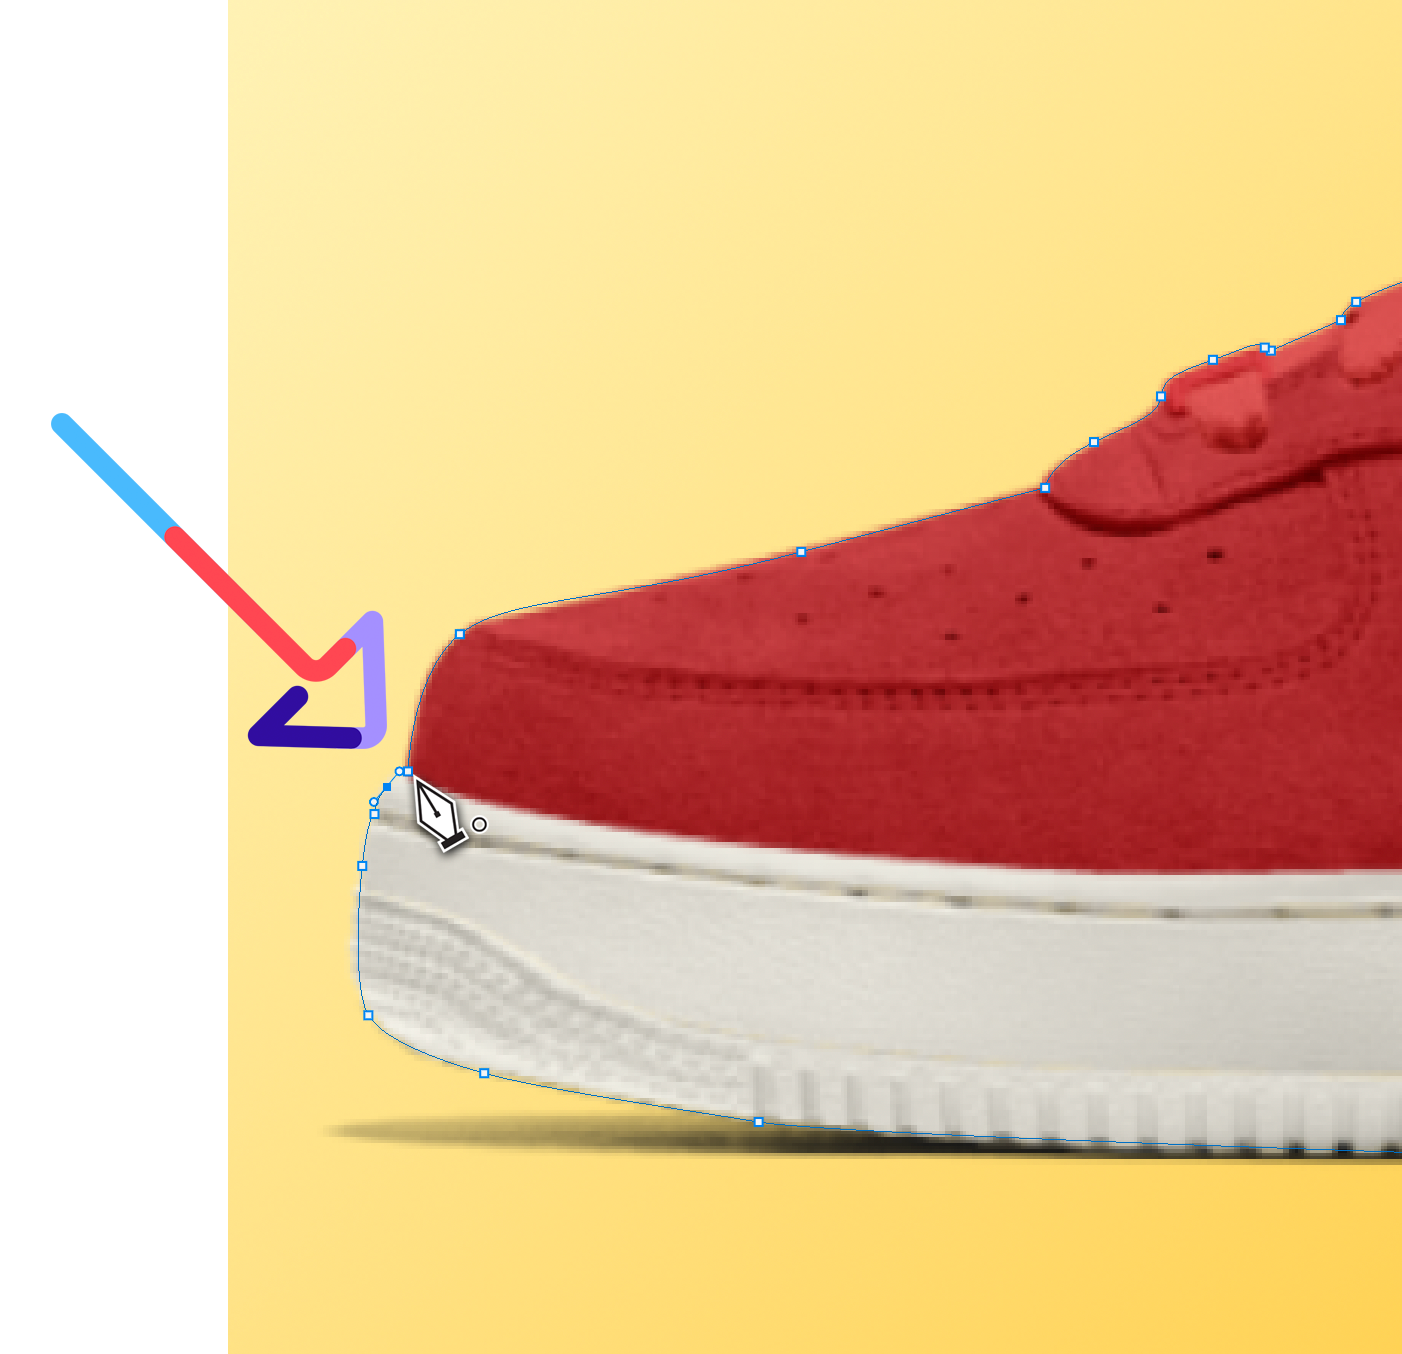
With your Pen Tool, click with your mouse once along the edge of the image you want to “clip.”
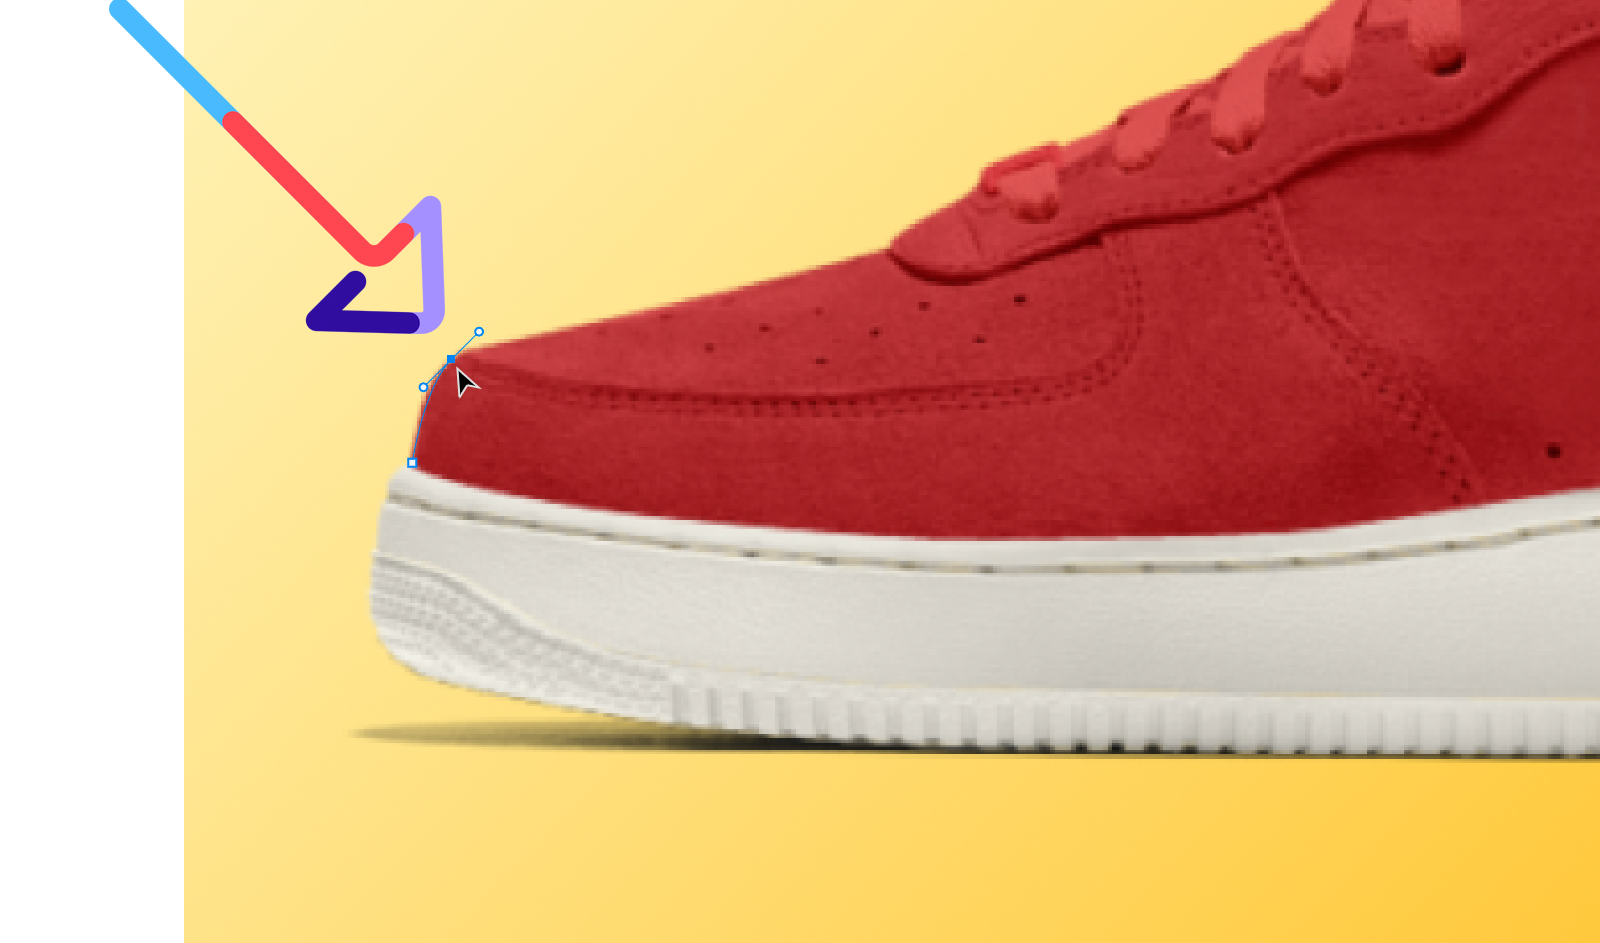
Click again to place the next point, but don’t release the mouse button quite yet. Instead, pull the mouse along the edge of your object to create a curved path. Once you’re satisfied with the shape of the curve, you can release the mouse button.
Continue along the edge of your object in this manner until you’ve created a path all the way around the object.
To complete the path, hover your Pen Tool over the starting point until you see a circle appear right next to the Pen Tool. That’s your cue that you’re about to close the path. Click on your first point to close the path.
If you want to modify or tweak the path by adjusting any of the points you’ve placed, you can do so using the Direct Selection Tool.

[cta text=”4 Photoshop and Clipping Path Shortcuts to Bookmark” button=”Learn more” link=”https://pathedits.com/blogs/tips/clipping-path-photoshop-shortcuts-editing-ecommerce-photos”]
Step 3: Save your path
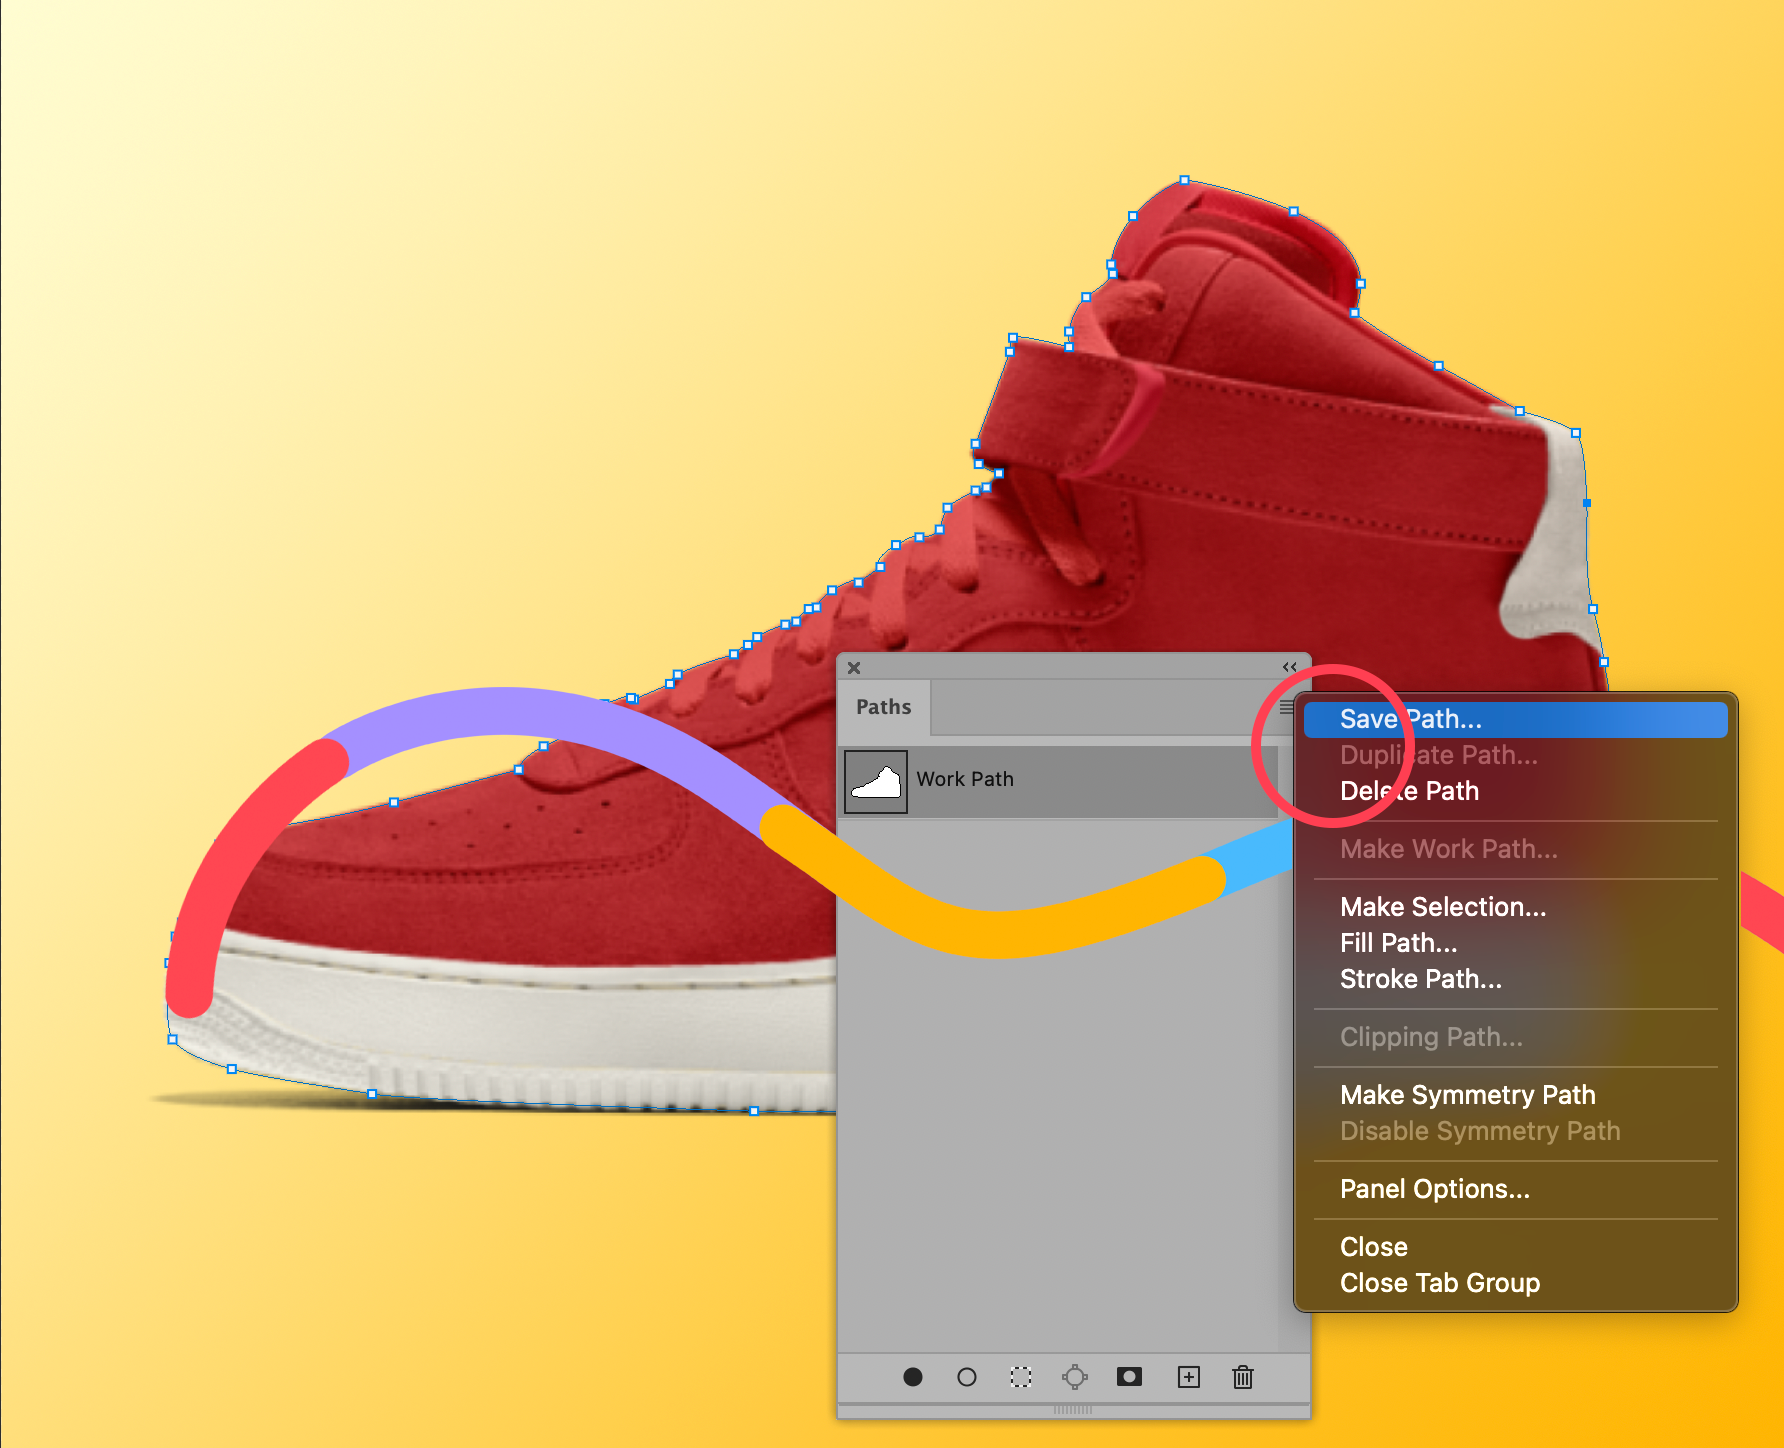
Once you’re happy with the path you’ve created, go to your Paths panel in Photoshop 2021. If you don’t see the panel, you can select Windows > Paths to bring up the Paths panel.
Once in the panel, click on the Work Path you’ve just created (if it’s not already selected). Then click on the panel’s menu and choose Save Path.
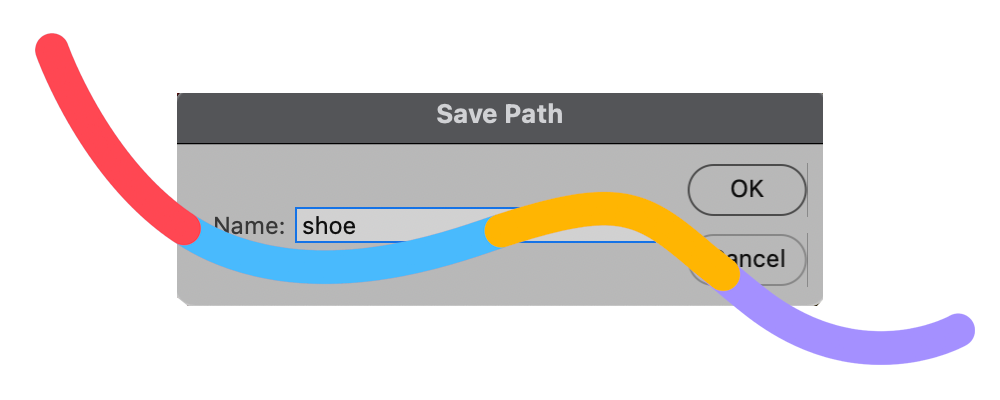
Tip: Give your new path a name that identifies the object it’s outlining. This is good practice as you may find yourself working in a file that requires multiple clipping paths.
Step 4: Create a clipping path
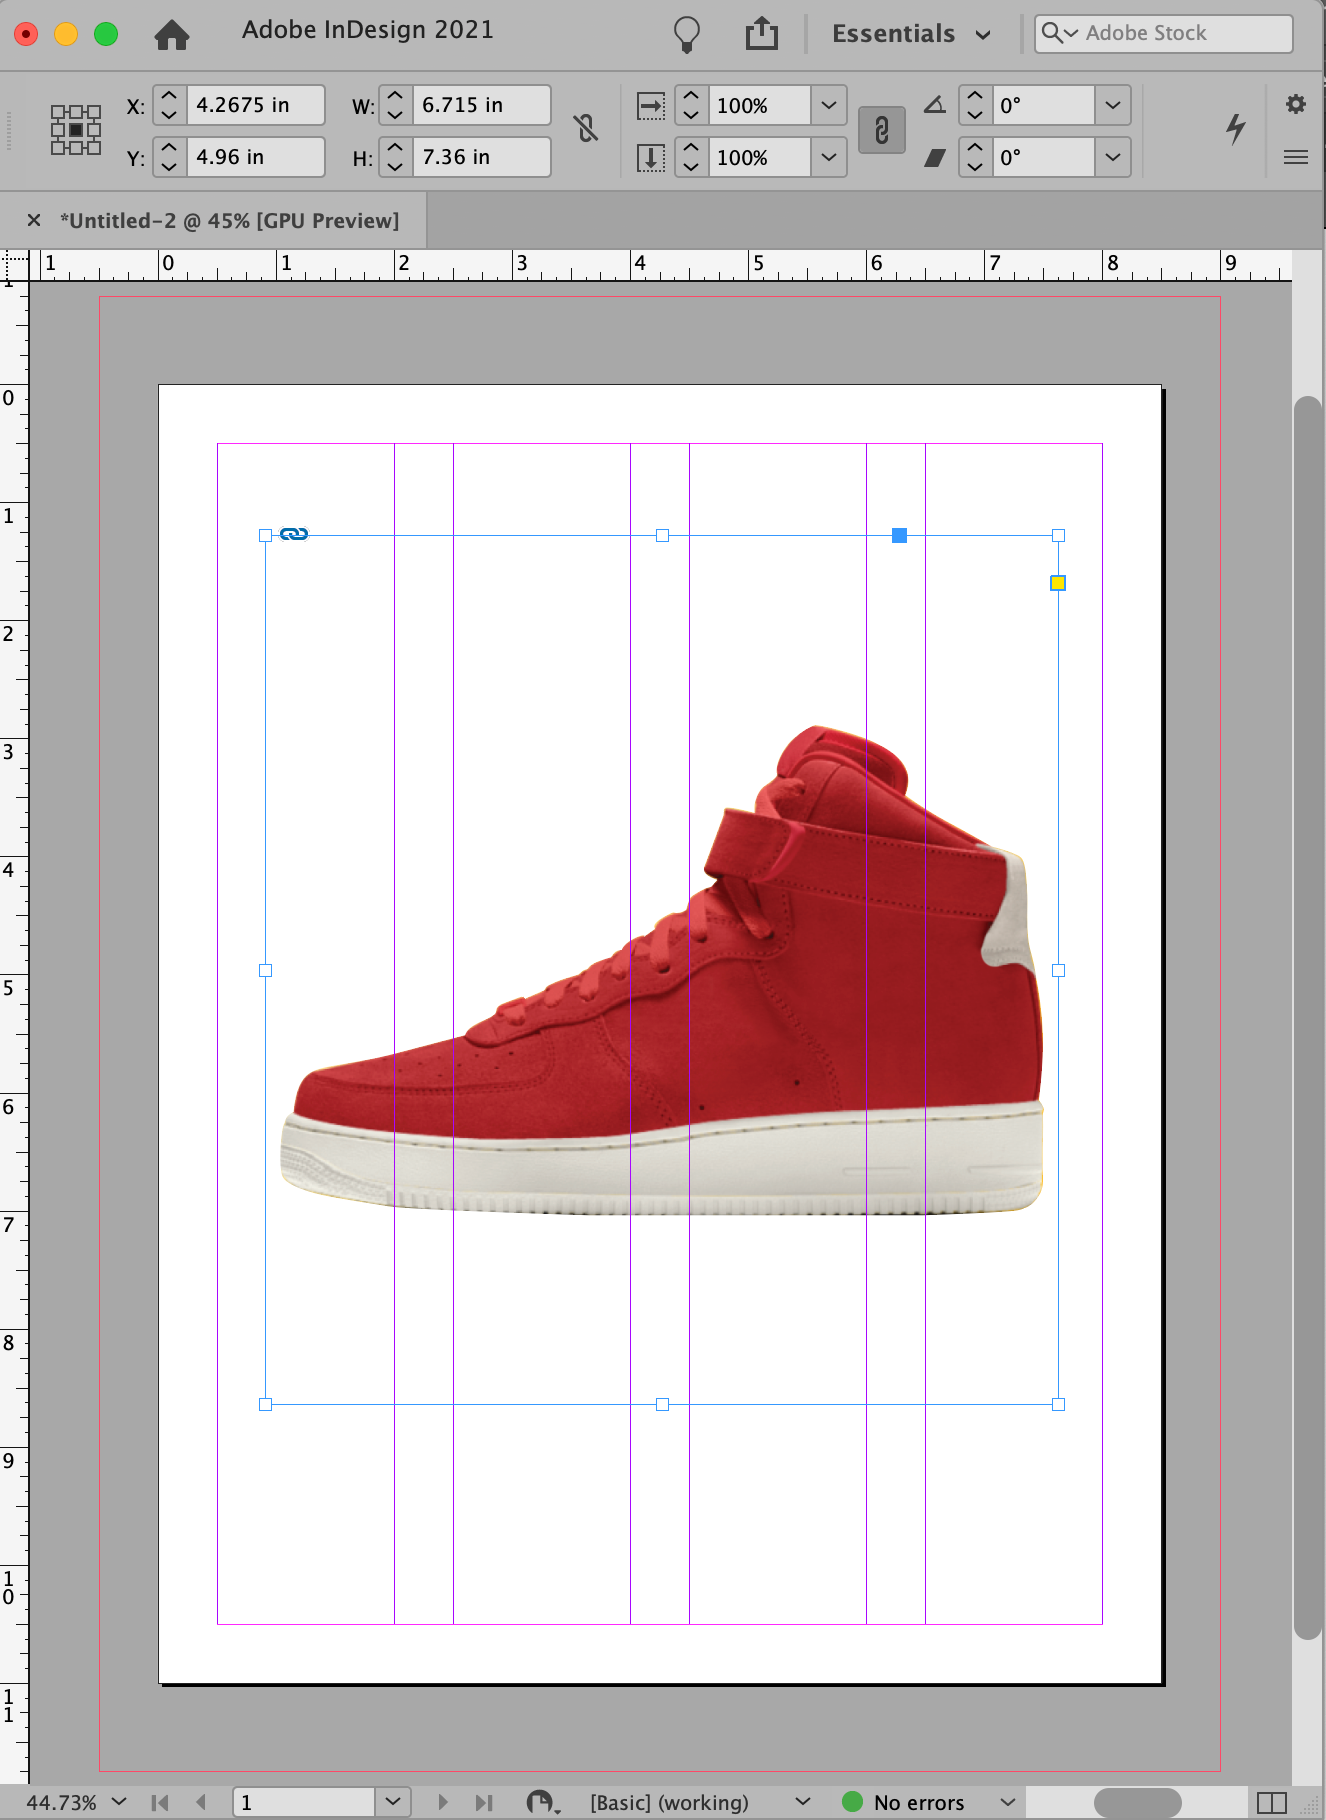
Traditionally, a true clipping path is a path created in Photoshop and can be read in other applications. For example, you can create a clipping path around a product photo in Photoshop without damaging your original image, and then import that image into design software such as InDesign or Illustrator, and the background of your image will be automatically “clipped.”
For this step, we’ll go over how to create a clipping path the “traditional” way. In the next step, you’ll learn how to use the path you created to remove a background directly in Photoshop.
To create a traditional clipping path, simply click on the saved path you just created in your Paths panel. Click on the panel menu again and choose Clipping Path.
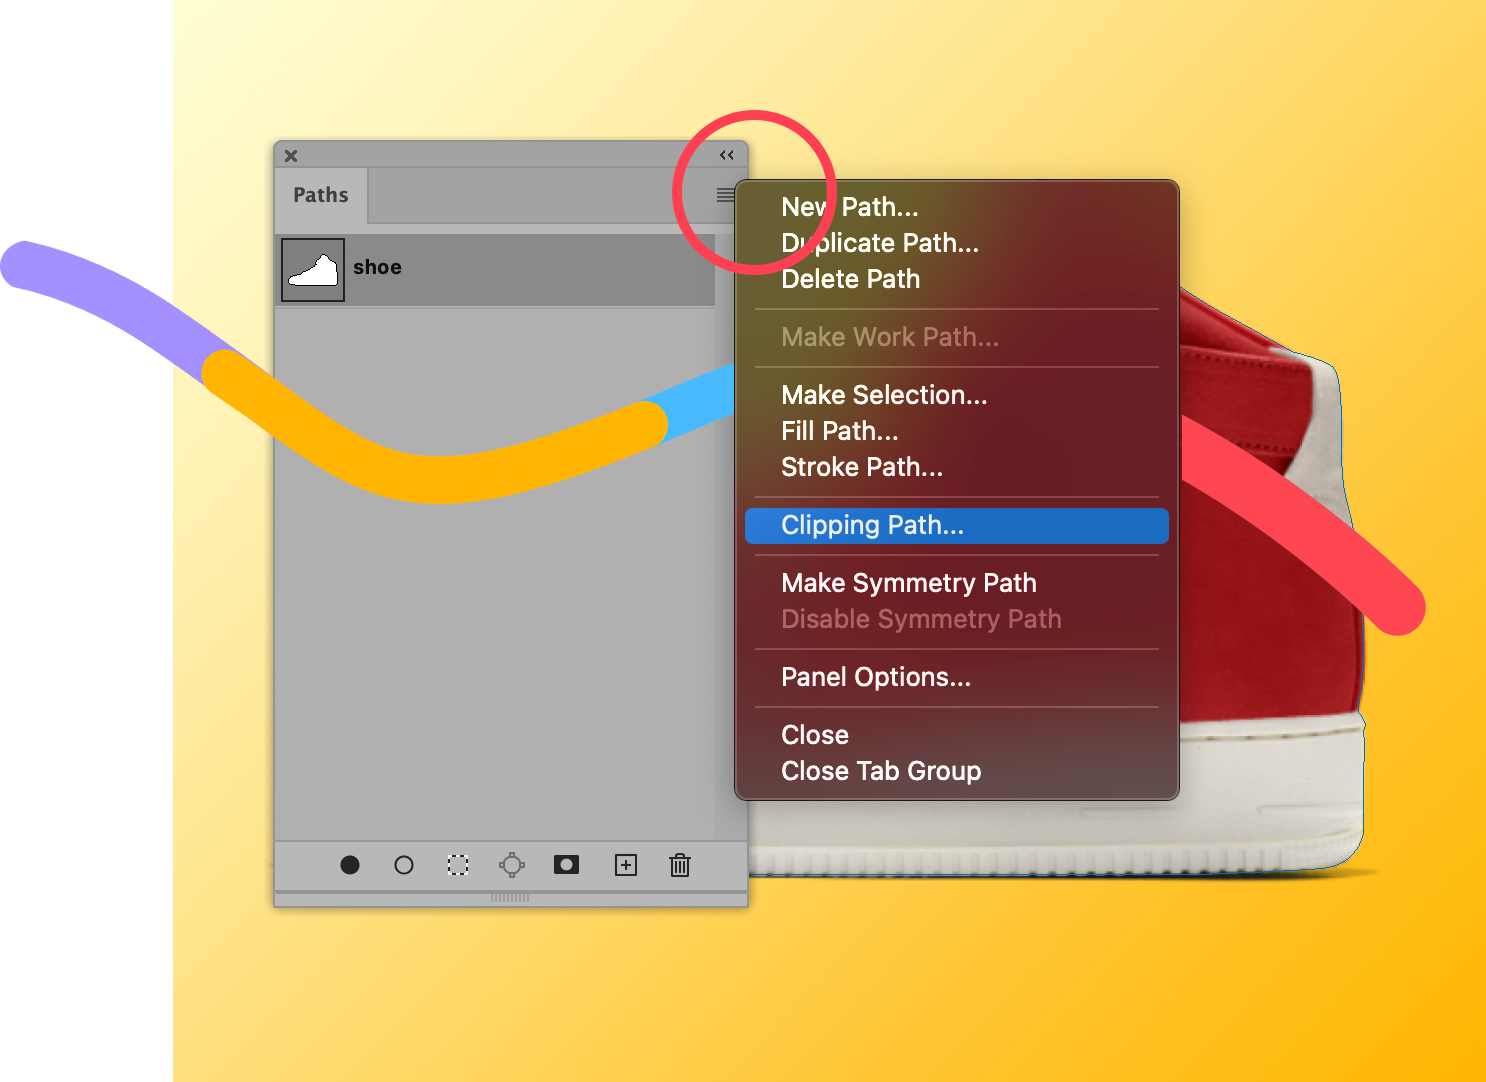
You won’t see a difference in your Photoshop document, but if you save your image in a PSD file format, and then place that image into InDesign or Illustrator, you’ll see the clipping path doing its job.
Step 5: Create a selection from your clipping path
For ecommerce use, you’ll most likely need to remove a background entirely from your product image within Photoshop. And now that you’ve created your path, the next part is easy. First, make sure you’re in a layer you can edit appropriately. Go to your Layers Panel. If you don’t see the panel, you can select Window > Layers from the dropdown menu at the top of the application window.
[cta text=”Photoshop Layers Tutorial: A Beginner’s Guide ” button=”Learn more” link=”https://pathedits.com/blogs/tips/photoshop-tutorial-beginningers-guide-using-layers”]
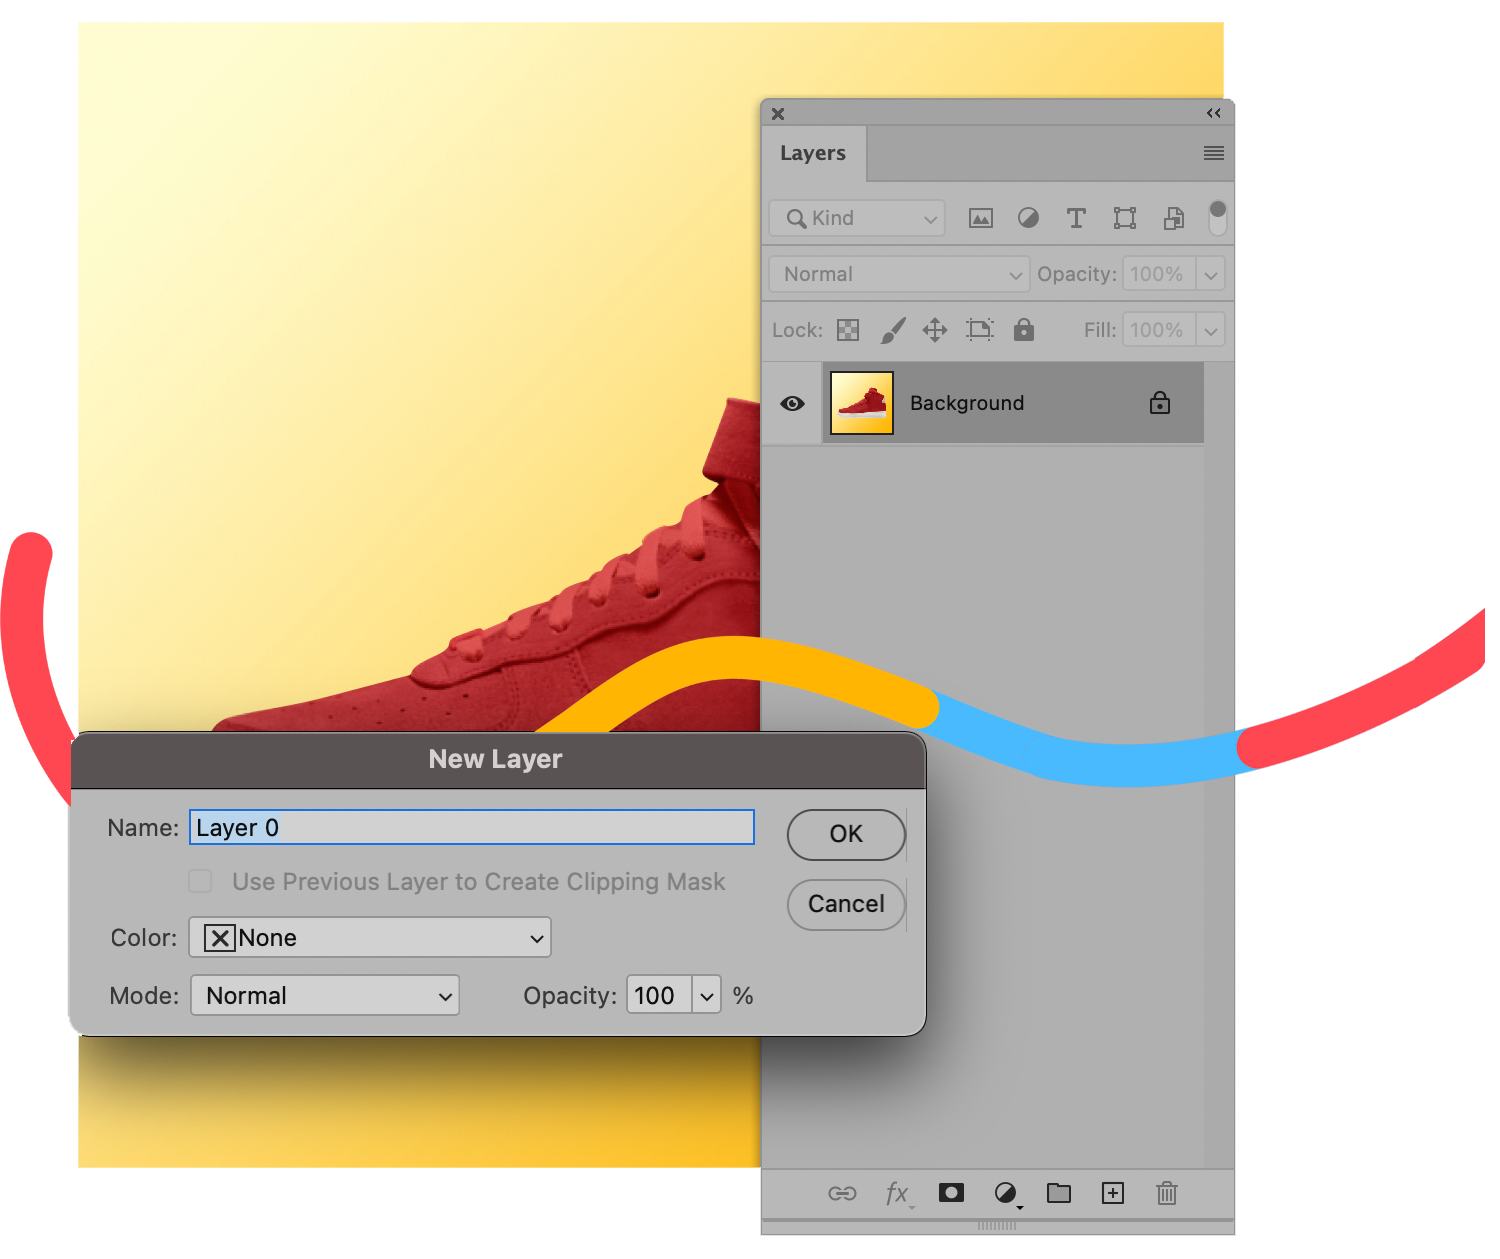
Make sure the layer containing your product image is unlocked. If your image is in a locked Background layer, simply double click on the layer to make it Layer 0. Click OK.
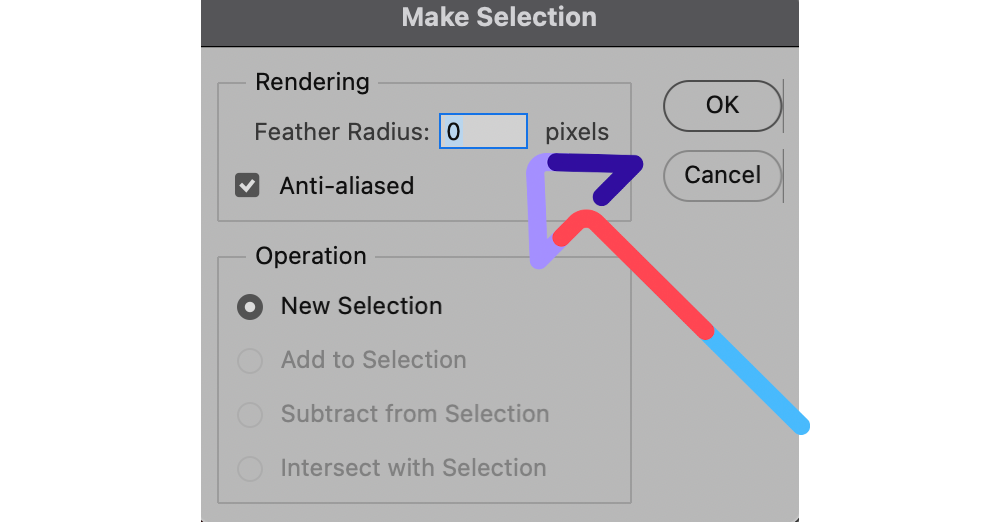
In your Paths panel, make sure your new Path is selected. Then, from the Panel’s menu, choose Make Selection….
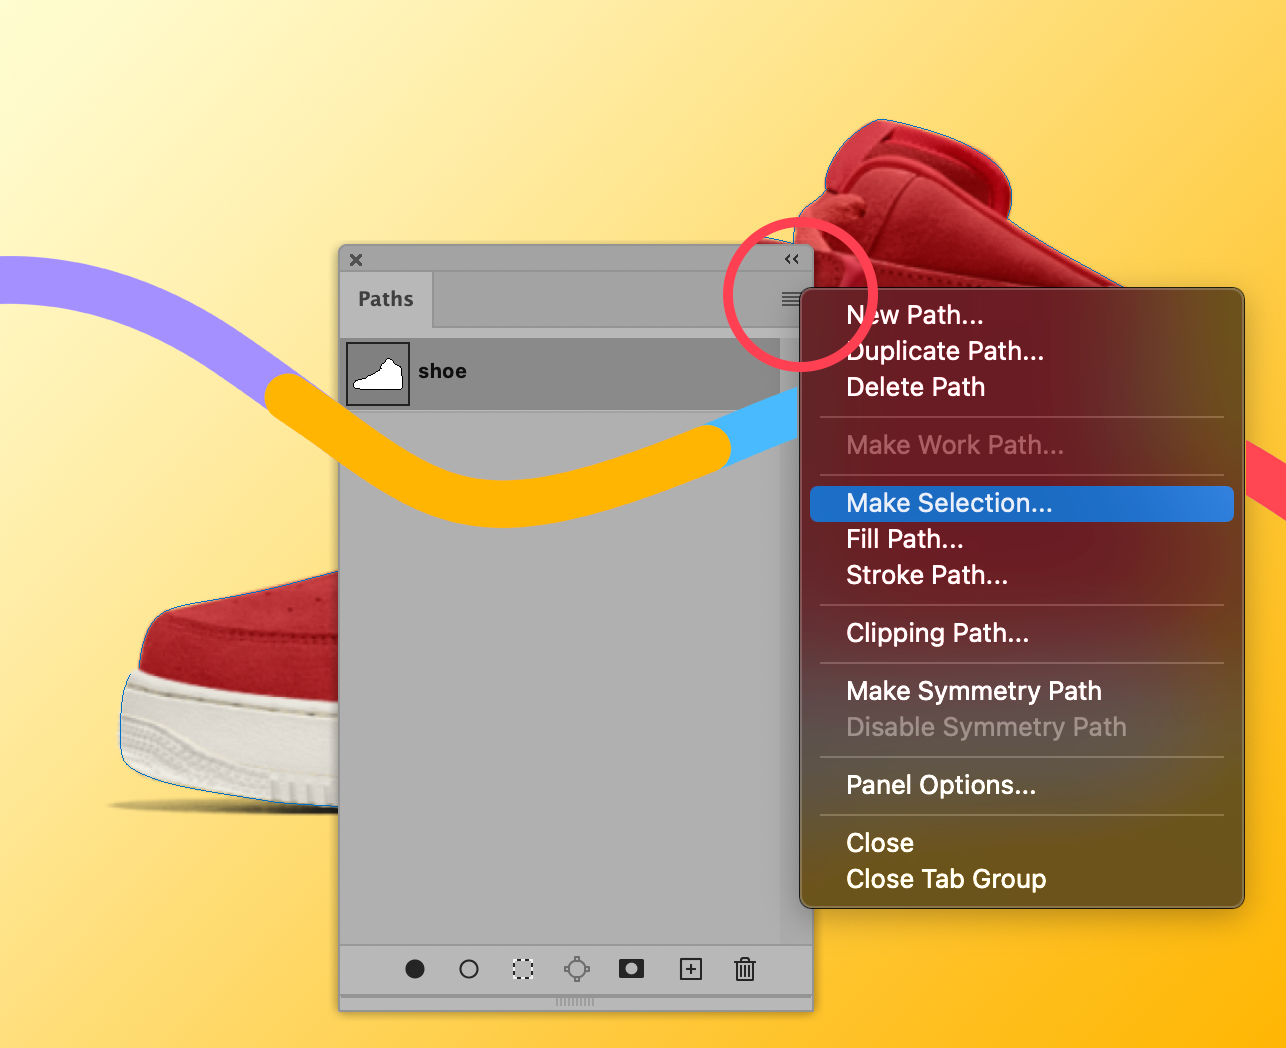
Check and make sure Feather Radius is set to 0. Click OK.
Now, choose Select > Modify > Contract from the dropdown menu at the top of the application window.
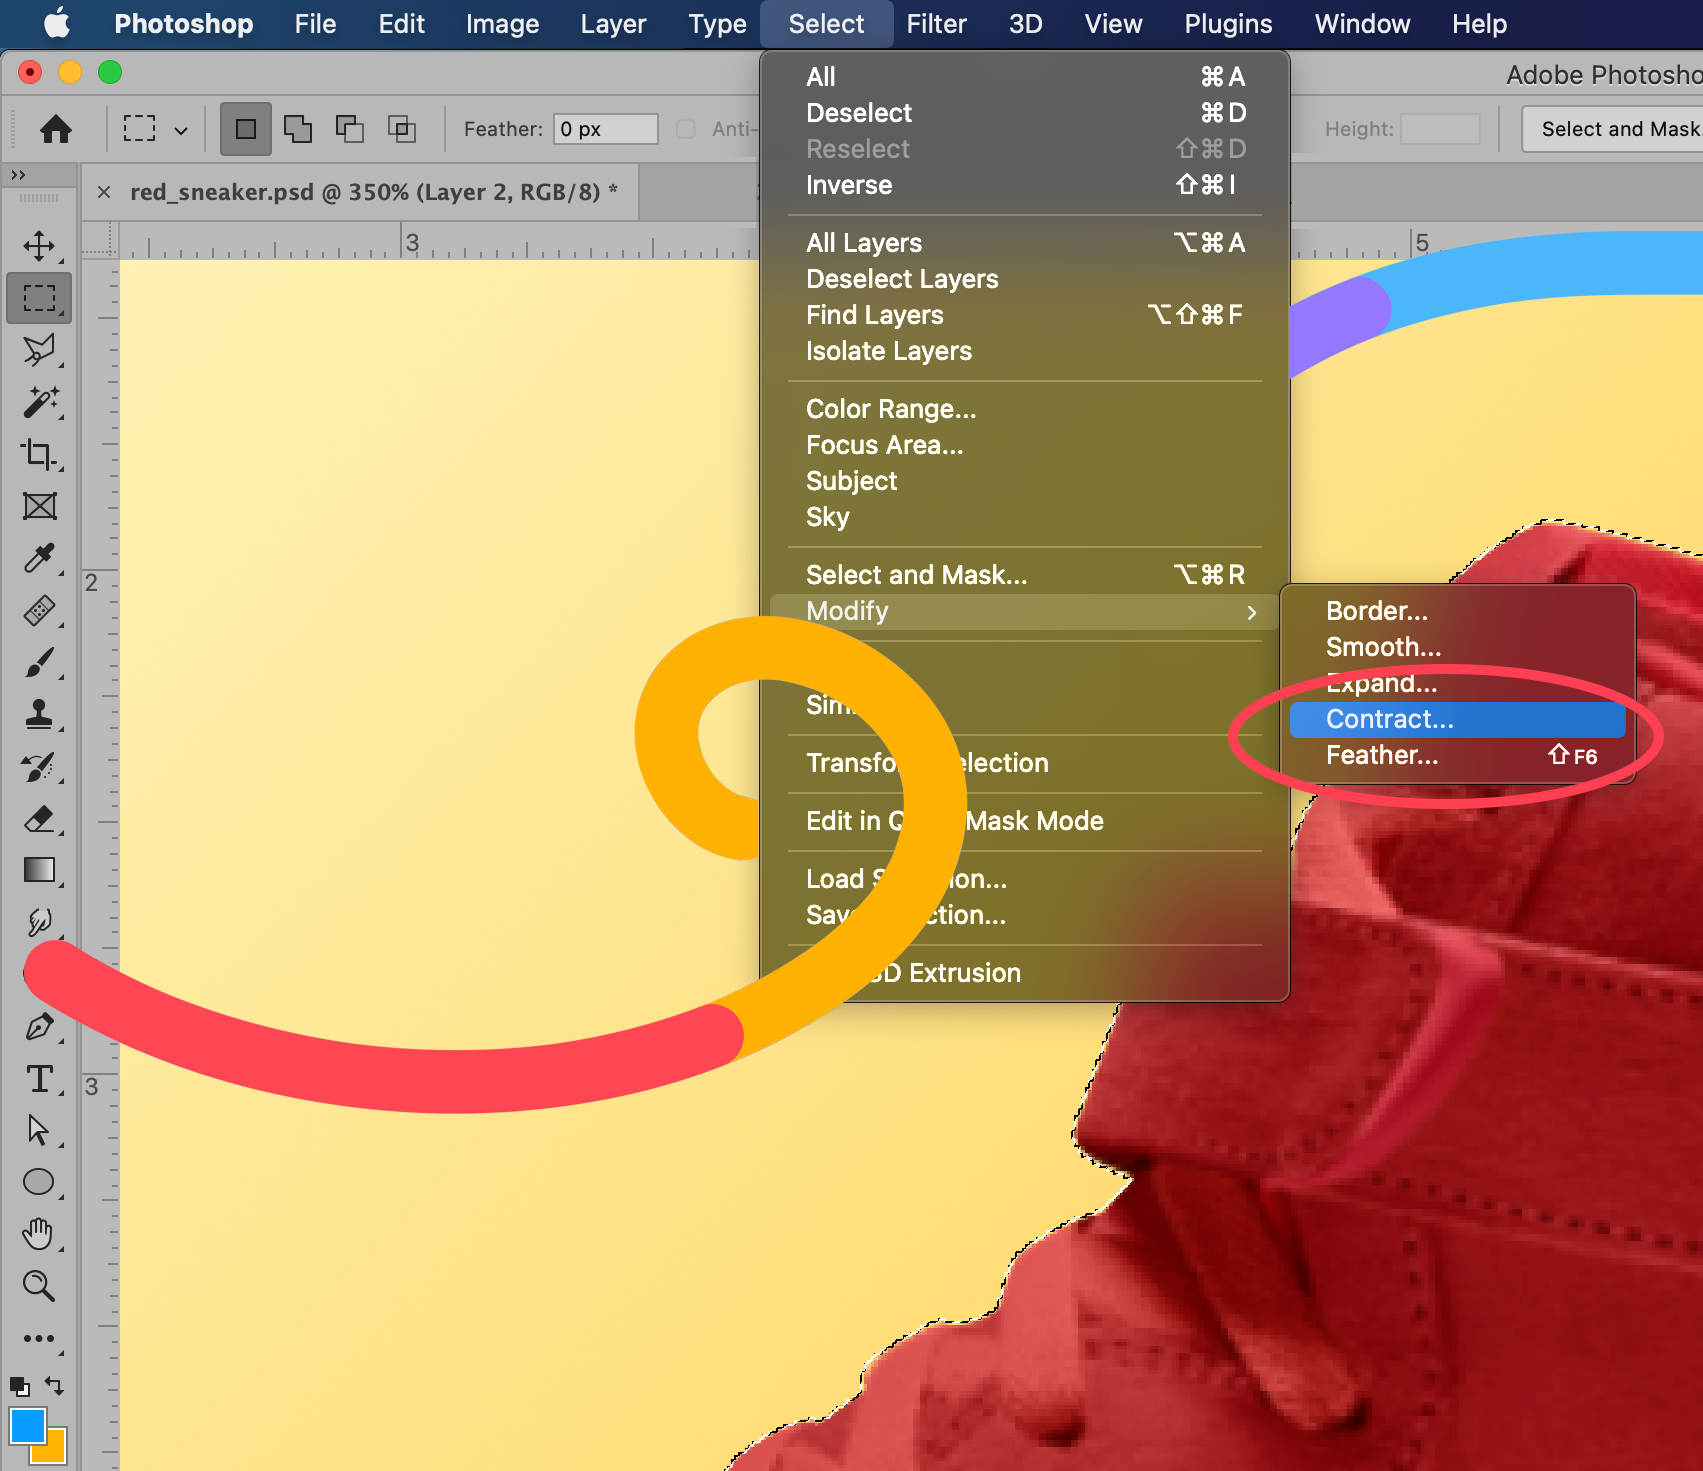
In the dialog box that appears, set the contract radius to 1. Click OK.

By doing this, you’ll move your selection just slightly inward, so you don’t end up with any background artifacts showing up in your masked image.
[cta text=”Clipping Path vs. Masking: What’s the Difference?” button=”Learn more” link=”https://pathedits.com/blogs/tips/clipping-path-vs-masking-difference-comparison”]
Step 6: Create a clipping mask
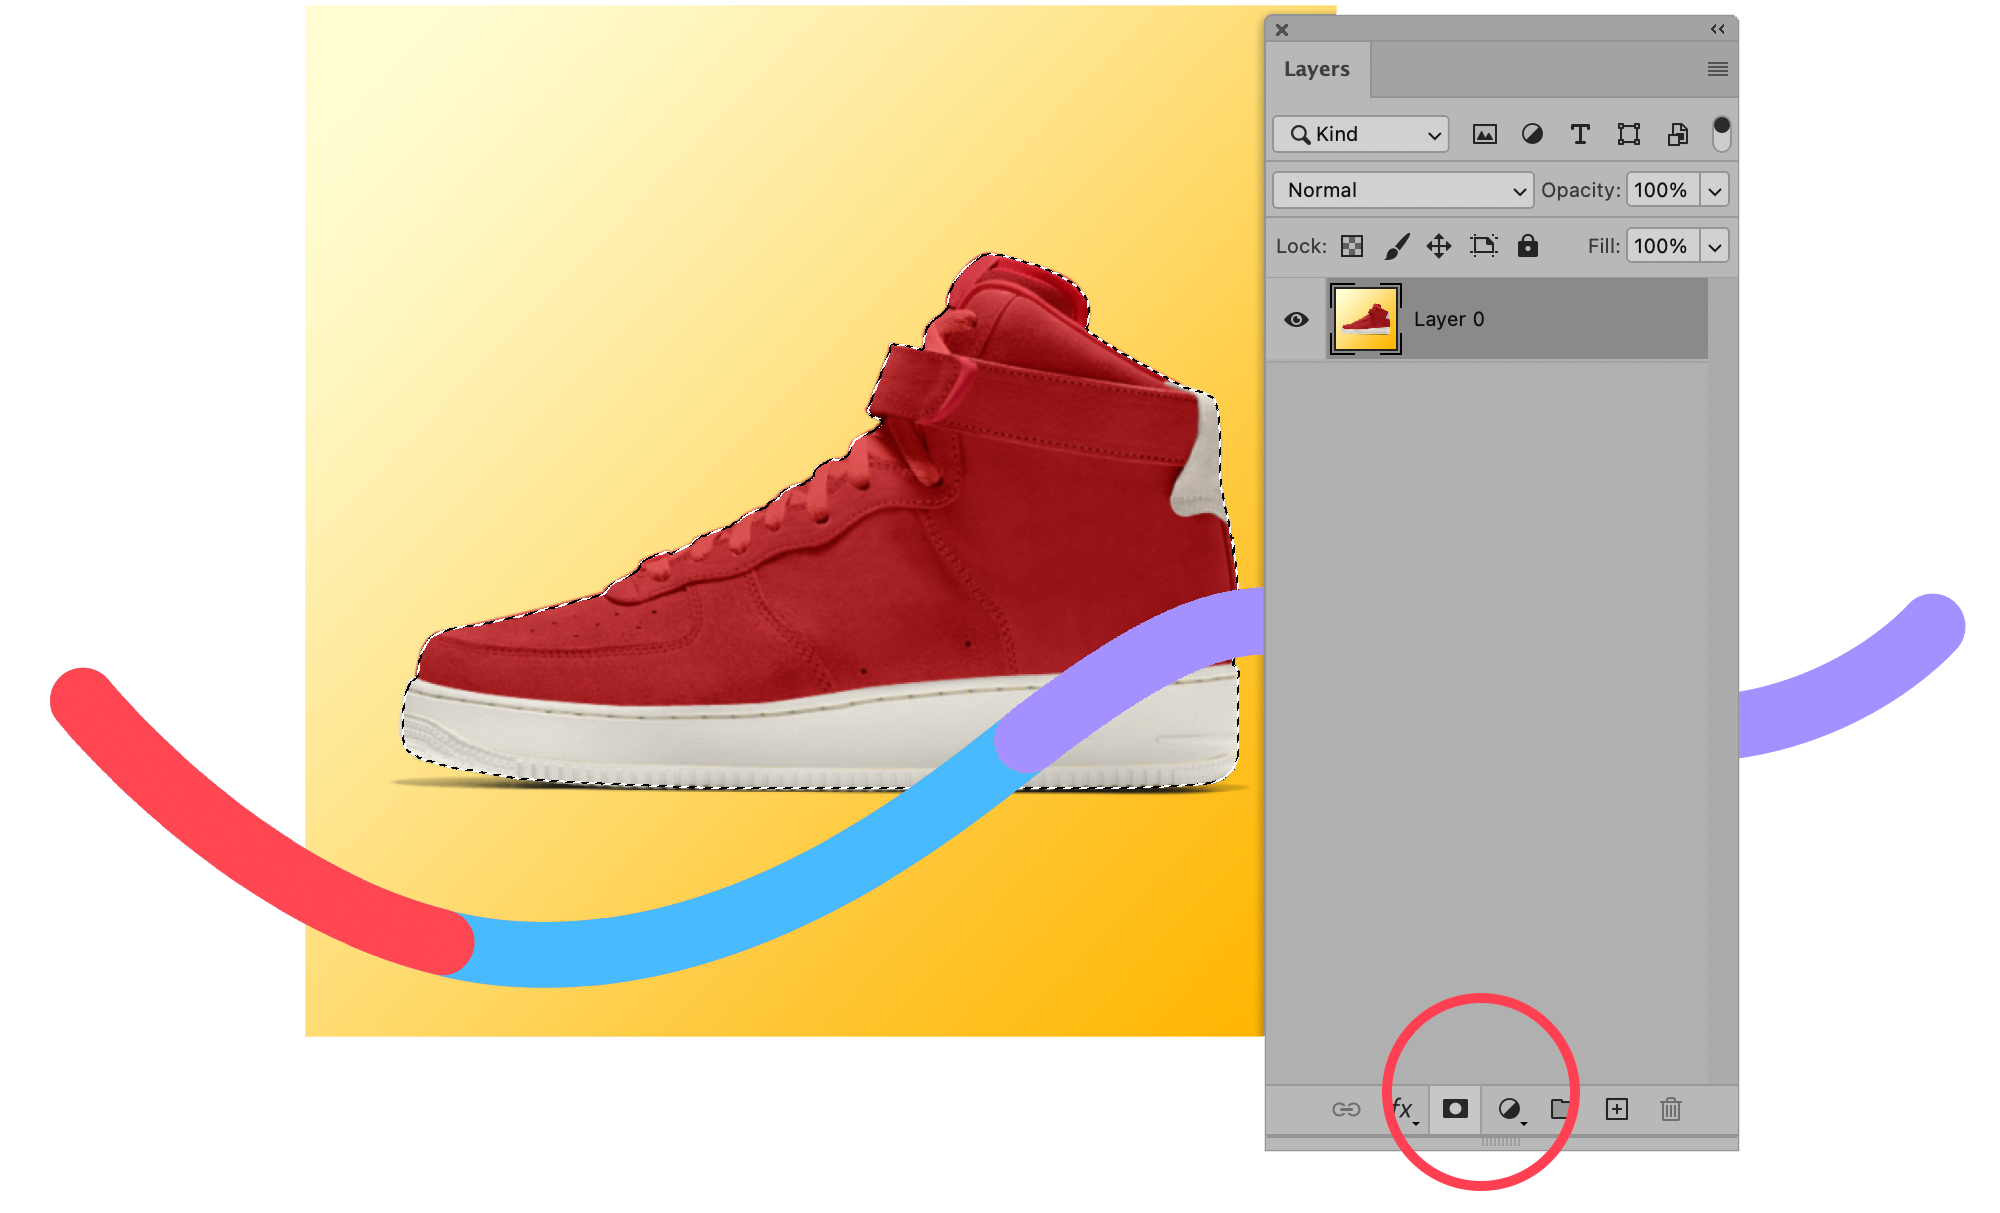
For this next step, you’ll need to go back into your Layers panel.
Make sure your layer containing your product image is selected in your Layers panel. At the bottom of your Layers panel, you’ll see a little icon that looks like a black rectangle with a circle cut out of the middle of it — the Add Layer Mask icon. Click on that icon.
You’ve now created a Layer mask that isolates your product image from its background.
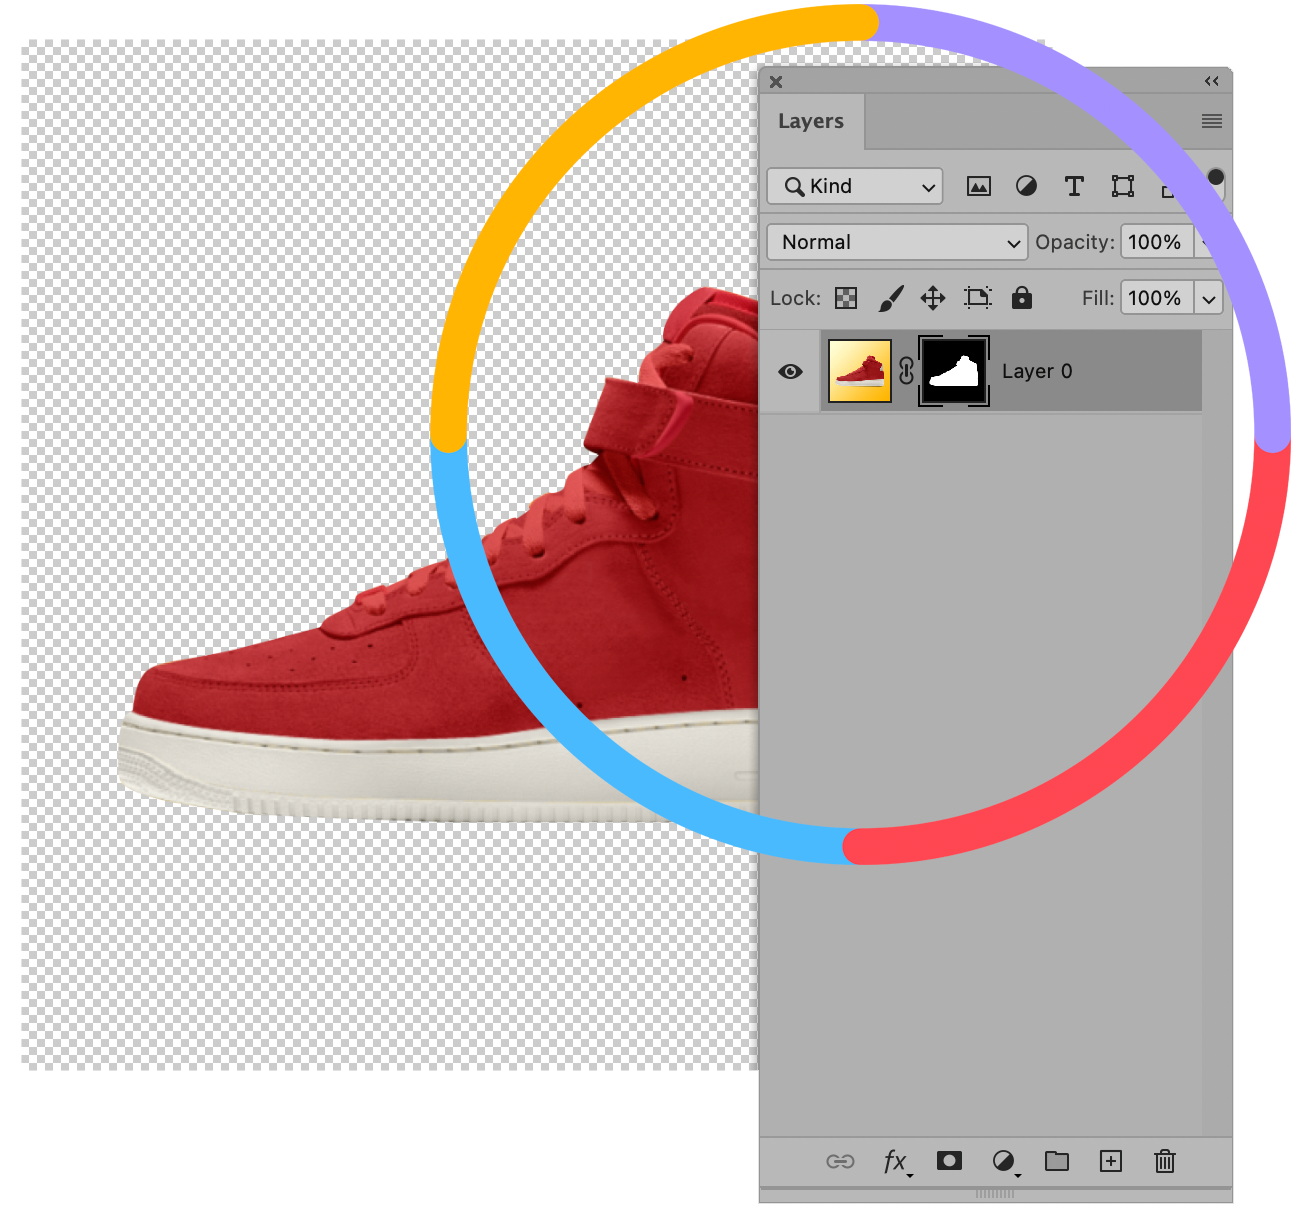
By using a mask, you are isolating the product image in a non-destructive way. Your original background is still there should you need it in the future, but it’s now masked.
You can easily place another background under your Layer 0 to put your product into another setting, or leave it on a transparent background.
[cta text=”Not enough time or patience to handle the clipping paths yourself? Outsource them to Path, your virtual clipping path studio” button=”Learn more” link=”https://pathedits.com/pages/clipping-path”]