DJI’s new Ronin 4D is an 8K cinema camera system for pro videographers

The new DJI Ronin 4D
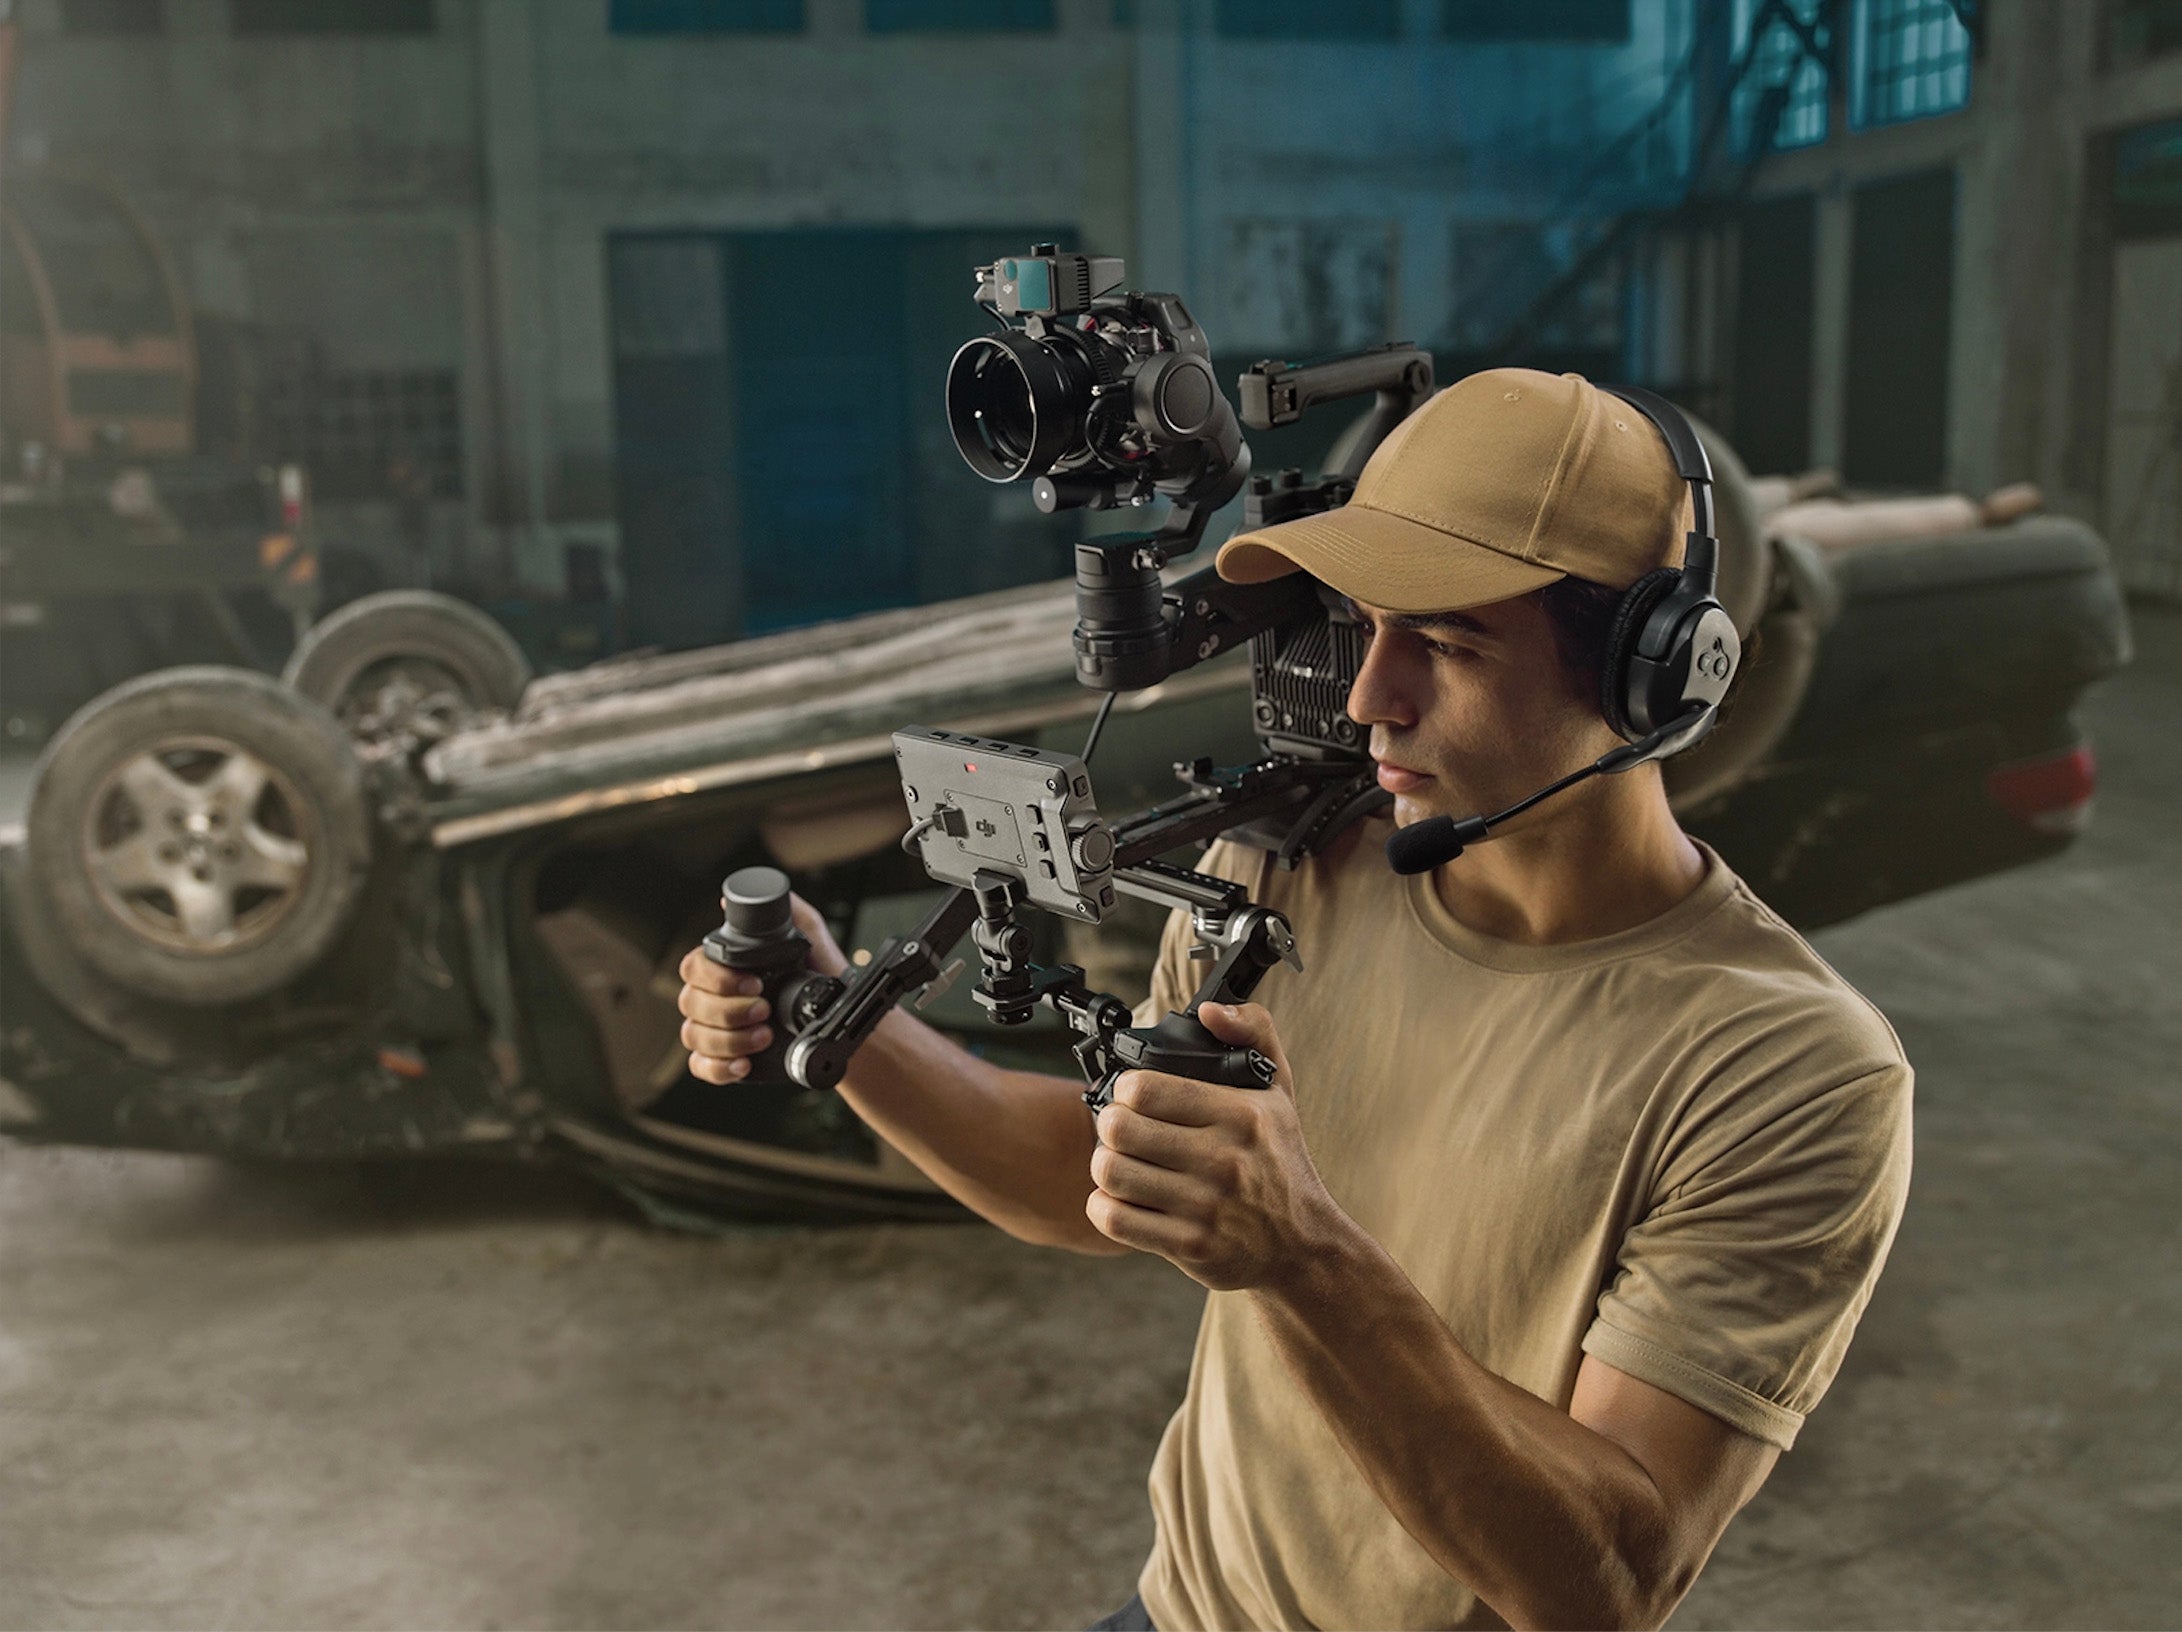
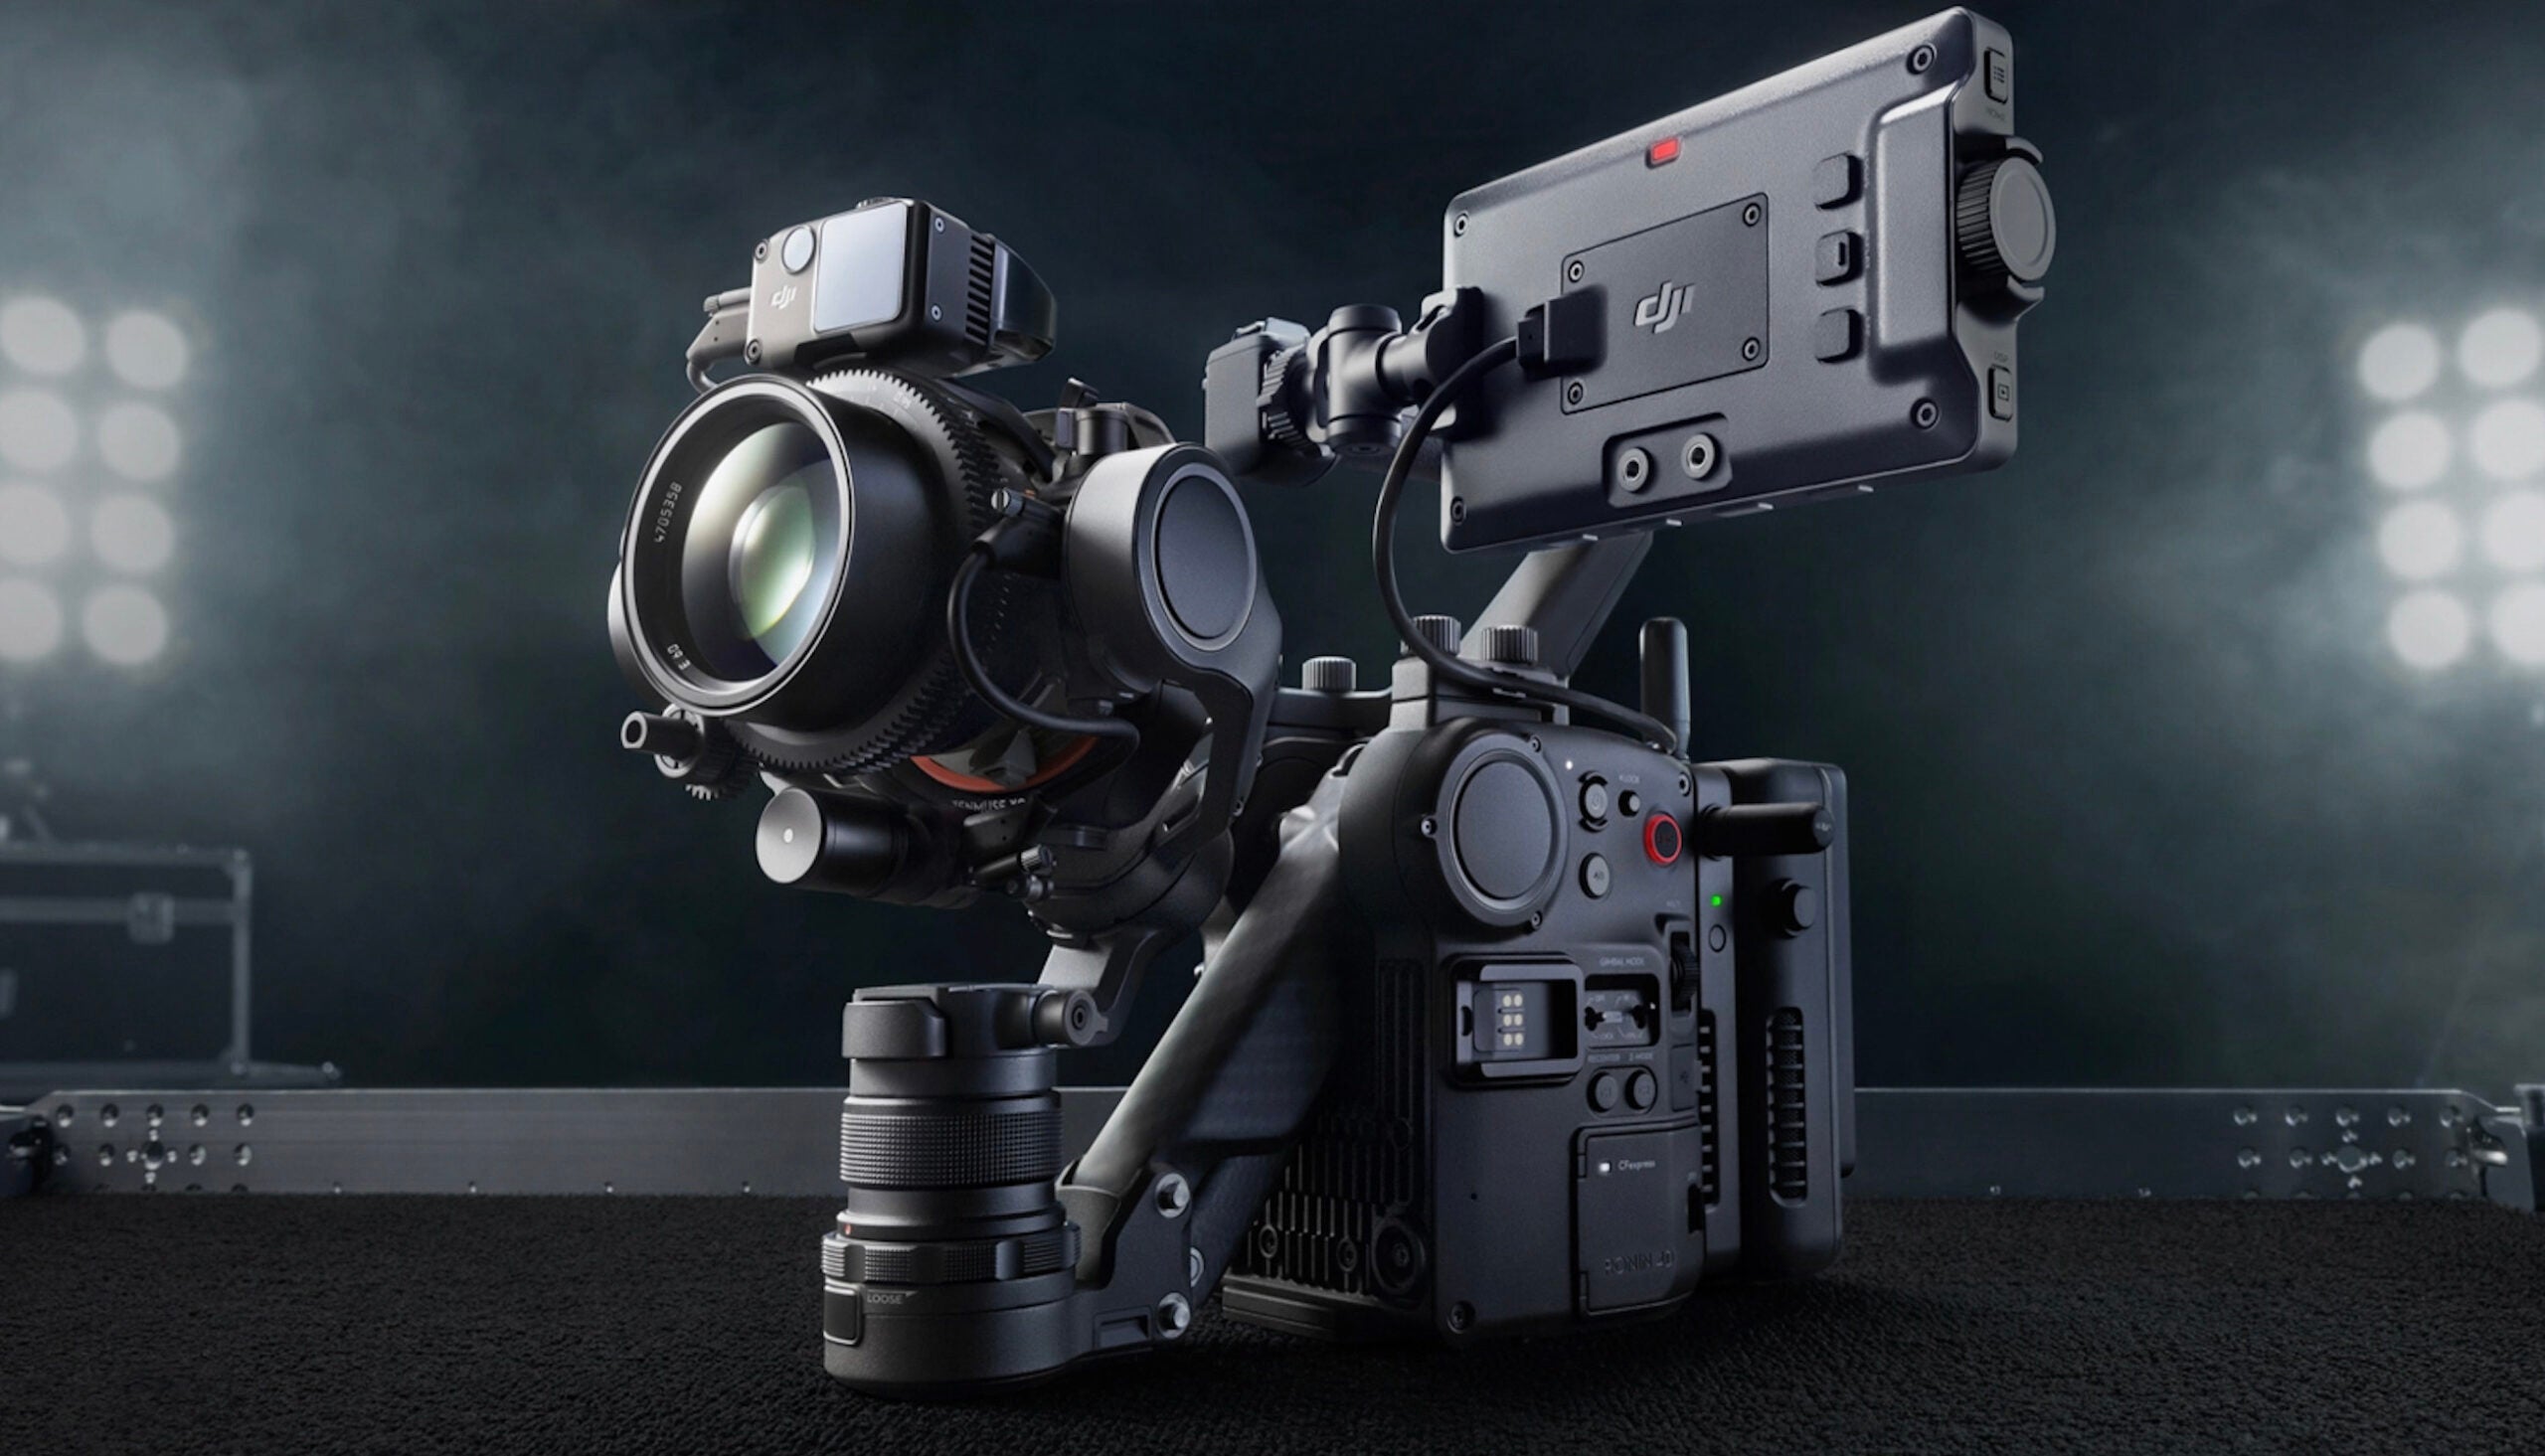
The Ronin 4D is the world’s first cinema camera with 4-axis in-body image stabilization. DJI

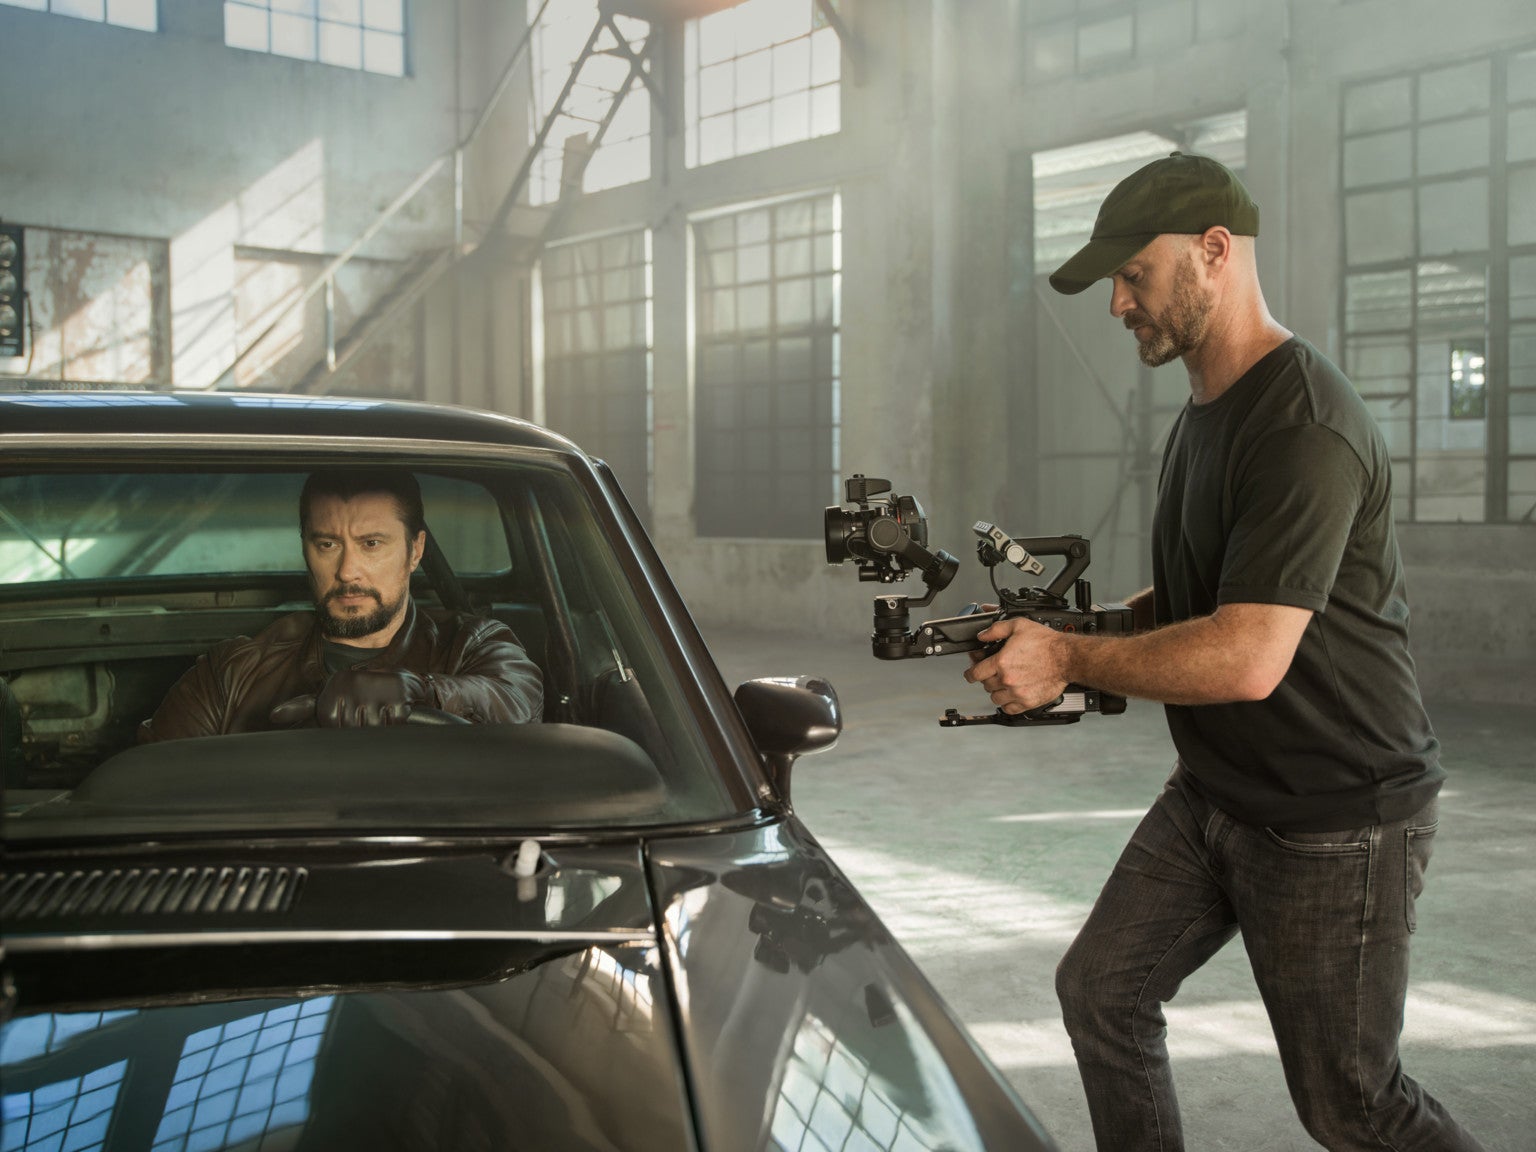
DJI has announced the Ronin 4D, a new cinematography camera system sporting a full-frame sensor, 4-axis in-body image stabilization, liDAR focusing and wireless video transmission capability.

Who’s it for

Targeted squarely at professional and advanced cinematographers, the Ronin 4D aims to improve the efficiency of high-end video productions. And it has a price tag to go along with these aspirations.

Video capability

The system comes in two flavors, an 8K and a 6K configuration. Both make use of a new and proprietary chipset called CineCore 3.0. And according to DJI, this allows for both 6K and 8K Raw video capture “with precise color reproduction, advanced assistive functions with a high-performance AI engine, and multi-link monitoring and control with low-latency image processing.”

Both versions of the Ronin 4D can capture footage internally, in a variety of codecs including the standard H.264 codec, as well as Apple ProRes and ProRes RAW. The 6K version can shoot up to 4K/120p and 6K/60p. The 8K version offers the same, as well as capture up to 8K/75p.

Zenmus 9 camera

The new DJI Ronin 4D
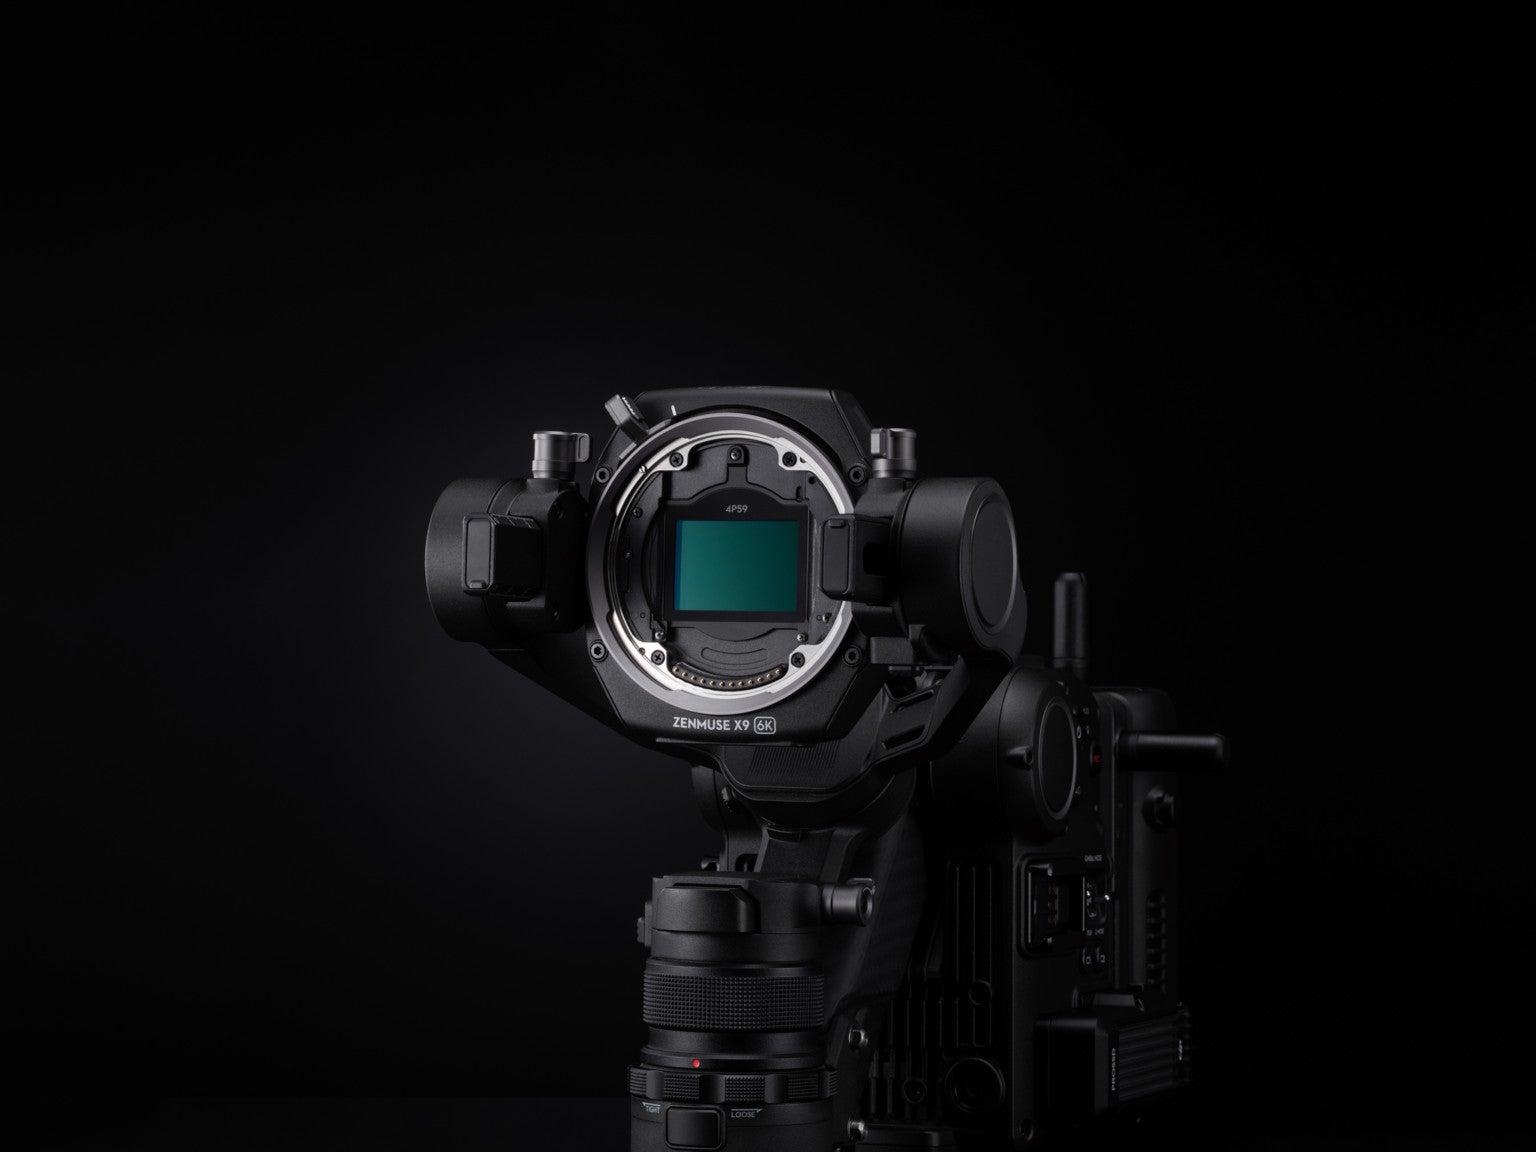
At the heart of the Ronin 4D is a full-frame Zenmuse X9 gimbal camera. DJI

The camera behind the system is the new full-frame Zenmuse X9 gimbal camera. Both Ronin 4D options will be available in either DJI’s proprietary DL-mount or Leica M-mount. No word yet on whether the system will be offered in other mounts.

The sensor behind the Zenmuse 9X is dual gain, meaning it can capture both a high and low ISO at the same time, for improved video quality. This particular sensor is capable of dual ISO 800 and ISO 5000 and can pump out up to 14-stops of dynamic range, according to DJI.

And for scenes with very bright light, the Ronin 4D offers 9 different levels of built-in neutral density filters.

4-axis image stabilization

DJI is calling the Ronin 4D the world’s first 4-axis cinema camera. Of course, 3-axis in-body image stabilization is nothing new, a ton of still cameras on the market offer it, including the Fujifilm X-T4 and Sony a1. These 3-axis systems correct for pitch, yaw and tilt. But the Ronin 4D’s 4-axis system also corrects for vertical movement along the Z-axis, i.e. camera shake.

Not only that, the unit has a range of sensors on board, to help keep things steady including a barometer as well as forward and downward visual sensors (similar to what you’d find on a DJI drone). All this should result in incredibly smooth handheld footage.

The new DJI Ronin 4D
The unit should be extremely stable when used handheld. DJI

LiDAR focusing

As if all this impressive tech wasn’t enough, the Ronin 4D also makes use of laser-based autofocusing. DJI’s LiDAR Range Finder works by continually generating precise subject distance measurements. The system cast 32,300 points as far as 33 ft out, to find and track subjects. And DJI promises it works quickly and precisely, even in very low light.

Of course, the Ronin 4D can also be used in manual focus mode.

Wireless transmission

We mentioned the unit is aimed at pro filmmakers. And the ability to monitor a camera feed remotely is something many production crews value. The Ronin 4D can output Full HD footage at up to 60fps to remote monitors up to 20,000 feet away. Whoa. Transmitted footage can also be encrypted. And DJI promises extremely low latency in the transmission feed.

The new DJI Ronin 4D
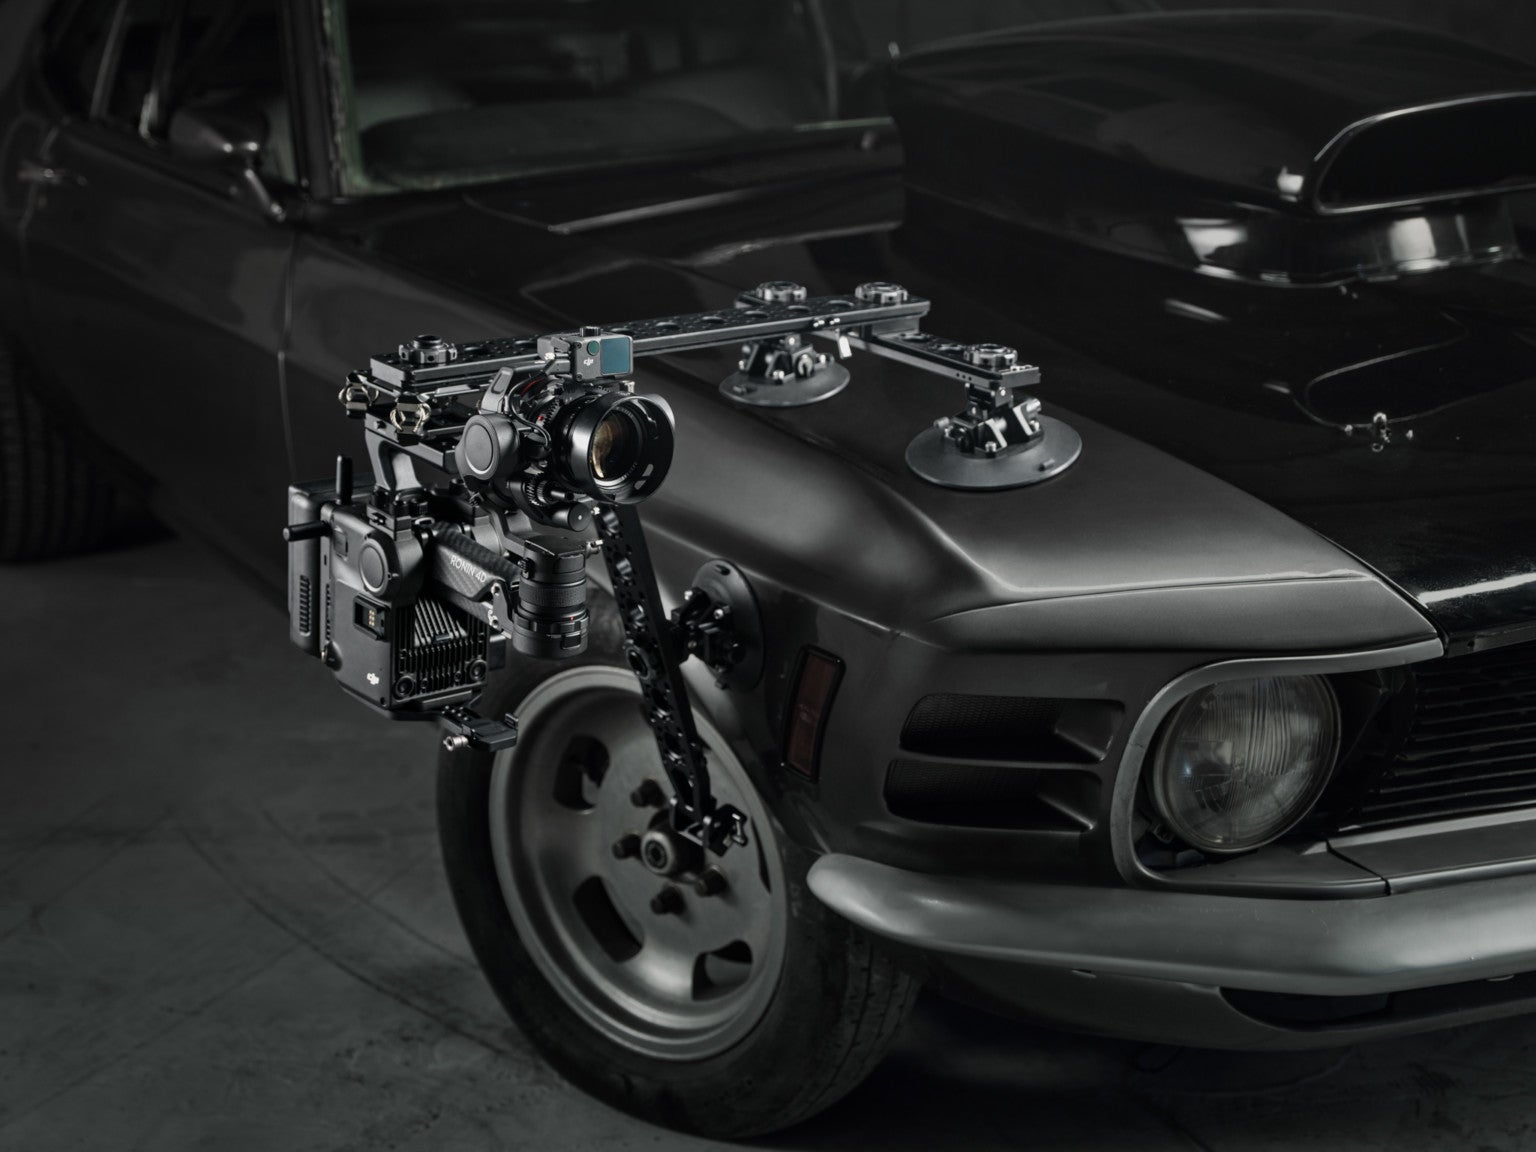
Ronin 4D can be mounted and controlled remotely. DJI

Battery, storage and audio

Ronin 4D is powered by the same battery as the Ronin 2, DJI’s TB50 Intelligent Battery. It promises up to 2.5 hours of footage capture, even in extreme temperatures.

Footage can be captured to USB SSD storage, CFexpress Type-B cards or DJI’s own proprietary PROSSD (DJI says this method delivers the best performance, because, well, of course they do).

For audio, the Ronin 4D offers a built-in 2-channel microphone. There are also two 3.5mm audio input jacks on the body as well as 2 XLR inputs.

Accessory monitor

The new DJI Ronin 4D
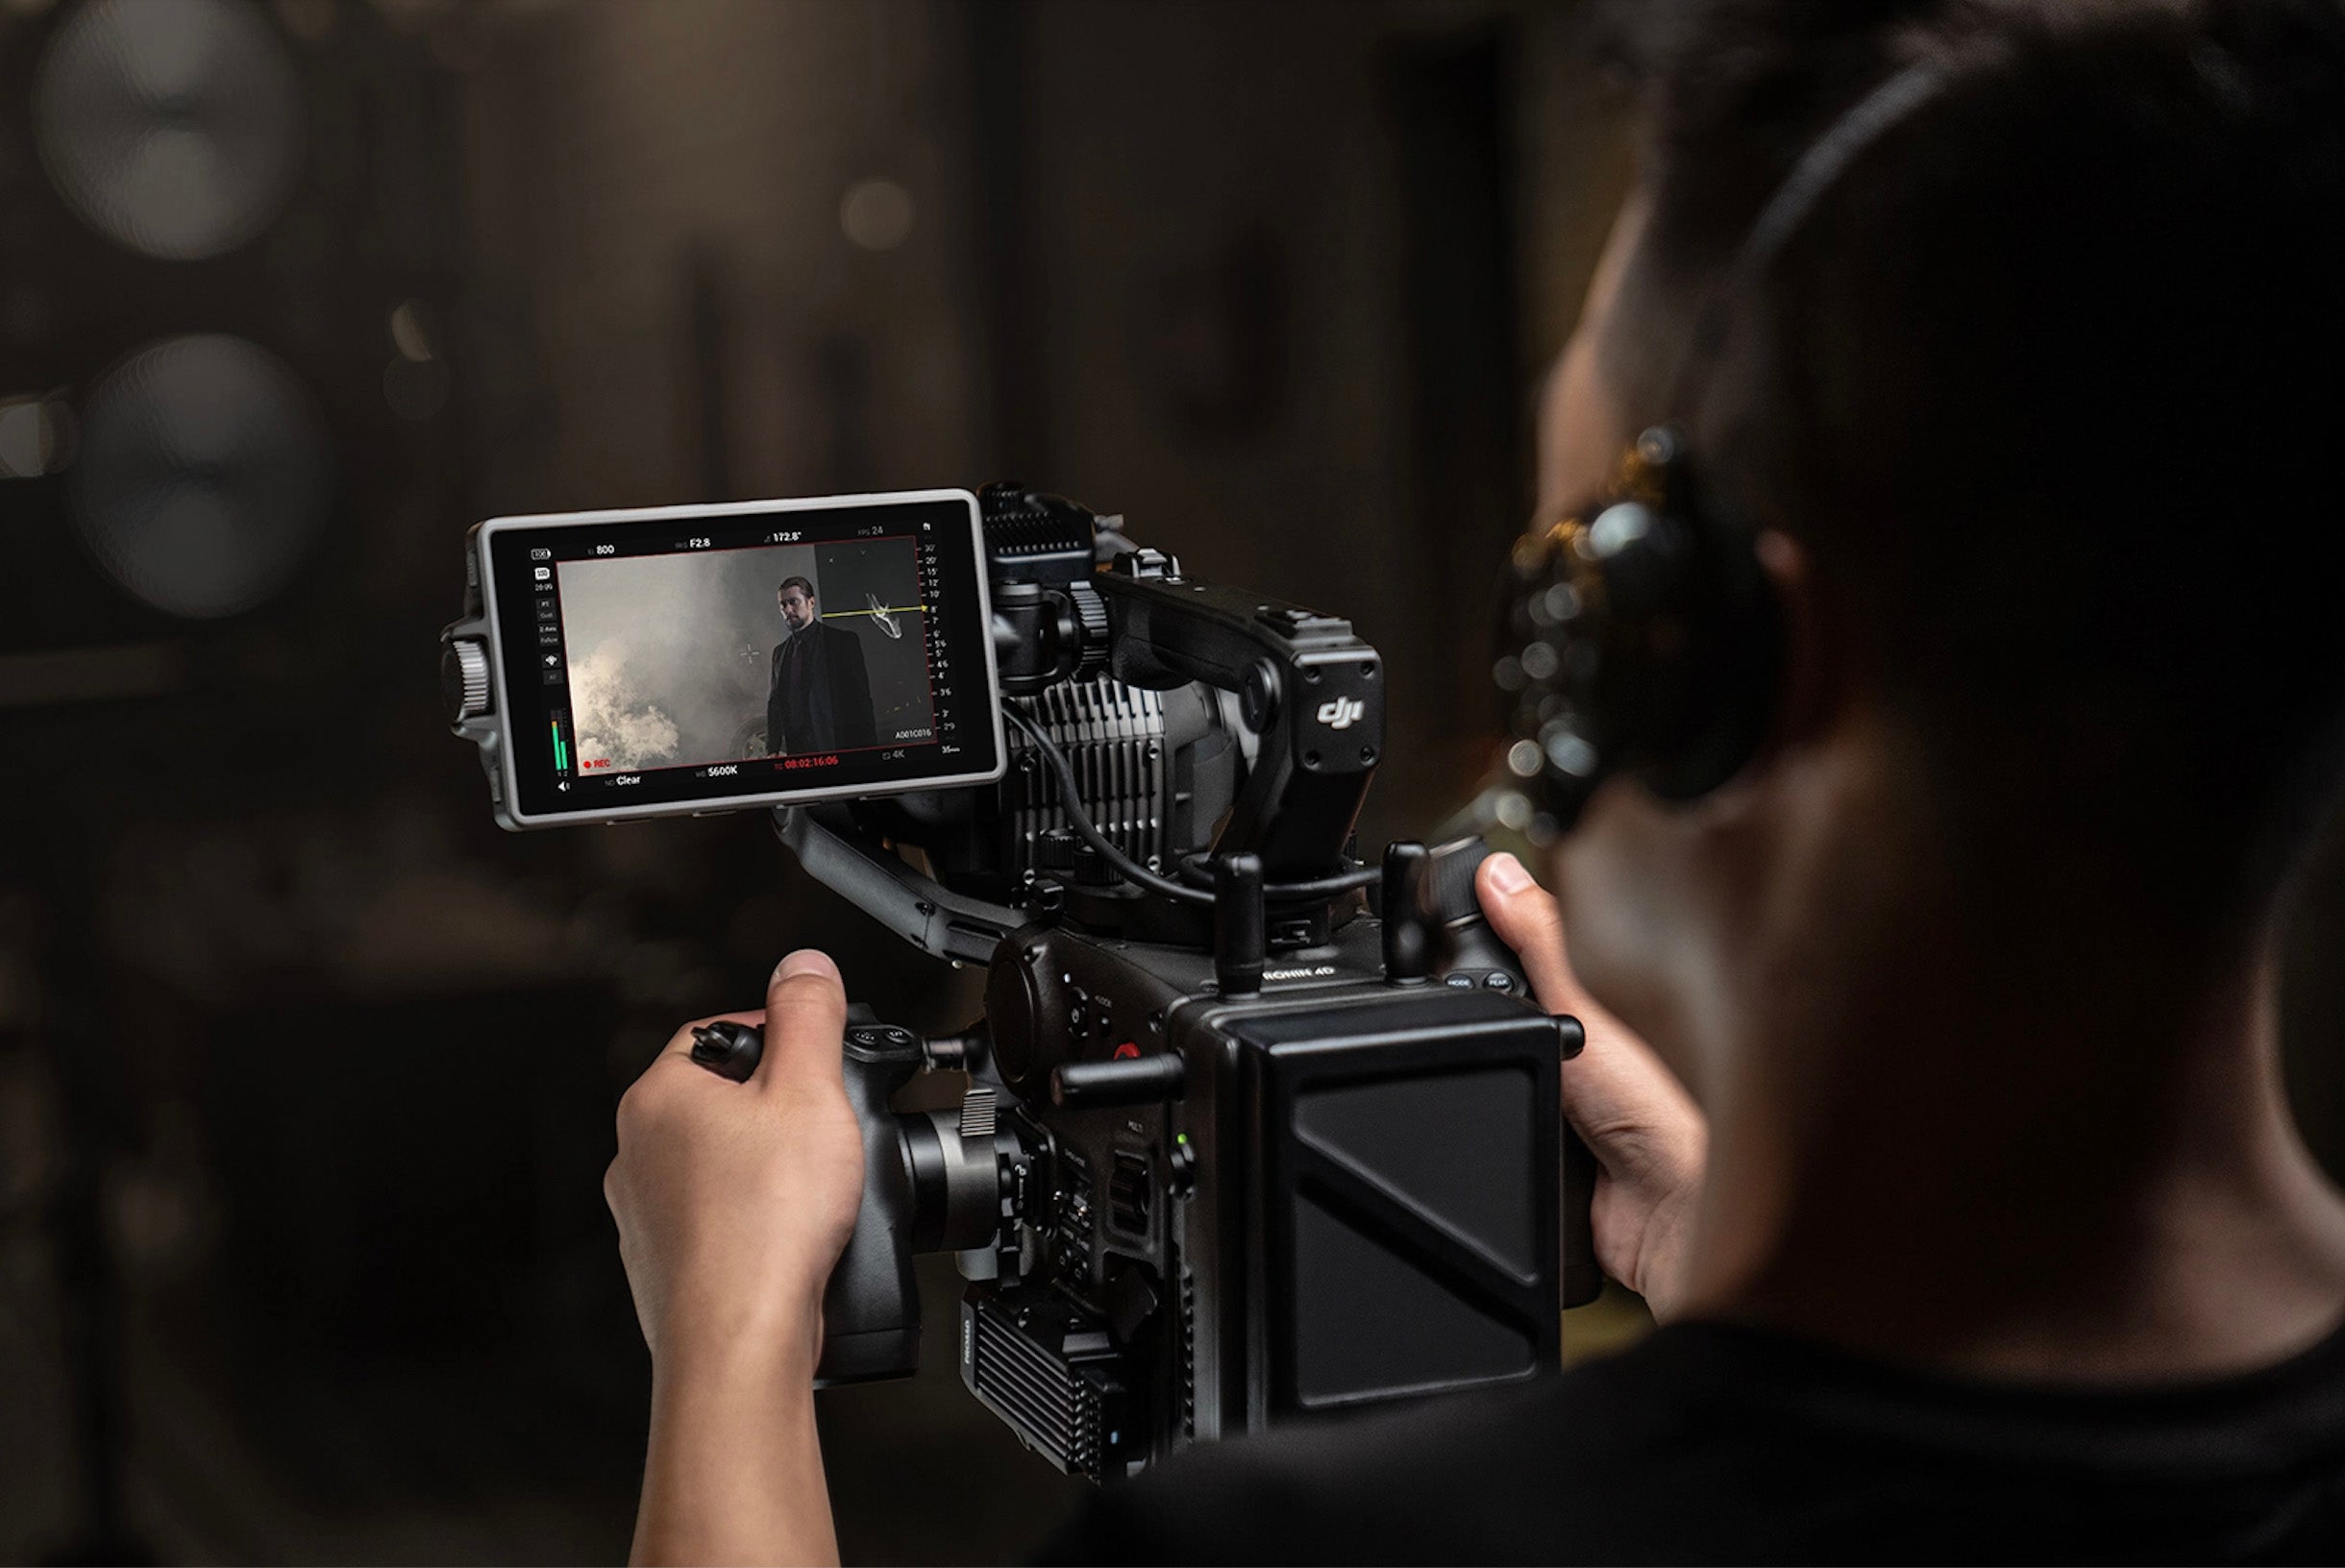
DJI also has a new 7-inch video monitor, launching with the Ronin 4D. DJI

DJI is also launching a new 7-inch monitor to go along with the Ronin 4D (though it works with third-party monitors too). The DJI High-Bright Remote Monitor can be used remotely/wirelessly to view footage or to control the camera entirely. It’s also compatible with a variety of DJI accessories. And offers a built-in SD card slot to capture proxy footage.

Price and availability

The new DJI Ronin 4D
The 6K version of the Ronin 4D will be available at the end of the year, bundled with accessories, for $7,200. DJI

The Ronin 4D 6K version ships in December for $7,200. The package includes the Zenmuse X9–6K gimbal camera, LiDAR Range Finder, High-Bright Main Monitor, Hand Grips, a Top Handle, TB50 Intelligent Battery and a carrying case.

The Ronin 4D 8K version ships at “a later date” for $11,500. That package includes the Zenmuse X9-8K gimbal camera and a PROSSD 1TB (along with, presumably, the same accessories mentioned with the 6K version).

The post DJI’s new Ronin 4D is an 8K cinema camera system for pro videographers appeared first on Popular Photography.

How Should I Choose the Color for My Product Background?

Having quality and professional product photos makes a big difference in how customers perceive your brand.

[form name=”get-tips” text=”Receive free ecommerce & product photography tips” align=”right”]

While post-production is essential, quality product photos start with your shoot. In this article, we’ll look at how to make the most of your shoot by choosing the right colors for your background. We’ll also share a few best practices to help get your product photos to the finish line looking great and ready to wow your customers.

In this article:

  • Why color matters
  • What color is your product?
  • Additional considerations for choosing the color for your product background
  • What is the best color for your product background?
  • Post-production essentials
  • Adding backgrounds after the shot

Why color matters

Photos are your opportunity to showcase your products and tell your brand’s story. What better way to do so than using color to evoke the right mood and feel? Color can take an otherwise ordinary product and make it pop off the page.

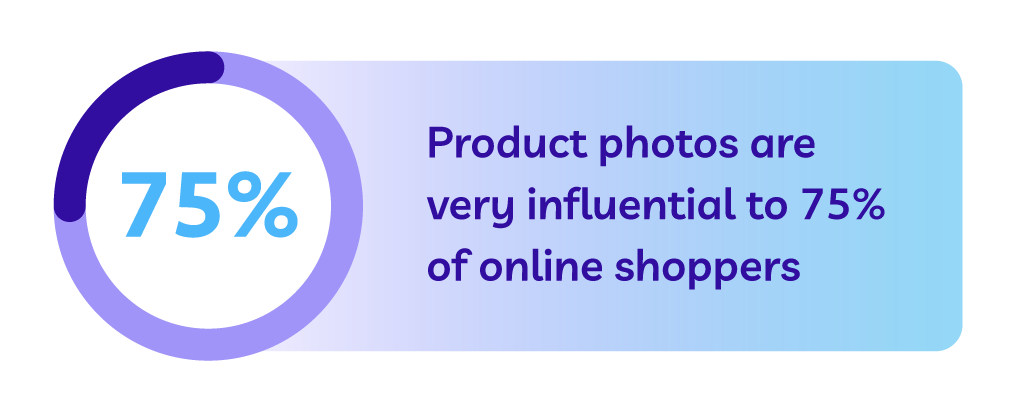
According to one survey, more than three-quarters online shoppers rate product photos as very influential on their online purchase decision. Throwing together product photos with a background color that doesn’t mix puts you at a disadvantage from the start.

Product photos are very influential to 75% of online shoppers

Not only does color help display your products more distinctly on the web and in catalogs, it also has a subconscious effect on people’s moods.

“Color is one of the most powerful tools to express emotions. Studies of involuntary physical reactions, such as eye movements, brain activity, and heart rate have shown that when we see colors, they trigger a very rapid and strong reaction. Colors communicate with us on an unconscious and non-verbal level,” writes Monika Lindquist, marketing strategist at market research firm Straylight.

Using color strategically, you can evoke the emotions you want your shoppers to feel when interacting with your brand and products. While often an afterthought in marketing and business, color can go a long way in influencing your customers and ultimately play a role in how they relate to you and your brand.

The right color combinations will not only help you highlight your product features, but the right color background can really make your products come to life. According to research conducted at the Seoul International Color Expo 92.6% of respondents believe visual factors are the most important when purchasing products.

Furthermore, 22% of returns occur because the product looks different in person than it did in the photos. The colors you choose for your shoot aren’t just to make your product look good — they show shoppers exactly what they can expect from their order.

Understanding the role color plays allows you to make the right decisions for your shoot, but how can you choose the right background for your product photos? That depends on a variety of factors.

What color is your product?

When deciding on your background color, one of the most important things to consider the color or colors of your product. Some colors play well with others, and some, not so much.

[tweetquote text=”“When shooting, make sure the product or object you want to feature shines.” – Mark David, professional photographer”]

Before your shoot, confirm with your team which products you’re capturing — make a shot list to help — and spend an hour or so auditing the colors of each. If you have a wide range of product colors, you can decide on multiple backgrounds to experiment with throughout the shoot.

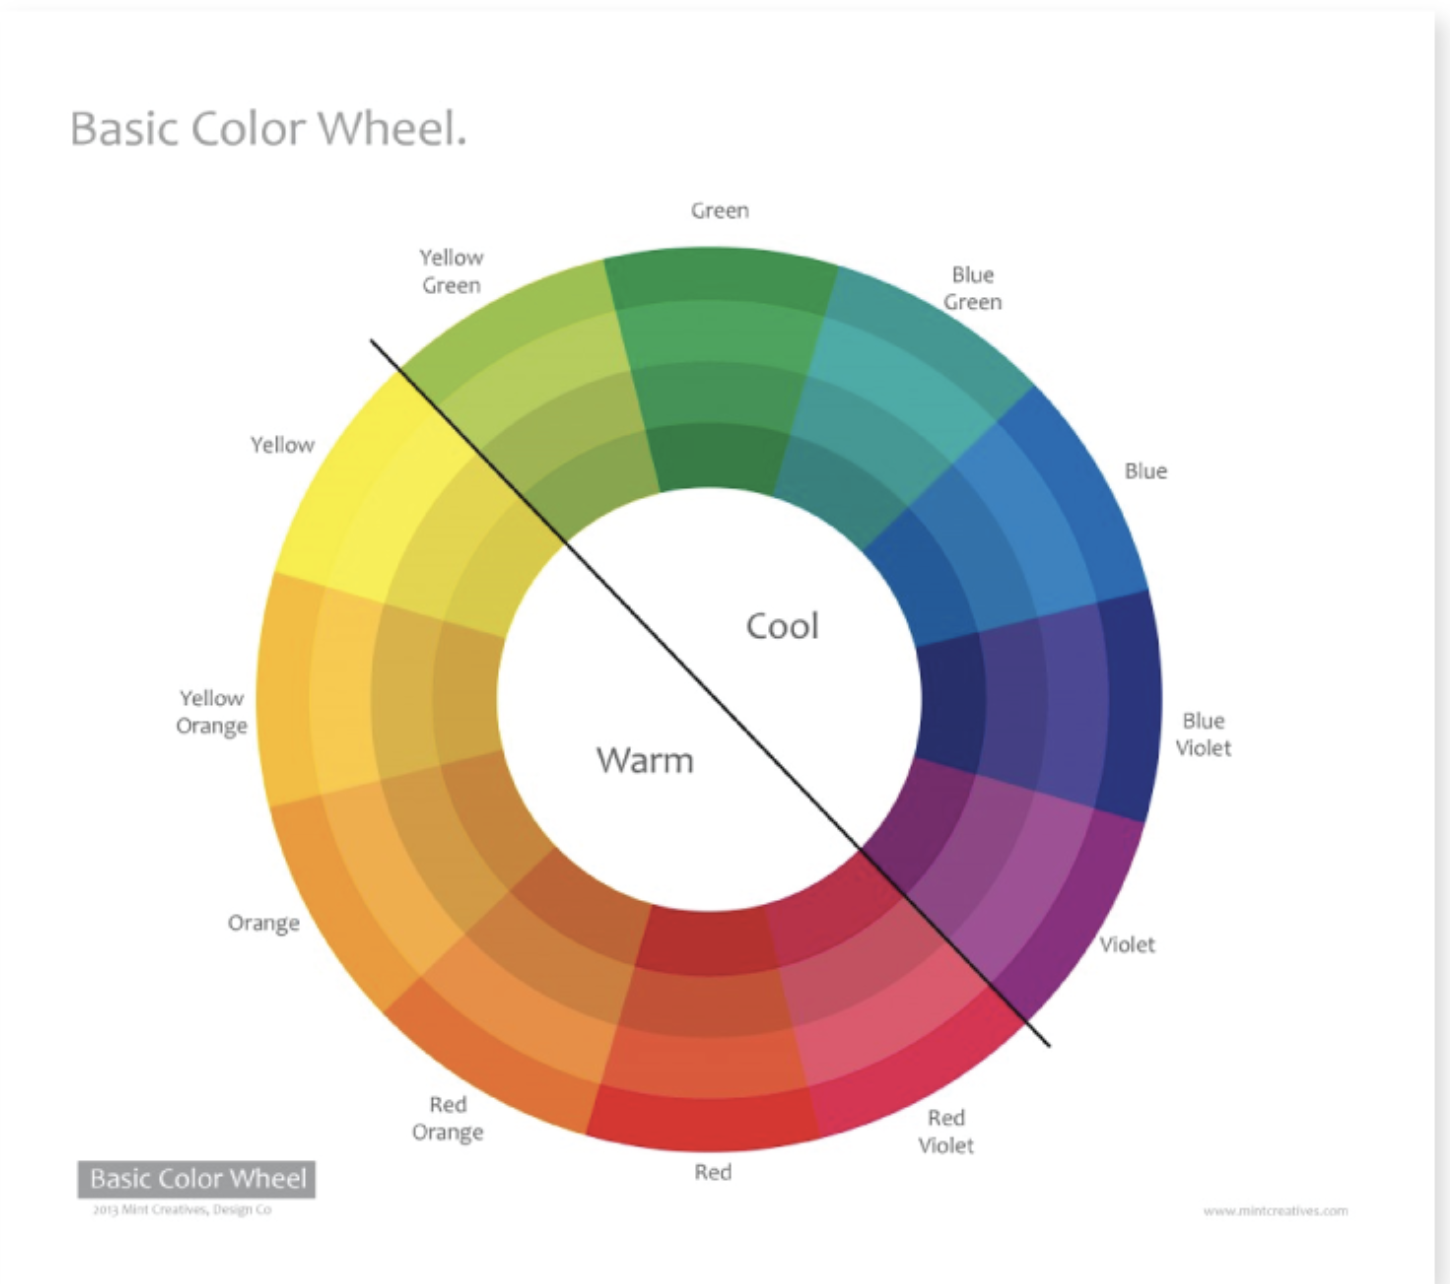
Basic color wheel

Image source

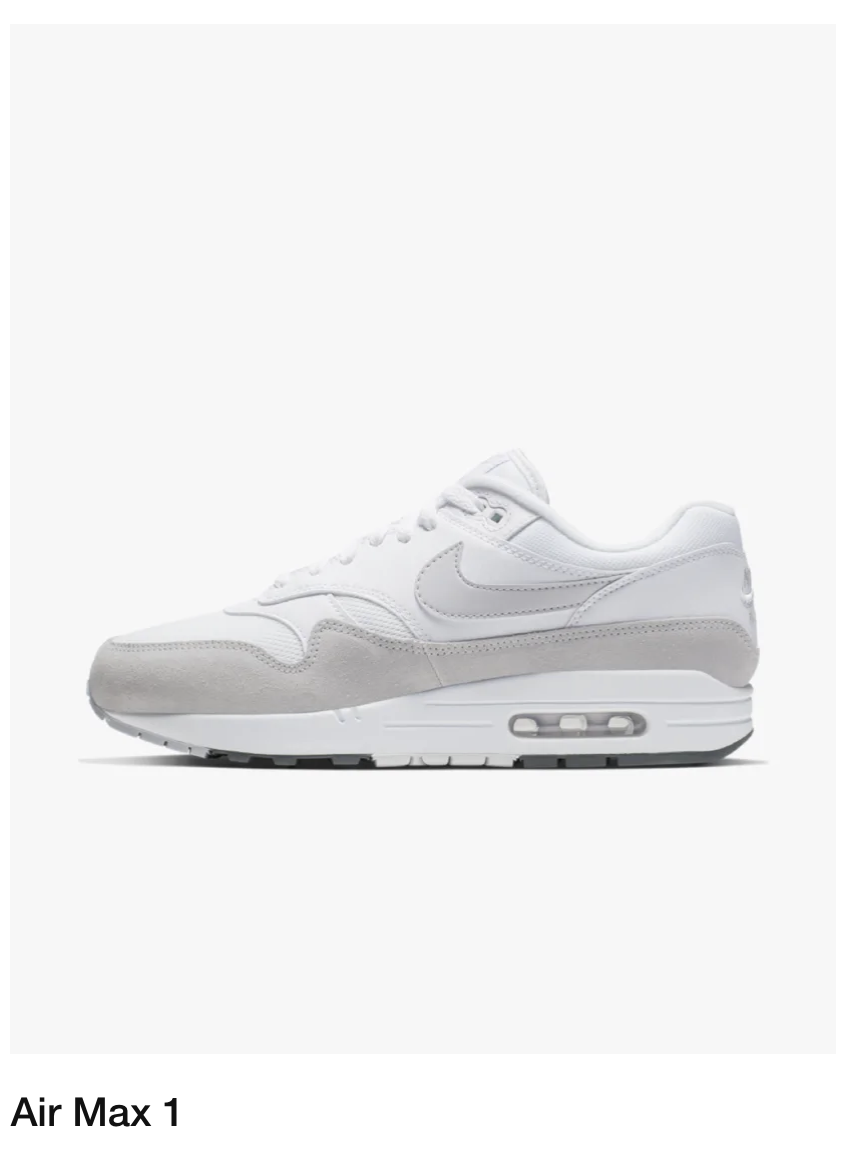
A white background is a ‘safe’ choice but can come with some disadvantages, which we’ll discuss below. A light or neutral color also works great for most products.

“If the product you’re shooting has a lot of warm tones, a cool color for the background could help the item really stand out. Using a light background with a dark color product (or vice versa) would give your image a lot of contrast, which is especially useful when shooting product imagery for a website,” says design manager of Nations Photo Lab, Niki Maro. “Alternately; matching a product and background with similar tones would make a much calmer, more nuanced image that could look more sophisticated but have less pop.”

Whatever background color you choose, you want to be able to clearly see your product. If the background overshadows the product or makes it difficult to see, that’s a clear sign you’ll want to try something different.

“When shooting, make sure the product or object you want to feature shines,” says professional photographer Mark David. ”The backdrop should never distract the viewer’s eye from the main subject. You don’t want loud, patterned backdrops.”

Image source

Image source

Image source

Finding the right balance comes down to experimentation. Keep in mind that you can always change the background color in post-production using a color change service if the shoot doesn’t go exactly according to plan.

Additional considerations when choosing colors for your product background

While product color has perhaps the largest impact on which color background you should use during your shoot, there are some other considerations to take into account as well.

Models vs. no models

More than half of the top fashion websites use people in their product photos — and most use a mix of plain background and lifestyle product photography. Models can undoubtedly help further enhance your product photos by showing what they look like in real life. If you plan to use models during your shoot, it’s crucial to consider model hairstyles, clothing, and even skin tone.

Remember, models play an important role in highlighting your products. But in most cases, they shouldn’t be the main focus.

Spend time with your team and photographer and think through how your model’s hairstyle, clothing, and skin tone work with your background color to make your products shine. When possible, establish who your models are in advance, as well as which background colors you’re hoping to use.

Additionally, before your shoot, it’s helpful to create multiple looks and themes beforehand, so you know what to expect. Working with a stylist can also help ensure your models and products complement one another as well. If you do want your models to be the focus of your shoot, consider using less “flashy” colors to keep the focus on them. “Make sure your model wears non-distracting clothes — solid color is best — and photograph somewhere with a background that isn’t too busy,” says professional photographer Nick Agro.

Sometimes, shoots with models require more than just a solid color background. Lifestyle photography can also have contextual backgrounds, in which case it’s still important to consider which colors will appear.

Image source

Lighting

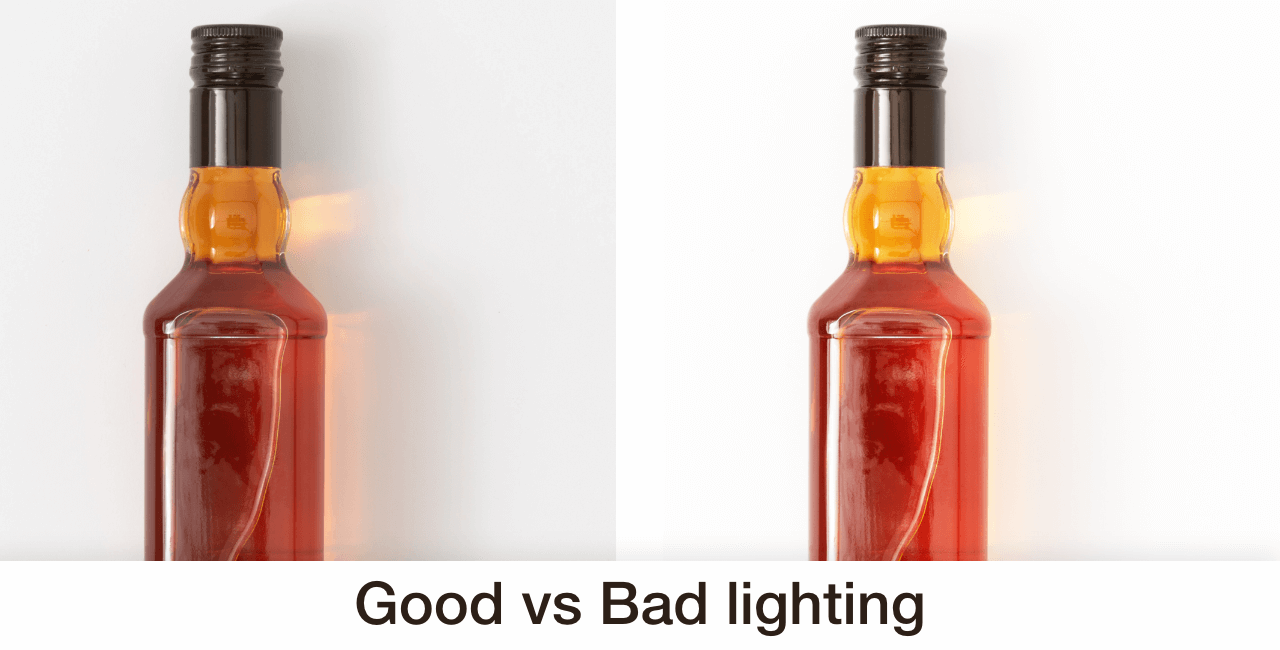
In addition to considering your products colors and models (if you plan on having any), don’t overlook the importance of lighting to enhance your photos. Effective use of lighting can often be the difference between a ‘meh” product shoot and one that has your team beaming with pride.

Good vs bad lighting

Image source

Will your shoot location have natural light? Or will you rely heavily on flash or indoor lighting? If shooting outside, don’t forget to plan around the weather as that can significantly impact your overall lighting. Having a backup location is always a great way to plan for the unexpected.

According to HubSpot, product shots do well in natural light if:

“Think about the overall feeling or mood you want to portray and use a light source to match. You can use harsh direct light for an edgier feel, or go with soft light from a window for a more subdued tone,” says professional photographer Nick Agro.

At the end of the day, he says simple is better. “Props can add a lot to your shoot, but if overdone, you’ll overshadow your product,” he says.

Pro tip: Take more shots than you think you need

Photoshoots require a lot of time and resources to pull off, which is why it’s a good idea to take more shots than you think you need. Experiment with different lighting and try different angles. The more photos you have, the more options you have during post-production.

It’s better to spend a little more time on the shoot and have more photos than you need than wishing you had when you start post-production. Besides, you can always cull them later.

What is the best color for your product background?

While there are many ‘best practices’ out there to help choose the right colors, not all products (and backgrounds) are created equal. Rely on your photographer’s direction and go into the shoot with a few different options to avoid wasting a day of shooting.

When you want to add some color to the background, consider how those colors may affect online shoppers. Are they complementary to the colors of your product and brand? Will they persuade shoppers to buy? Do they resonate with your brand? You might also need to add color to the background of white or transparent products.

In North American culture, for example, “the color blue creates a feeling of trust but also encourages appetite. Green supposedly means nature, freshness, growth, and money. Yellow brings with it sunshine and happiness.”

While color is important, the truth is, there is no “best color.” The colors you choose depend on what you’re trying to convey with your product photos. This requires some strategic planning before your shoot.

As the CXL Institute notes in their research on button color for conversion rates, “The color of the button has little-to-no effect on its own. What’s more important is how it changes the visual hierarchy of the page and how it makes the call-to-action stand out.”

Ultimately, “Whether it’s portrait or product photography — or anything in between — always consider the subject of the photo and what feeling it will evoke for the viewer, both alone and in context of the frame […] “It has to work with the subject,” says Mark David.

Should you use a white background?

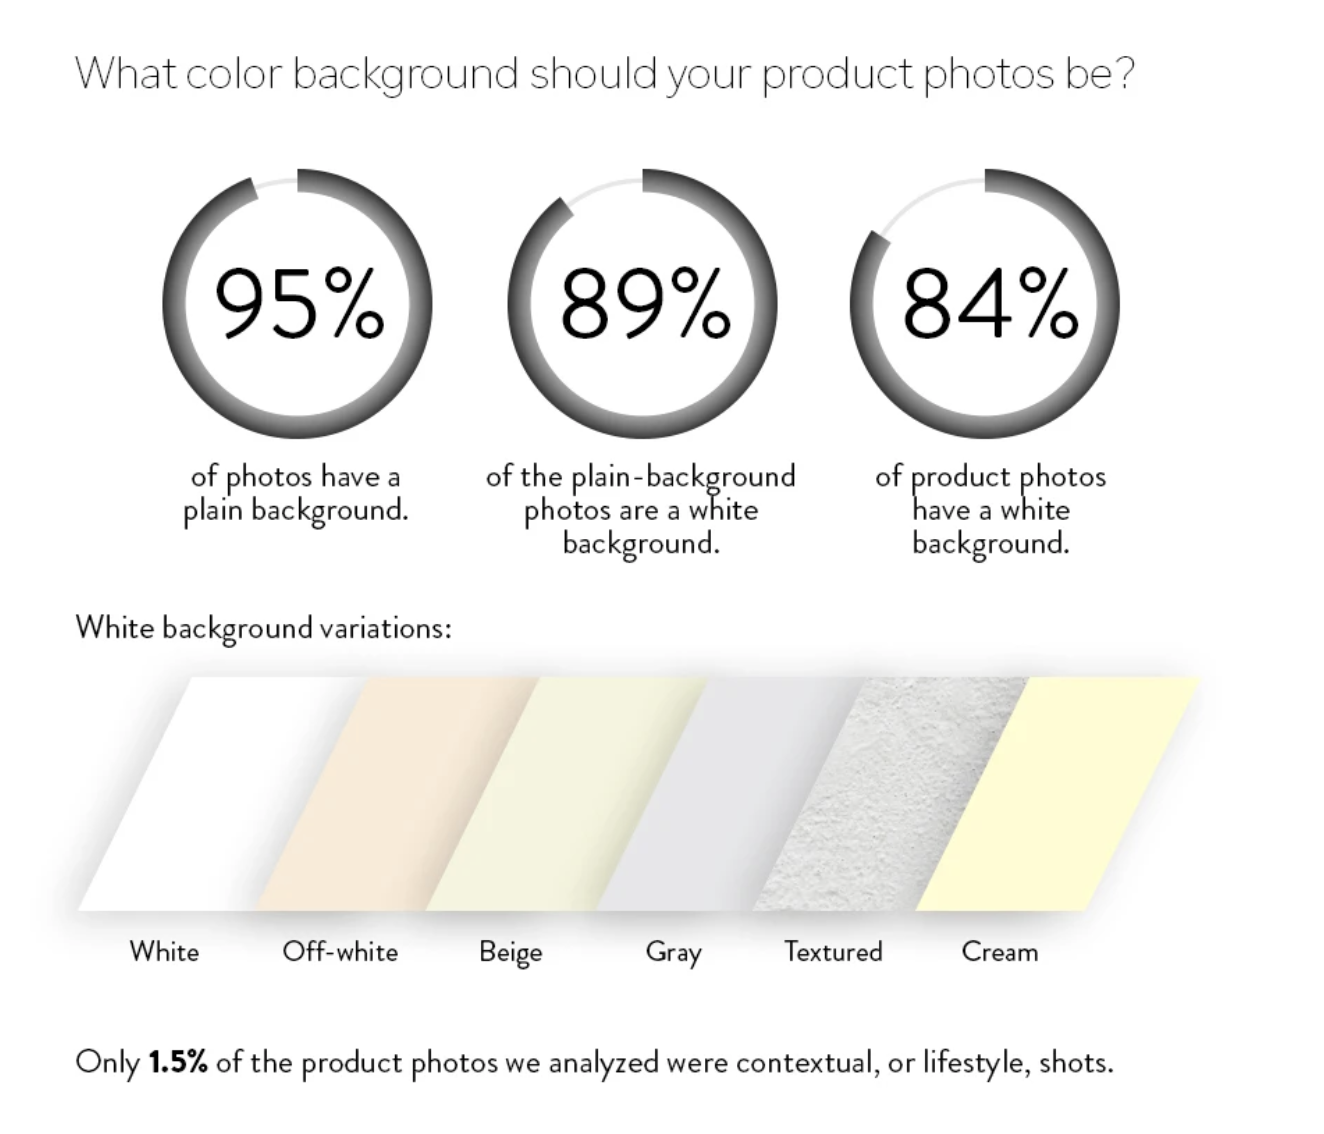
White is the most common background color by default, and for good reason. It works well with most color combinations and doesn’t require heavy edits. Put simply, it’s a safe bet.

Additionally, many ecommerce marketplaces, like Amazon, require at least one product photo to have a white background. So when shooting, it makes sense to incorporate several background colors.

“If you want the product to be the star of the photo or need the image for a design with a lot of imagery or text (such as a website or an email) using white/light neutral background colors helps keep the end result looking cleaner. If the display size of an image is relatively small, this is a much safer bet. Also, a lot of colors in an image creates larger file sizes. If you are worried about the load time on your website, white backgrounds may help decrease the overall amount of data size,” says Maro.

What color background should your product photos be?

Image source

While a white background color is a common choice, the problem, however, is it’s easy to get ‘lost.’ Some creative professionals and even consumers believe white backgrounds to be a little ‘boring.”

Even a slight variation from white can help you stand out. Additionally, if your product is white, it can require a bit of editing and lighting to get right when using a white background.

There’s certainly nothing wrong with using a few different colored backgrounds to see which one looks best, but a white background does have it’s advantages.

“If I was photographing a technology product, the first thing that comes to mind is a pure white background or a plain background,” says Mark David.

Complement your brand colors

To get the most from your product photos, don’t forget that they need to go well with your brand colors. The last thing you want is to have a handful of quality photos that don’t match your website and brand color theme.

This is why planning your shoot beforehand is so important.

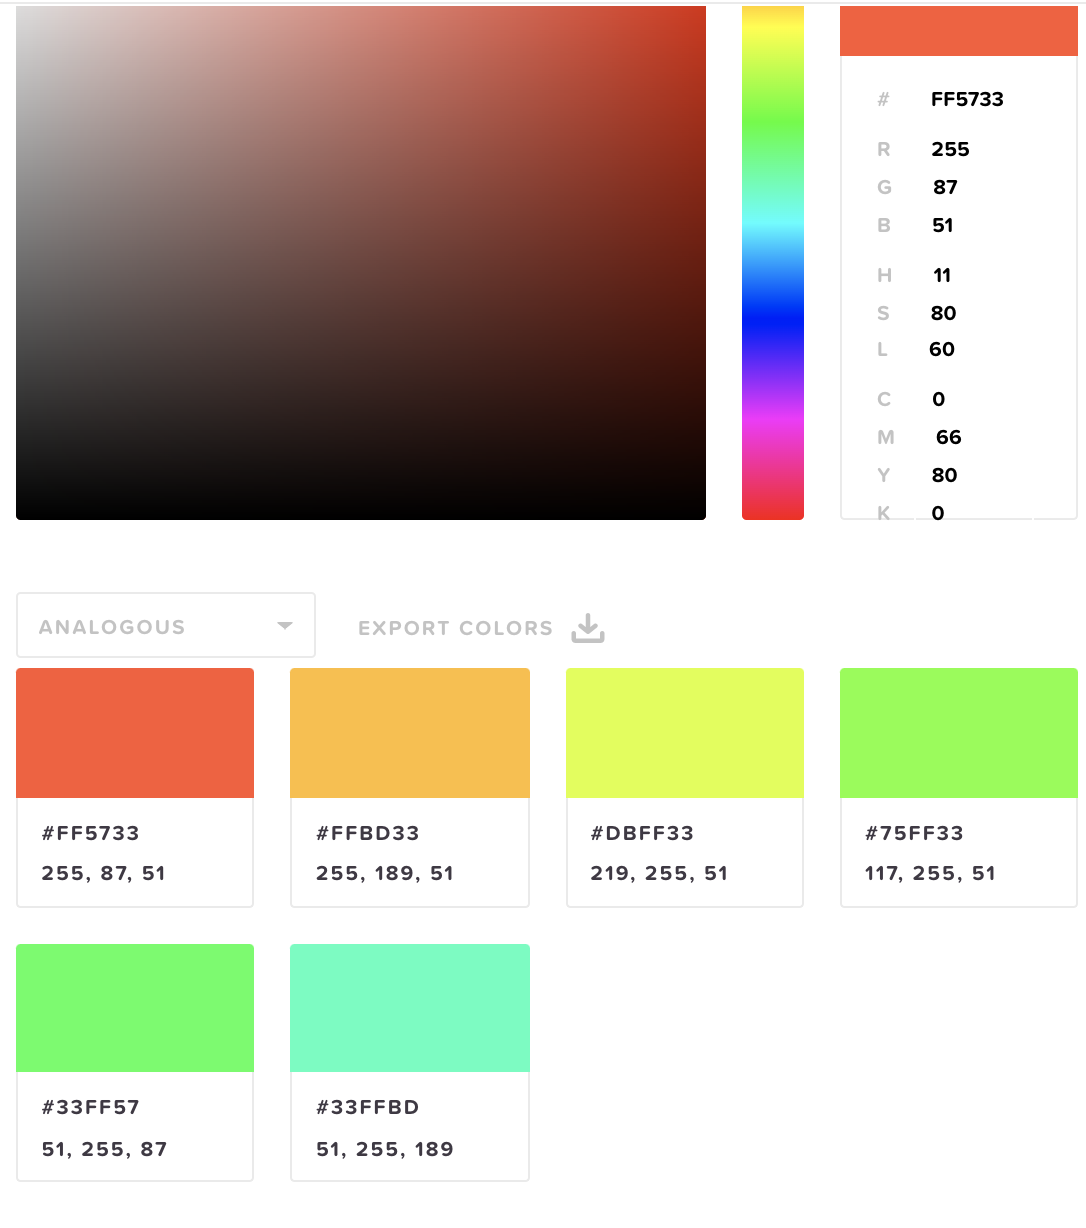
HTML color codes

Using a tool like HTML Color Codes gives you an idea of which colors work best together.

Image source

Image source

Consider where your product photos will be shown

Not only do your product photos need to look great on your own website, but you also need to consider the context of your photos for other placements such as an in-store display and on social media.

Social media: a neutral background is often a safe bet, but feel free to experiment with more ‘creative designs’ during post-production. Throughout the shoot, keep in mind the optimal image sizes for sharing on social media channels. You can also crop, add filters, and get extra creative when posting product photos on Instagram (or even Snapchat) using the editing tools available for each platform.

Remember, your product shoot can be a great time to create quality digital assets for marketing and helpful for repurposing your image assets in the future.

In-store signage and displays: If you plan on using your product photos for in-store displays and signage, make sure you’re considering that during your shoot. In-store displays typically need to highlight your product’s main benefits and pricing in an easy to read manner and often rely heavily on text.

in-store signage and displays

Image source

Catalogs: Despite two decades of email and social media marketing stealing the show, catalog mailings have been steadily increasing since 2015. If you plan on using your photos in a catalog, spend part of your shoot with that in mind. With catalogs specifically, lighting and consistency of colors is especially important.

Catalogs

Image source

Ultimately, regardless of where your photos will be shown, context matters: 37% of online shoppers want to see your products contextually. When shoppers can see the product in use, they can envision using it in their own lives.

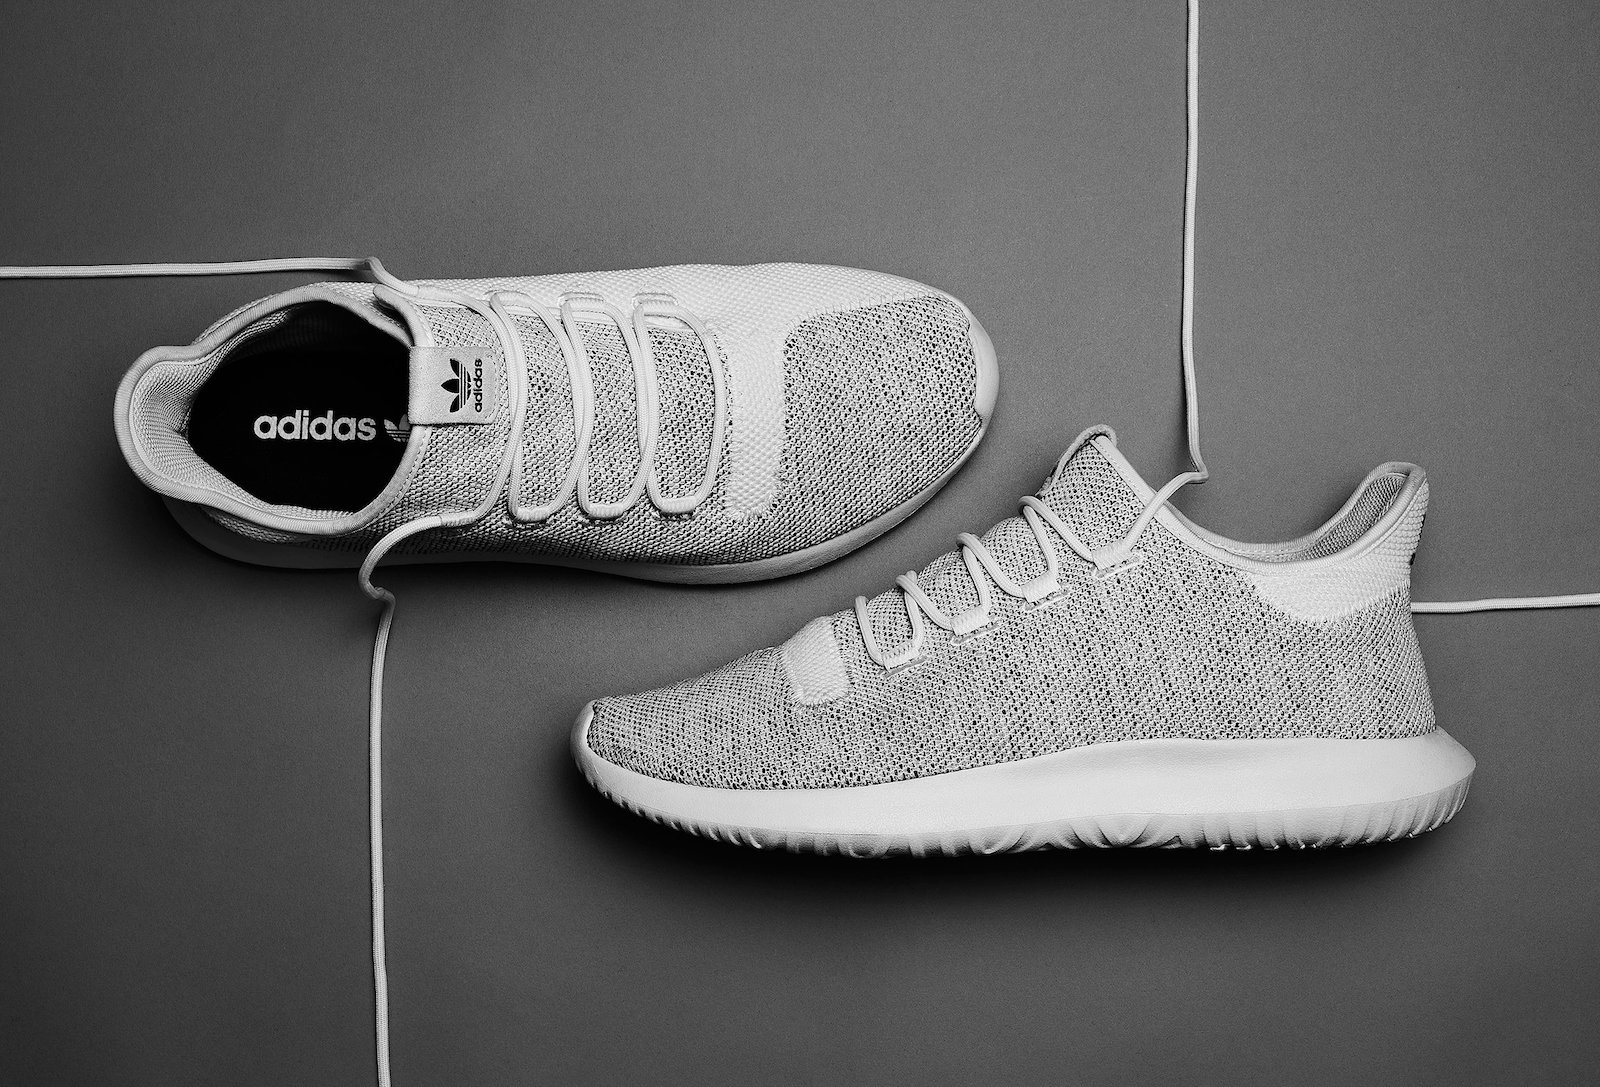
Start with neutral colors

As we’ve previously shared, “the safest play and closest to a standard white background, neutrals like off-white, gray or beige can highlight your products online. The neutrals won’t distract from your product, but it also allows you to apply a different visual aesthetic.”

start with neutral colors

Image source

You can experiment with other background colors and textures as you get a better feel for how your products look when using a strong foundation such as white or neutral colors. Don’t feel as if you have to be perfect from the start; you’ll slowly get a better idea of what works each time you have a photoshoot.

If you’re looking for more options to consider, we wrote an in-depth article on nine alternatives to white backgrounds. You can read the article here.

Align with your ecommerce platform guidelines

Having photos look great is important for making your products stand out, but keep in mind that different ecommerce platforms have different guidelines.

If you’re selling products on eBay, for example, they currently require product photos to have a white or gray background. While not directly related to the color of your photos, you also want to make sure your images are high quality at the required image sizes for each specific platform.

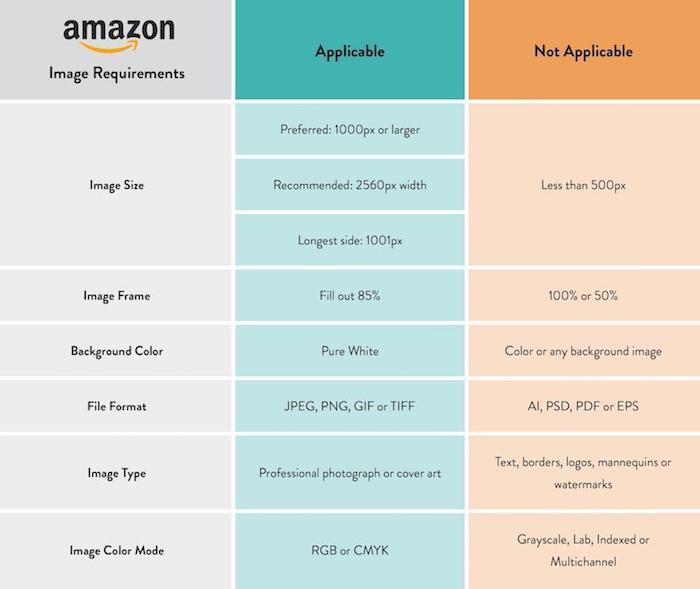
Before your shoot, get familiar with the requirements of the main platforms you intend to use to showcase your products. Here are the latest requirements for Amazon, for example.

Amazon image requirements

Post-production essentials

We’ve covered a lot of ground so far. By making just a few adjustments to what color background you use, you can dramatically improve your shoot’s quality and success. That said, even with the perfect product photos, post-production is crucial for taking your photos the last mile.

Just as a well-written book goes through hours and hours of editing, quality product photos require editing as well.

In post-production, you’ll want to edit and tweak the lighting, size of your photos, and make any additional edits such as cropping. While post-production can often help you ‘save’ a poorly executed photoshoot, you want to make post-production as easy as possible with proper planning and a clear strategy for your shoot.

Bad lighting the day of the shoot? No problem, you can use a photo editing tool to help improve the lighting.

Capture a few unwanted items in the background while shooting? You can remove those as well in post-production.

Adding color backgrounds after the shoot

One of the most powerful aspects of post-production is the ability to change the background color you used during your shoot. Sometimes you just won’t have the perfect colored material when shooting—that’s okay! If you can’t find the colors you need, you can always add the color afterward. We have an excellent tutorial on how to add color to your product images in case your shoot didn’t go as planned.

While there are some great tools (both free and paid) online, don’t make the mistake of taking post-production lightly. Just as post-production can make your photos jump off the page, poor post-production can make a great shoot average.

Though it sometimes feels like the actual shoot is the most challenging part, there’s a lot of “little things” that go into getting it right. If you’re unhappy with how your product photos turned out, or need help making your backgrounds look better, our team of designers can help.

[cta text=”Learn how to outsource nitty-gritty background color changes to your virtual photo-editing studio” button=”Learn more” link=”https://clippingpathindia.com/pages/background-removal”]

What is a Photoshop Fail? How to Avoid Digital Embarrassment

Mistakes happen. Some might even say it’s human to err (rather, Alexander Pope said that one, but whatevs, it still applies in the 21st century).

[form name=”get-tips” text=”Receive free ecommerce & product photography tips” align=”right”]

But when it comes to Photoshop fails, is it human or machine to err?

Photoshop fails happen with new editors learning the ropes as well as with seasoned photo editors. No one is immune or safe. If we break it down, it can happen if you’re on a tight deadline, have way too many photos to go through, you’re not paying attention to detail, direction isn’t clear, or if you’re using automation and AI to do it for you.

In this article:

  • What is a Photoshop fail?
  • How Photoshop fails happen
  • Why Photoshop fails are bad for business
  • How to avoid Photoshop fails
  • The caveat … with a big-fat* disclaimer
  • Just (don’t) do it

What is a Photoshop fail?

A Photoshop fail is when there’s a glaring mistake on a photo or image that has been edited with Adobe Photoshop or any other photo editing software. But sometimes the mistakes are in the details. It can be retouching gone wrong, wanting to slim down a model and not taking into account proper body proportions, or even touching up photos but forgetting about the shadows. The list of fails is endless.

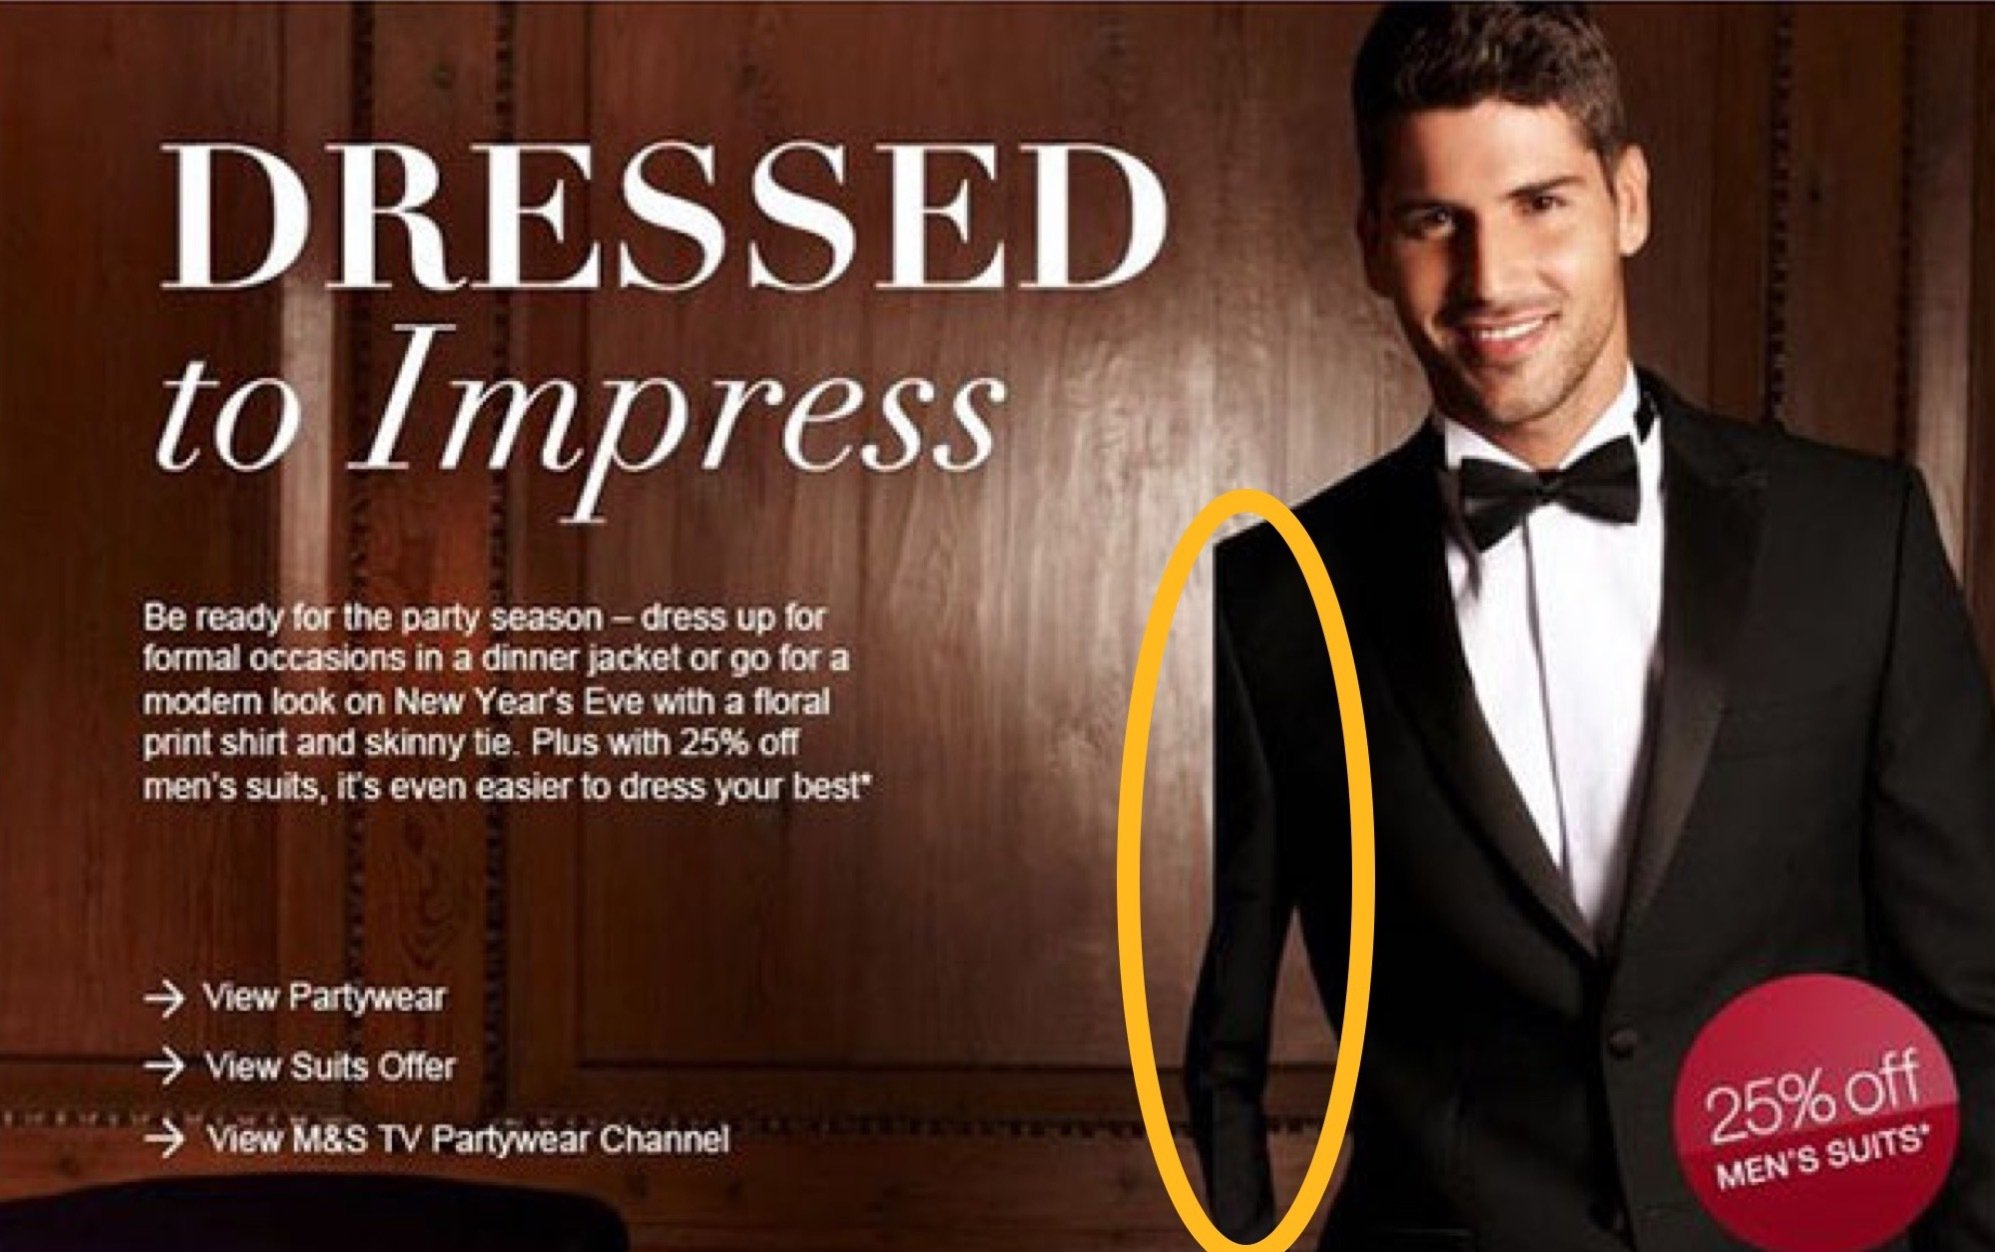
Either someone only ever has “left arm day” at the gym or someone’s arm was slimmed down a bit too much.

Either someone only ever has “left arm day” at the gym or someone’s arm was slimmed down a bit too much.


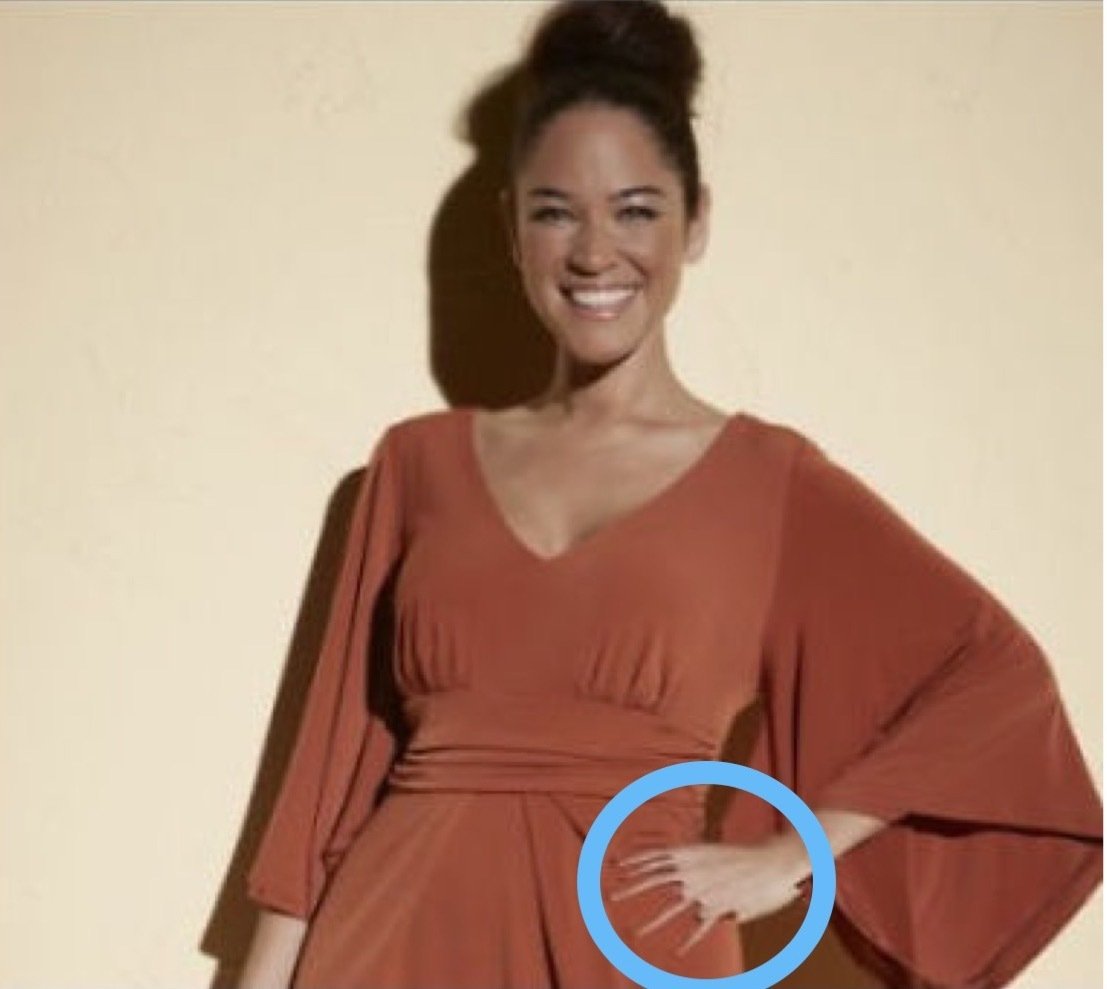
Does something seem weird with her fingers, or is it just me?

Does something seem weird with her fingers, or is it just me?

Is that your third hand?

Is that your third hand?

The devil is in the details and the detail here is forgetting to also remove the shadows.

The devil is in the details and the detail here is forgetting to also remove the shadows.

Photoshop fails really became popular with overzealous fashion brands like Victoria’s Secret wanting to make their “angelsappear even more slender and perfect. These haven’t always worked in their favor, as savvy consumers can quickly spot the touch-up faux pas.

These mistakes aren’t exclusive to human models. They can also happen in product photography. If you outsource your editing to low-quality service providers, they may either rush through the job or use automation and artificial intelligence (AI) to edit your images.

How Photoshop fails happen

Photoshop fails almost always happen by mistake, especially when it comes to professional product photos. The most common reasons are because of inattention to detail, bad direction, no post-edits reviews, and using AI instead of humans.

The lesson here is to simply not use AI. The apps are great for quick edits on your personal social media feed, but when it comes to product photography or images you’re using to promote your brand, nothing beats having a real human taking the time to ensure flawless work. After all, your photos are your customer’s first impression of your brand and products. You gotta make it count.

If you’re going to ghost a mannequin, don’t forget the hands. This one looks angry about it.

If you’re going to ghost a mannequin, don’t forget the hands. This one looks angry about it.

Is this what it means to have one foot out the door?

Is this what it means to have one foot out the door?

Psssst… here's how you know if you're bad at Photoshop:
✘  you don't use layers
✘  you delete or erase instead of masking
✘  you use filters like you're a teen on Snapchat
✘  you don't know what any of the above means

Why Photoshop fails are bad for business

Photoshop fails are bad for business because they misrepresent your products and your brand, which ultimately hurts your brand image, consumer trust, and your bottom line. Yikes.

No matter how small the mistake, someone will notice. Unfortunately, thanks to social media and smartphones, mistakes are given way too much air time and the bigger the mistake the more viral it might go. You may even become a meme. And once you’ve made a mistake, your brand will never live it down and everything you post will be scrutinized forevermore.

The real detriment is that everyone will be so focused on the error that your product won’t get the attention it deserves. It will sometimes also lead to customers thinking your product is fake or poor quality (or both). The bottom line, it leaves a negative impression of your brand and that’s hard to come back from.

This caption would read very different if the cut/paste on this photo wasn’t so obvious

This caption would read very different if the cut/paste on this photo wasn’t so obvious

The easiest way to replace your models is to cut/paste new faces directly onto them

The easiest way to replace your models is to cut/paste new faces directly onto them

How to avoid Photoshop fails

Luckily, it’s easy to avoid Photoshop fails if you put proper processes and quality control in place.

Ensure humans are completing the bulk of the work and reviewing all the work so no errors slip through. Our designers do every edit by hand because we know how important every detail is, no matter how small the edit is.

The other way to avoid mistakes is to review direction or scope of work so that all the edits being requested are clear. And reviewing post-edit images can make all the difference in the world, even if that sometimes means having a second or third person look at them. Because when you spend a long time working on a project, you can’t always catch every single detail. It happens to all of us, so don’t be afraid to ask.

Working with editors you trust is also paramount to having consistently great product photography. Once you’ve found an editor that understands your work and that produces great edits, this relationship will go a long way in having beautiful photos that truly represent your brand.

These are applicable whether you’re doing the edits in-house or outsourcing to a third party. Not sure which is the better option for your business? Here’s a helpful article.

Something doesn’t add up here…

Something doesn’t add up here…

Perfect if you’re going for a natural smile.

Perfect if you’re going for a natural smile.

I think I saw this movie… it didn’t end well for her family.

I think I saw this movie… it didn’t end well for her family.

The caveat… with a big-fat * disclaimer

Sometimes – and we mean sometimes – Photoshop fails are done on purpose.

This is the point where you’re probably like

How Much Does Product Photography Cost in 2021?

Product photography isn’t cheap, but it’s a priceless investment for ecommerce businesses. Professional photographers that focus on product photography have niche knowledge and specialized equipment to highlight the best features of the items they’re photographing.

If you own an ecommerce brand, you’ll want to hire a pro with product photography expertise. To avoid sticker shock (or get stuck with bad images), we’ll break down the costs of product photography and why it’s worth it to invest in a knowledgeable photographer.

In this article:

  • How much does product photography cost in 2021?
  • How much brands pay for product photography in 2021
  • Factors impacting product photography costs
  • Product photography costs: a rundown
  • Where to save money vs. where to invest
  • Moving forward with your product photography

How much does product photography cost in 2021?

Product photography costs vary depending on several factors including the type of product, the number of products you need photographed (most photographers discount bulk orders), the style you’re looking for (e.g., white background or lifestyle), and your turnaround time.

To give you a better idea of product photography rates, here are a handful of pricing structures (from real companies):

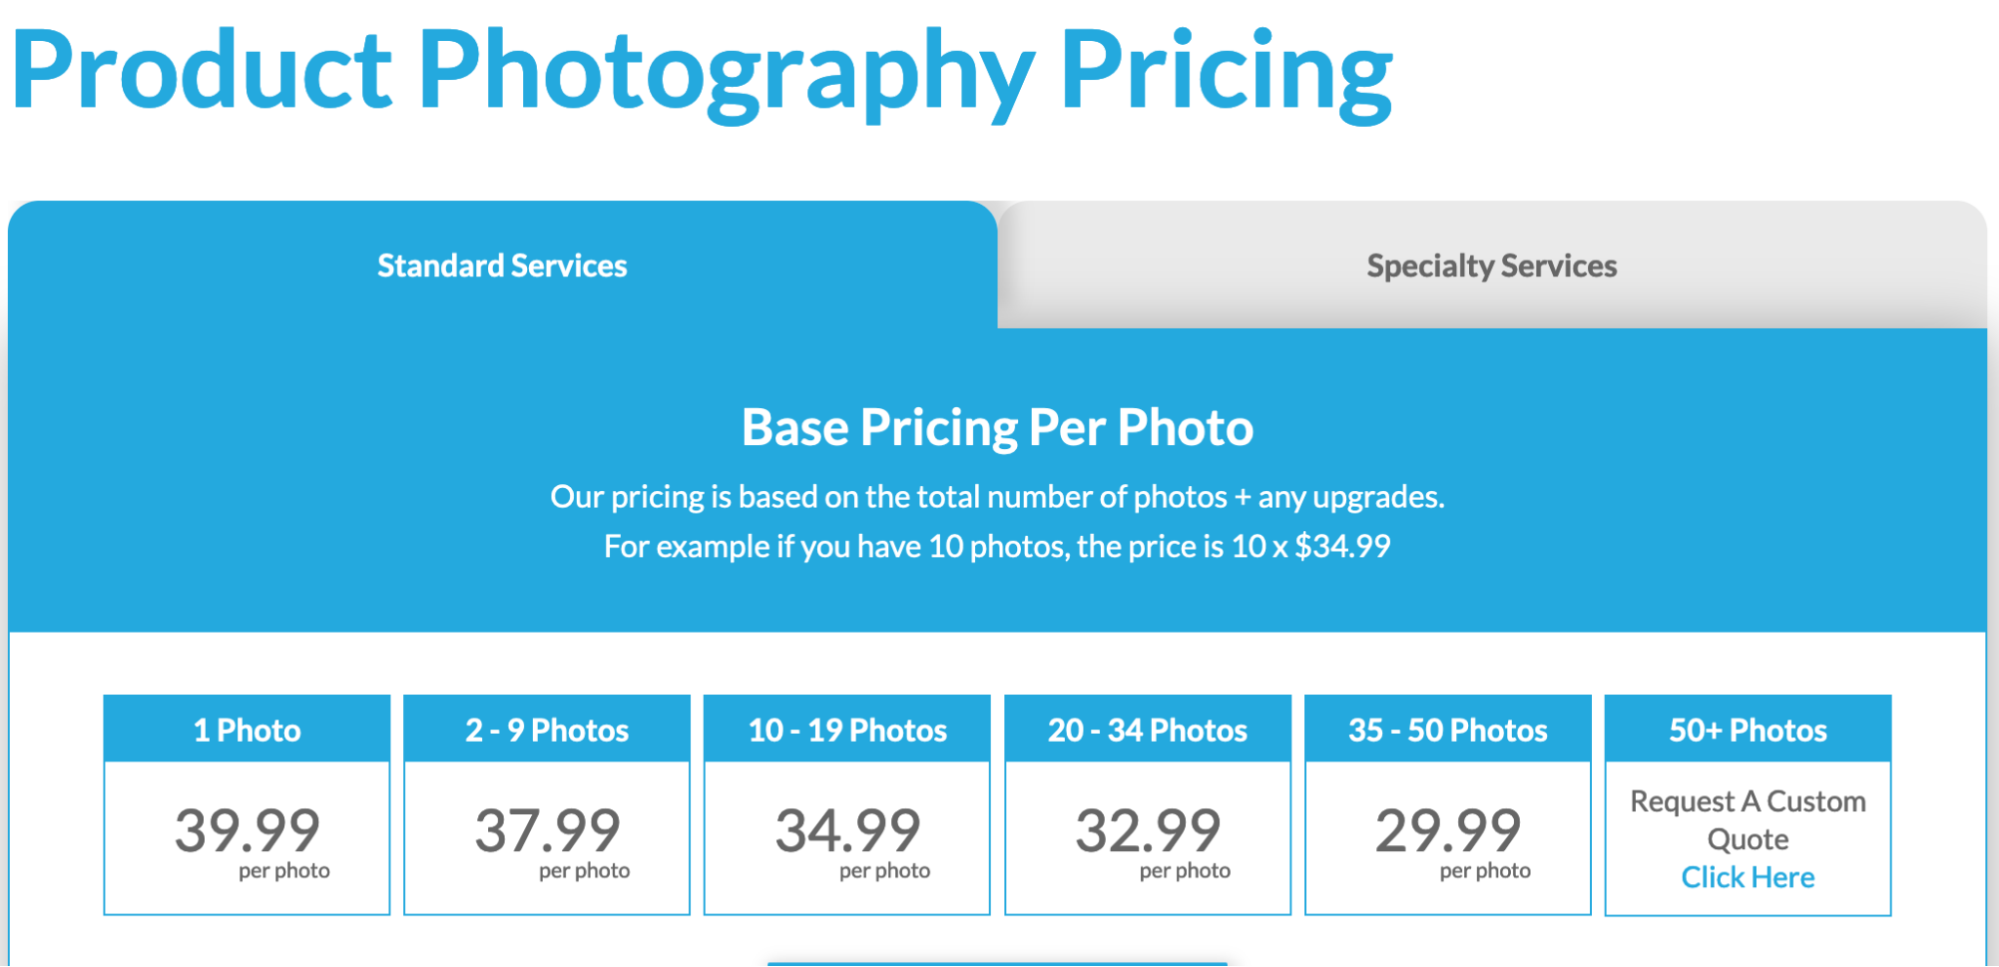
Products on White Photography charges anywhere between $29.99 and $39.99 per photo.

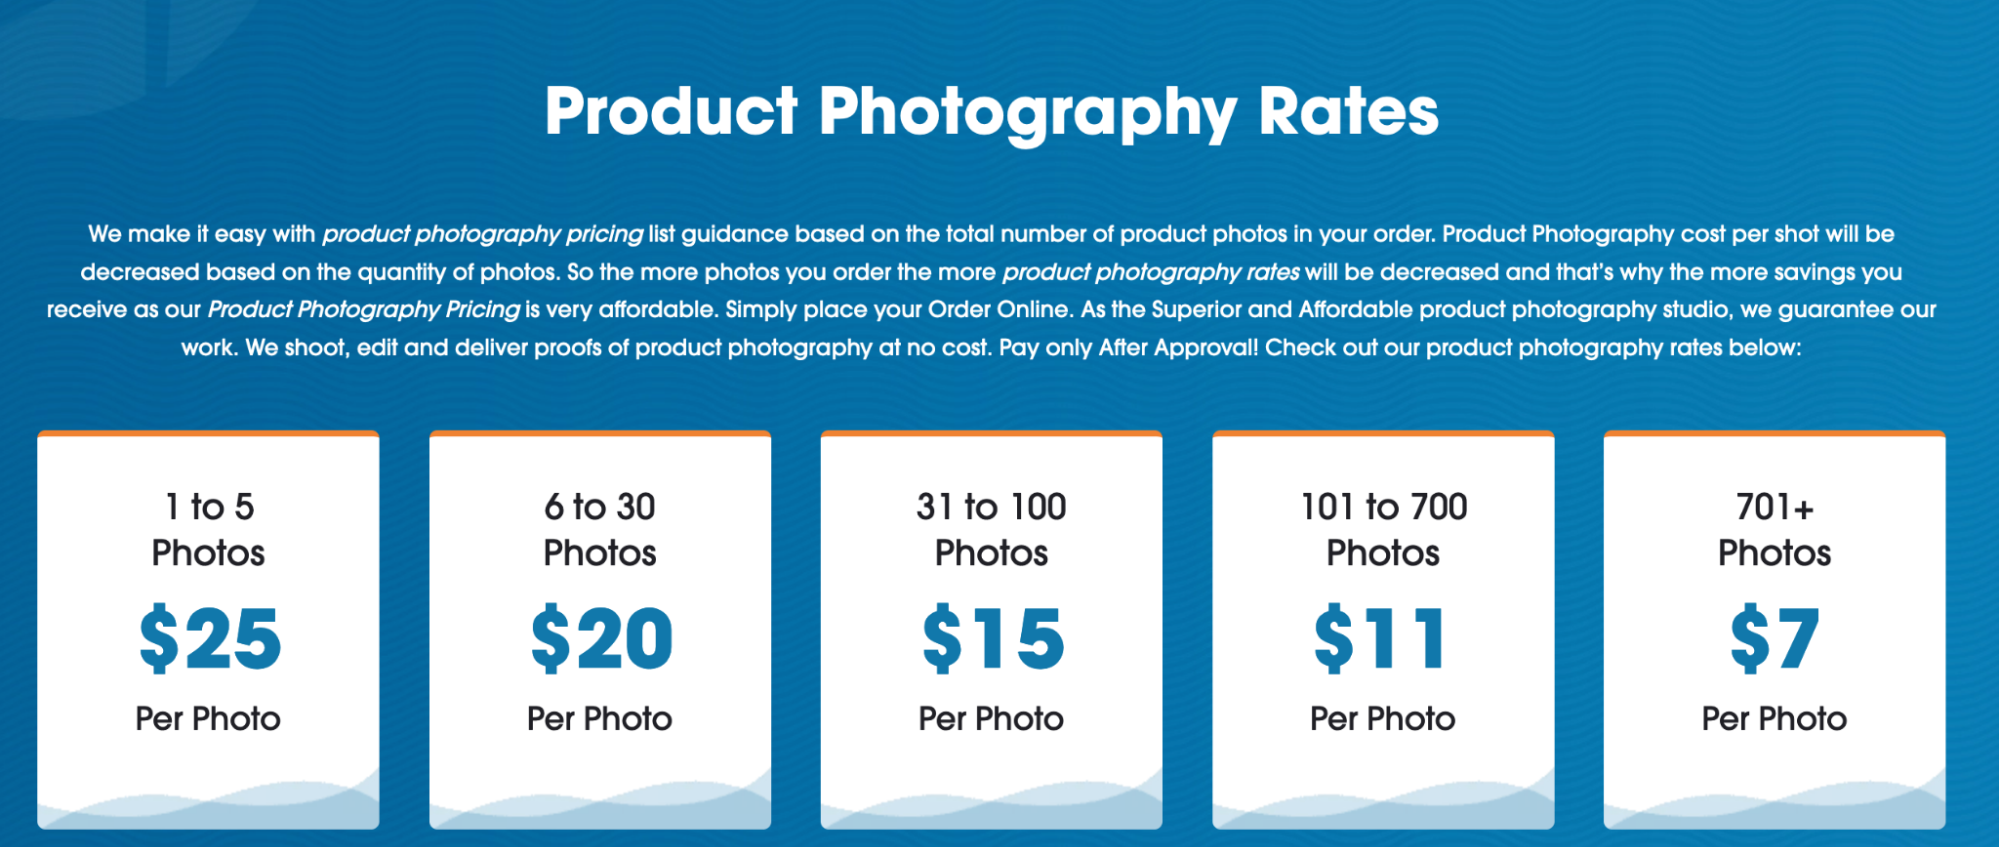
ProductPhoto.com is a bit more affordable, with product photography pricing available as low as $7 per image.

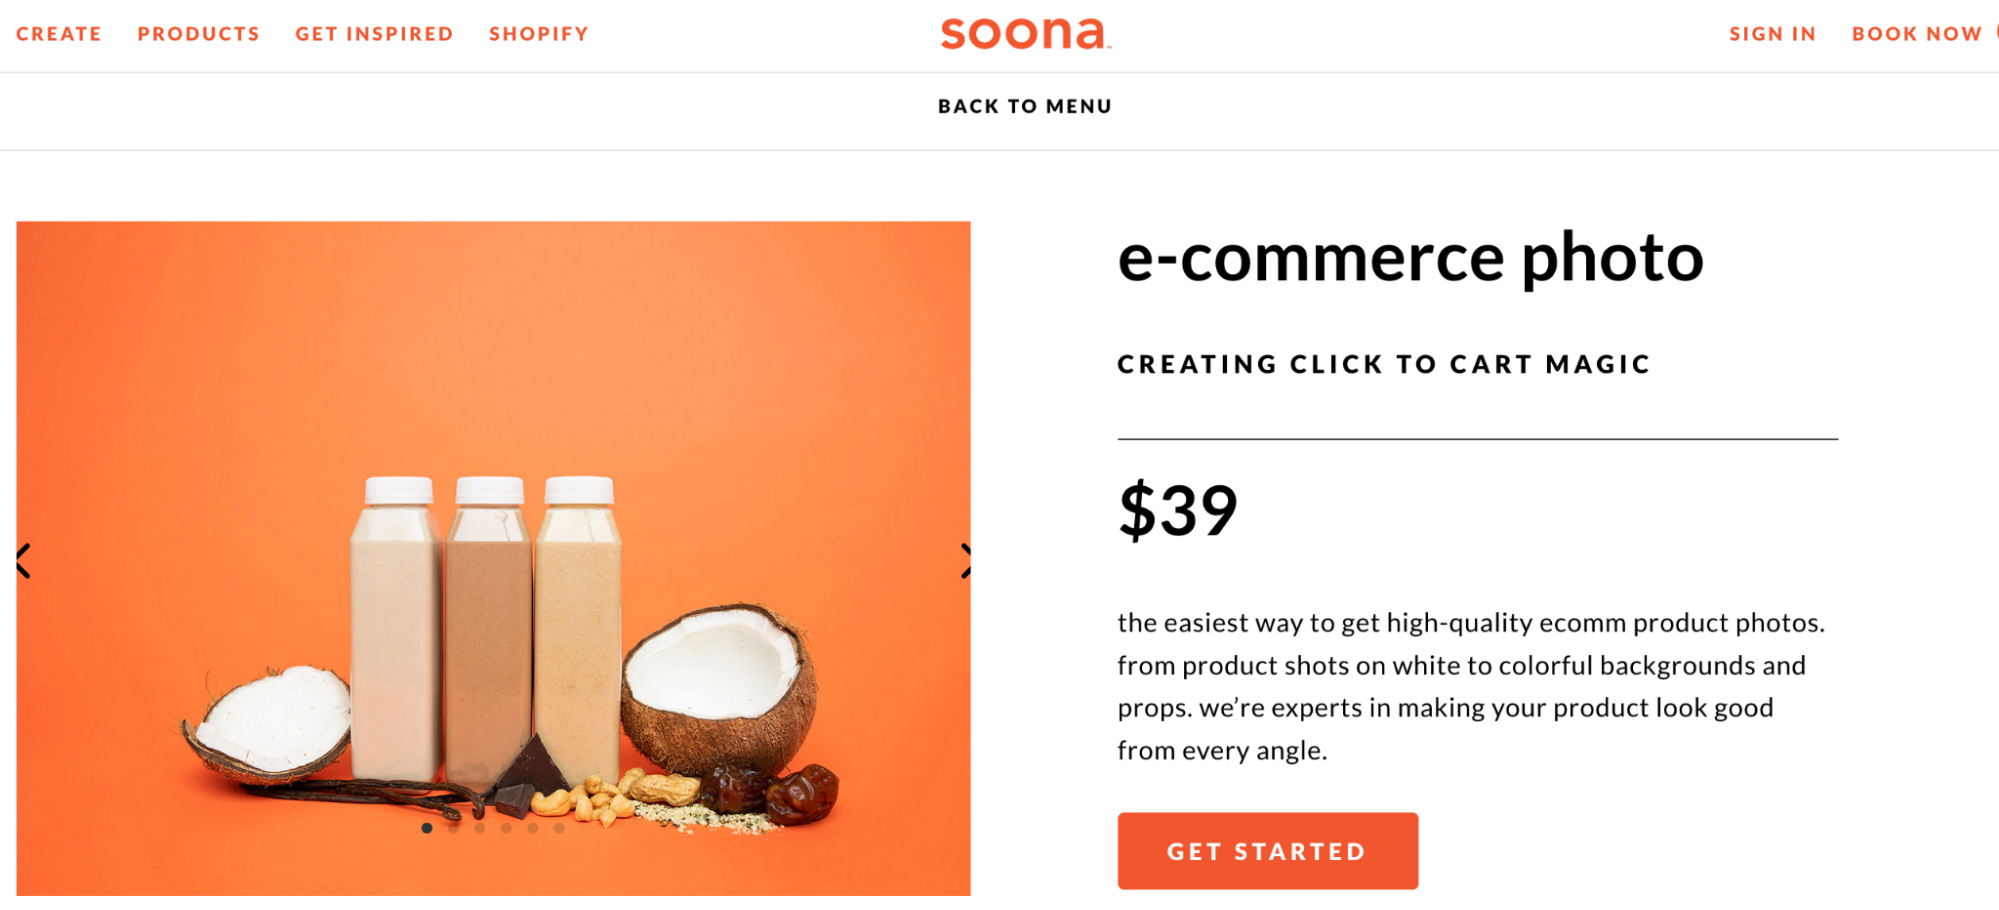
And Soona charges a starter pack of $39 for two images.

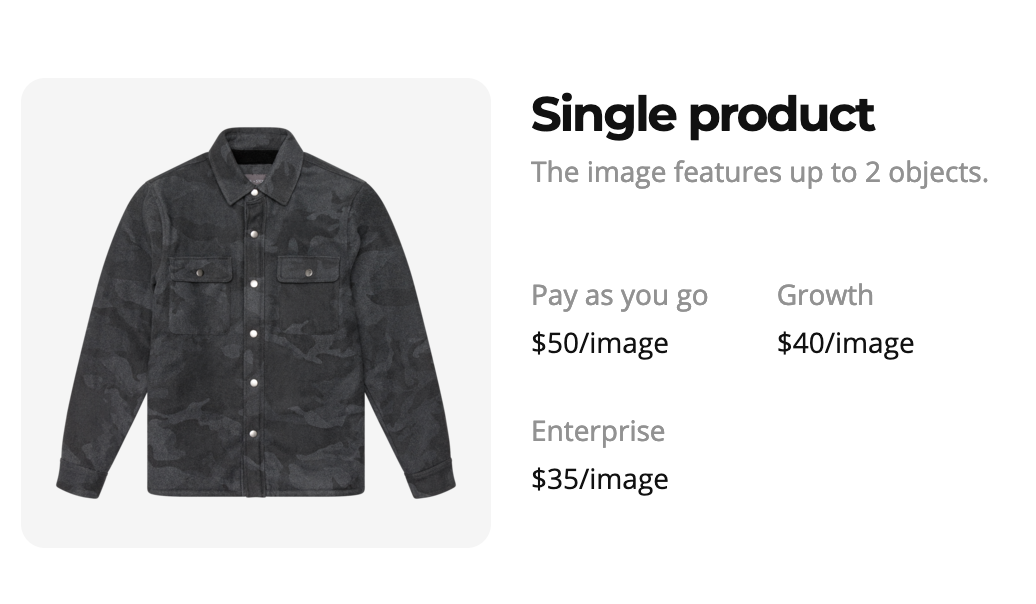
Finally, Squareshot has pay-as-you-go as well as membership plans which grant subscribers access to a certain number of monthly photos at a set price depending on their plan. The $39/month subscription gets you $40 per image pricing and two rounds of revisions, while the higher tiered plan costs $159/month plus $35/image.

You’re going to find a wide range of prices, partly due to differences in what’s included in the base cost.

You’ll find that many individual photographers don’t post their rates on their websites. Many times, you’ll need to reach out with information about the project. You might find some pricing, though. Denver-based photographer Leigh Germy, for example, charges $100/hour for product design—while her portraiture photography goes for $300/hour.

How much brands pay for product photography in 2021

To find out what real-world ecommerce brands pay on average per photo, we surveyed some business owners to get their insights.


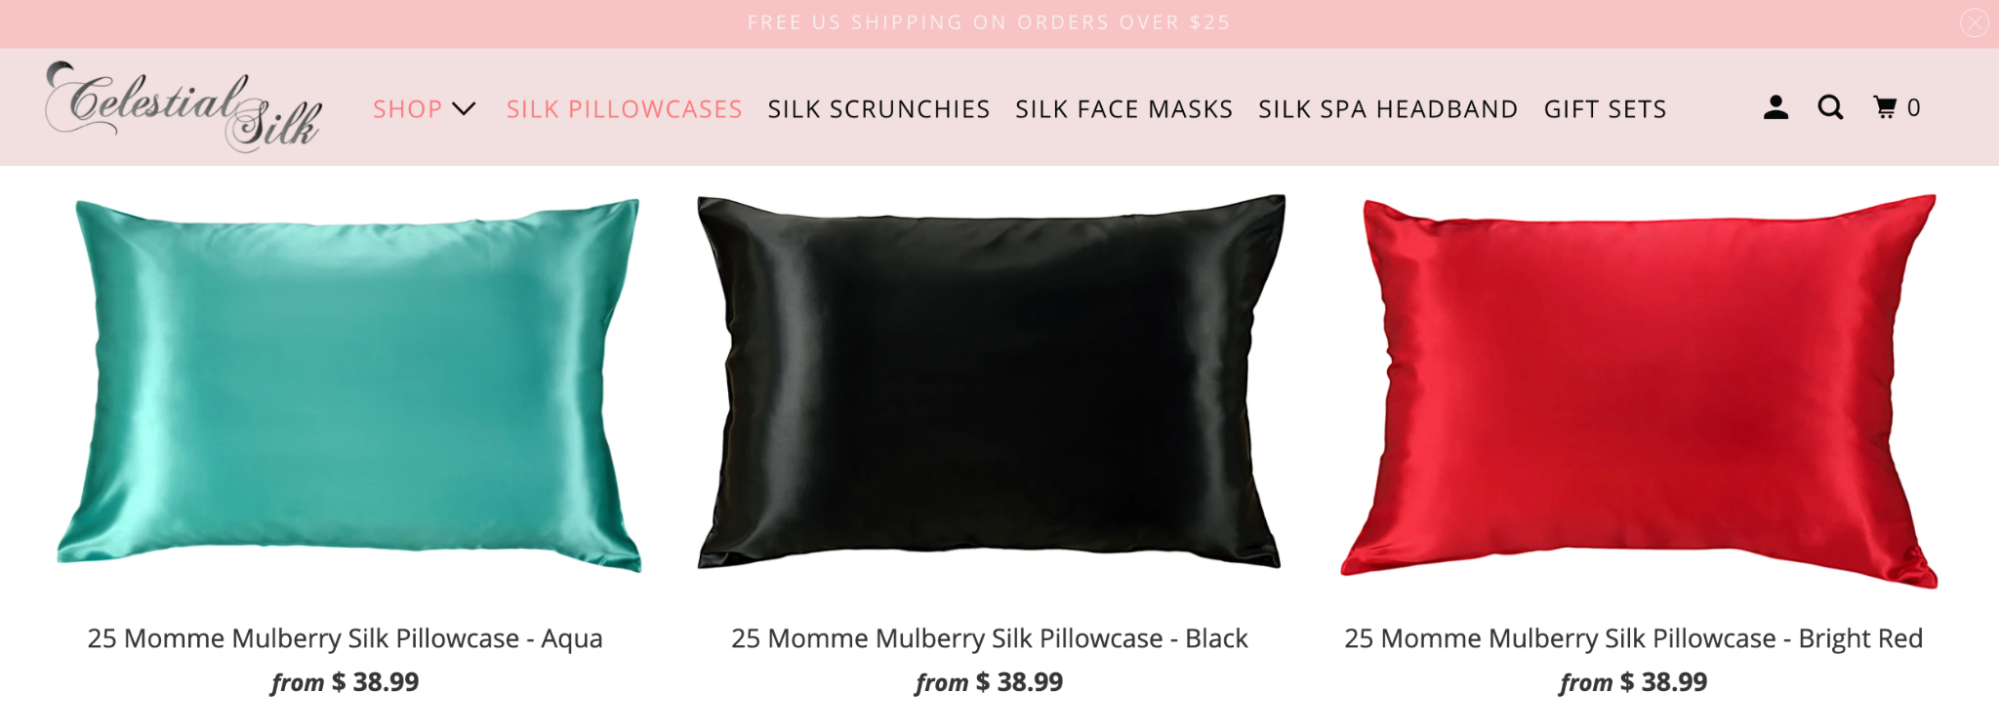
Celestial Silk

Estimated cost per photo: $25–$80

CEO and founder of pillowcase brand Celestial Silk Danielle Jackson says she uses a combination of outsourced and in-house product photography. Whenever they need live models in the shots, they outsource the photos at $80 apiece. But for more straightforward and less complex images, they shoot in-house at about $25 each.
 

Lēto Foods

Estimated cost per photo: $90–$250

Lēto Foods, which sells smoothies for pregnancy health, knew the importance of investing in high-quality product photography to successfully launch their ecommerce brand. For most of the images, founder and CEO Amanda Gorter and her team shipped their products to an ecommerce photography company and paid $90/shot. They also worked with a local photographer and food stylist to come up with more creative and special shots—investing closer to $250/image for these.

Cooper’s Treats

Estimated cost per photo: $40–$60
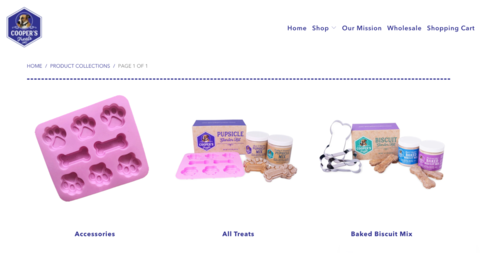
Premium dog treat company Cooper’s Treats uses a photographer who charges $40 per shot plus a flat startup fee, which works out to be a total of about $50 per image. The photographer also sends over images they haven’t culled as the top shots, offering them at half the price. Cooper’s Treats receives edited images, though sometimes they have to crop for a specific use case like Facebook ads or marketing emails. Owner Alex Willen sometimes drives the products from San Diego to their photographer in Los Angeles, and other times they mail the products for about $30–$40.

Carigu

Estimated cost per photo: $9–$28
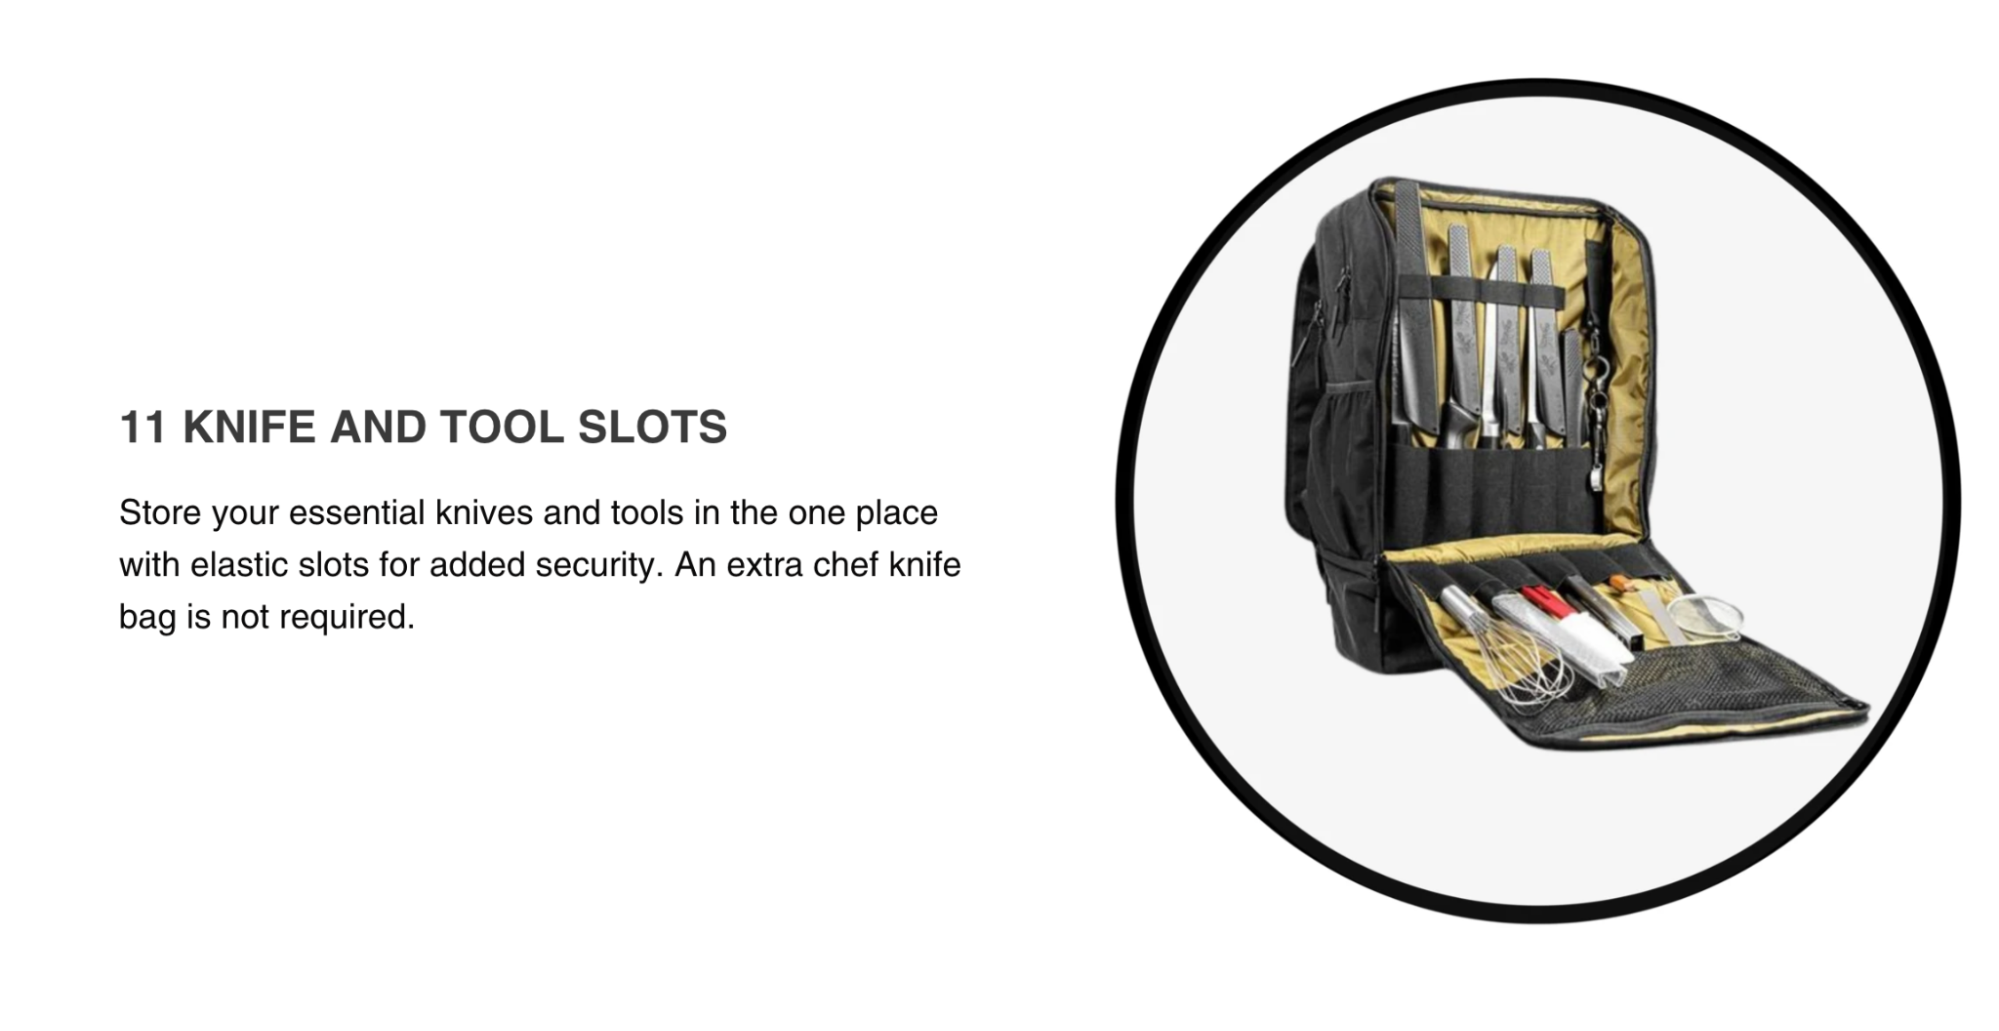
Australia-based chef gear and accessory brand Carigu outsources their product photography. The images are priced differently depending on the style of the shot. Traditional ecommerce photos—white background, for example—cost them about $9 per image. For more creative lifestyle shots, they pay closer to $28 per photo.

Moriarty’s Gem Art

Estimated cost per photo: $10
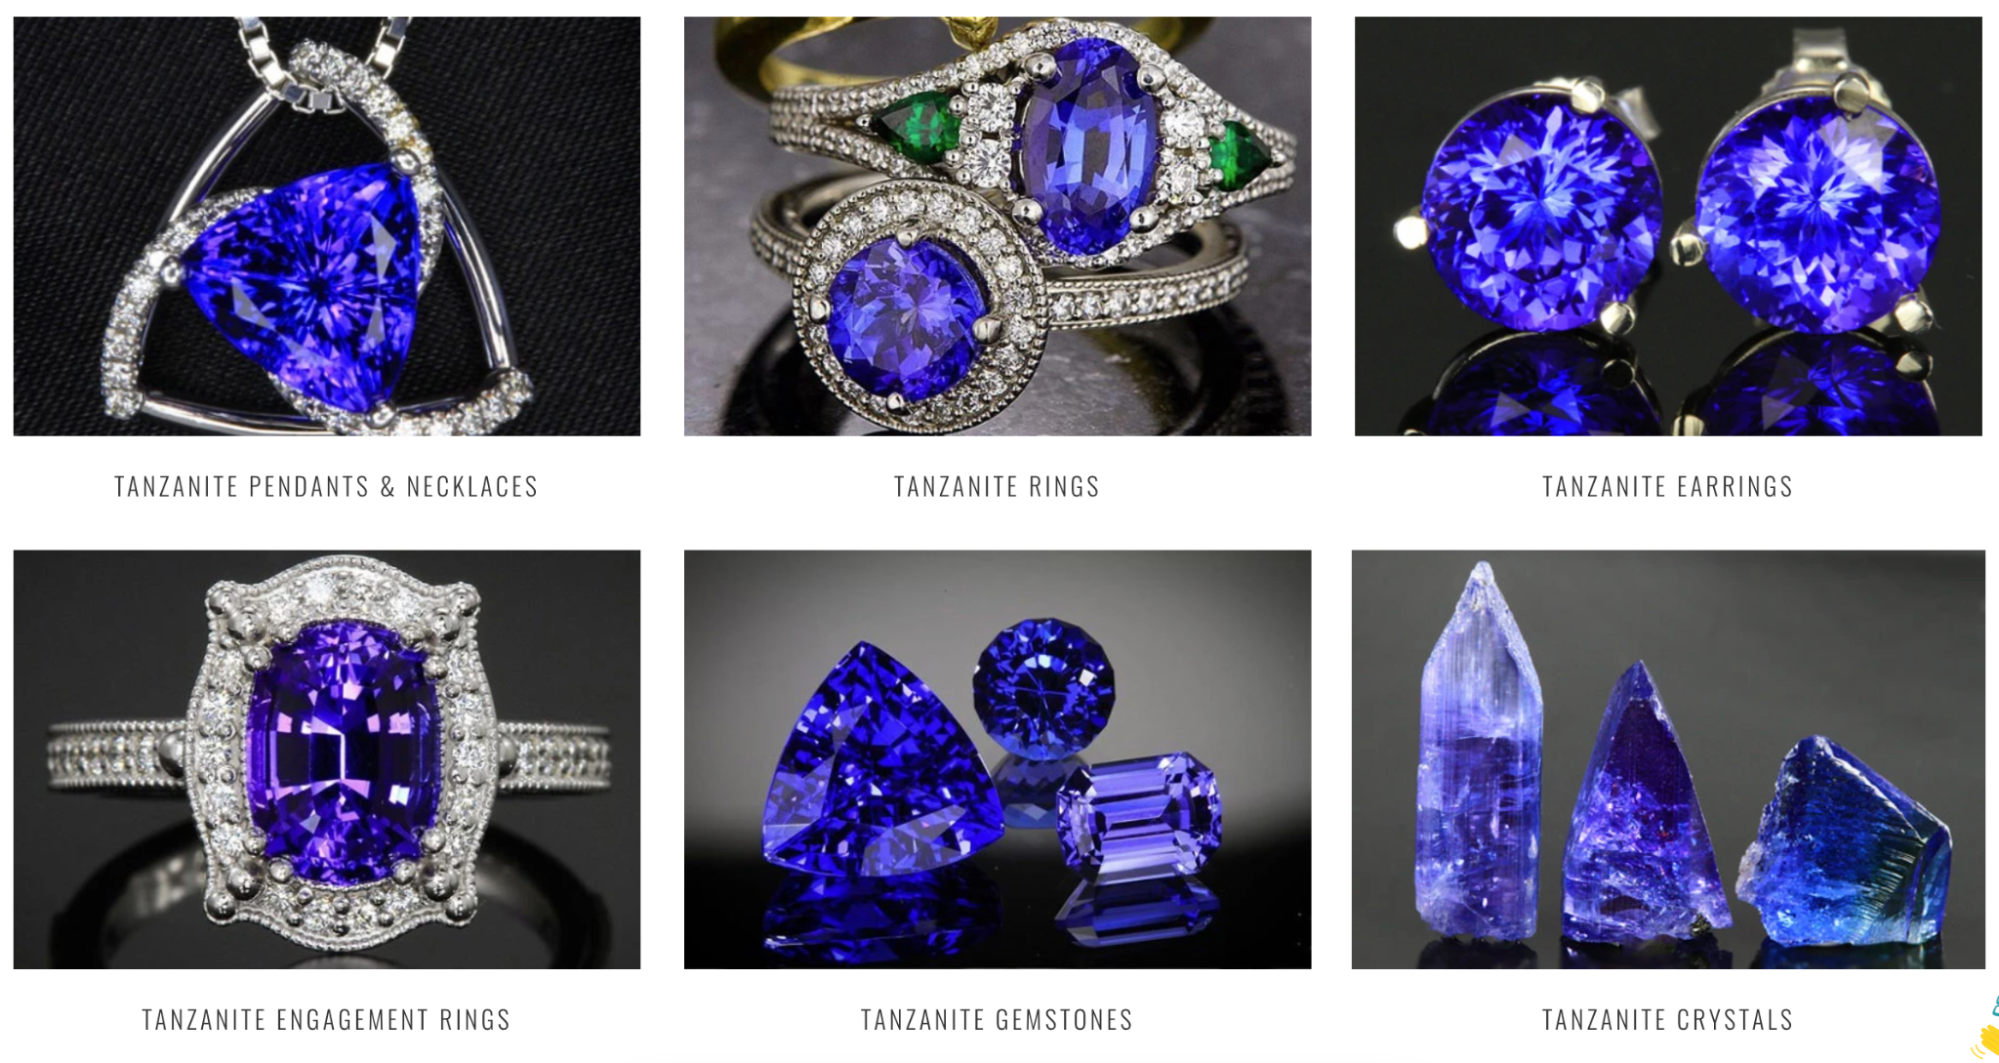
Jeff Moriarty of Moriarty’s Gem Art prioritizes product photography because it’s so important for capturing the details in their jewelry—essential for online shoppers looking for these types of items. They hire a local photographer to come to their business every week or two to take both photos and videos of their products. The photographer charges $50 per hour and gets about 5 shots per hour, coming in at about $10 per shot. Each shoot takes 4–6 hours, yielding 20–30 shots for a $200–$300 investment.

“The results of [our photographer’s] work are amazing. It leads to improved sales and conversion rates, so we will continue to invest in her.” – Jeff Moriarty, Moriarty’s Gem Art

Quality Logo Products

Estimated cost per photo: 75¢–$15
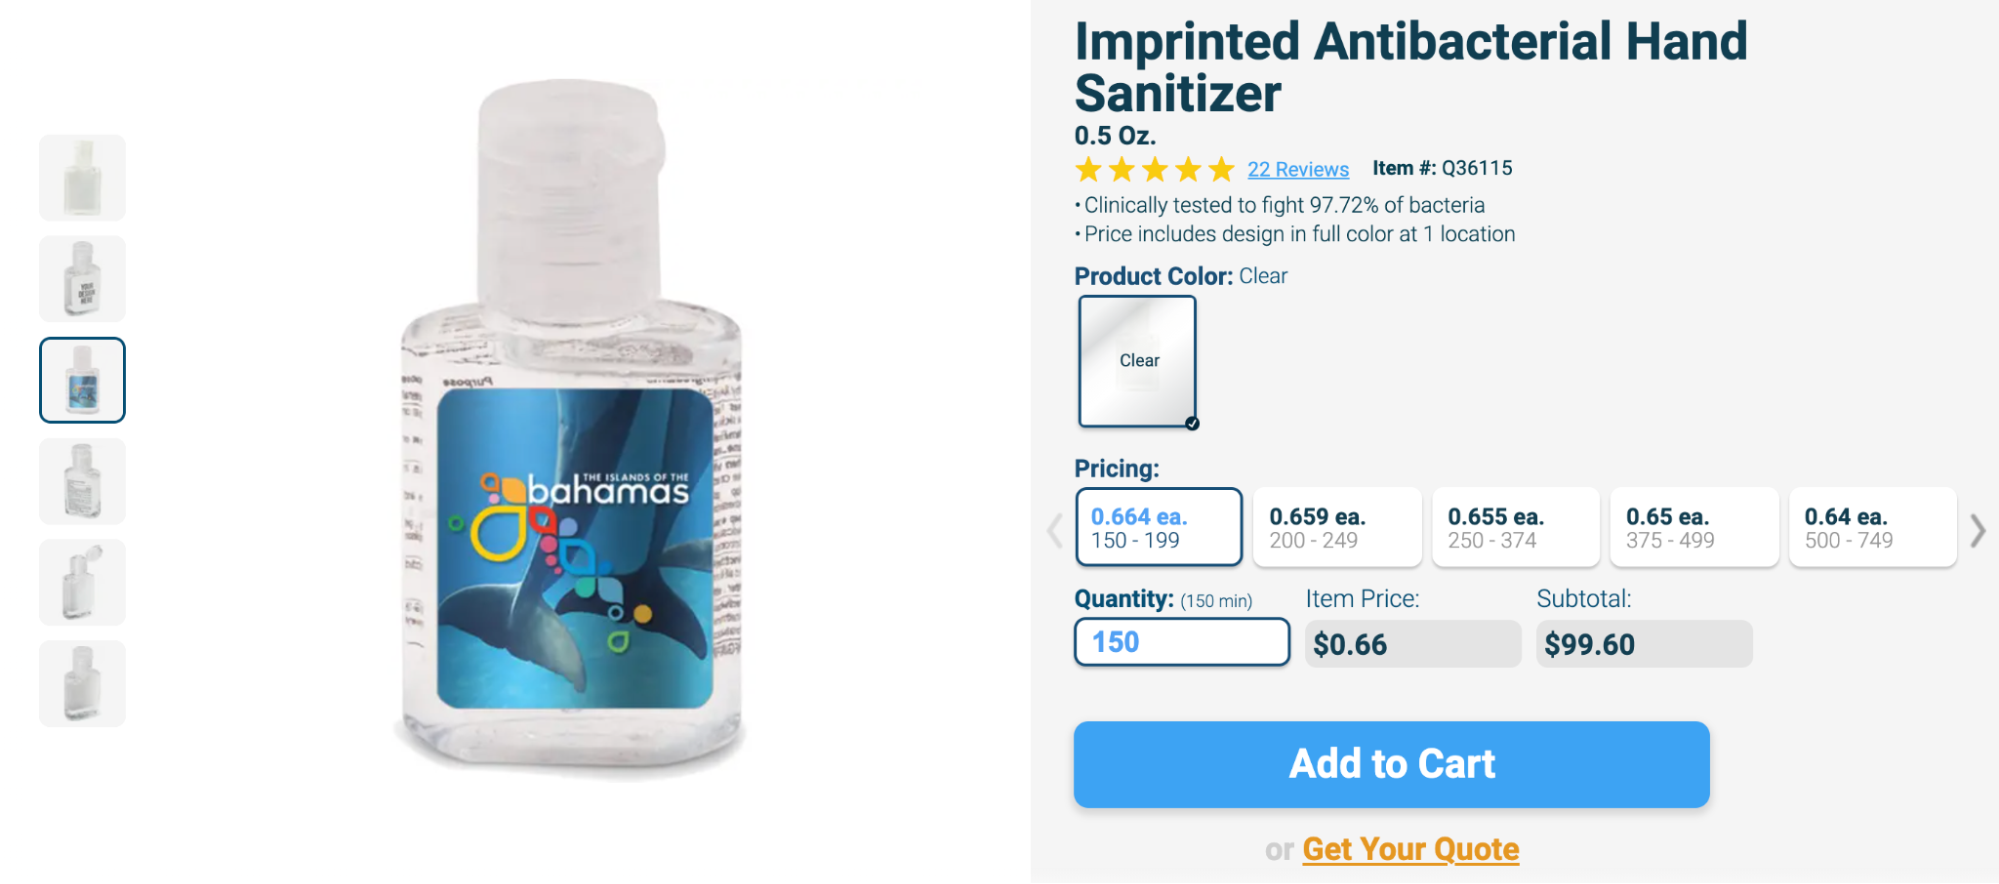
Quality Logo Products sells customizable promotional goods and takes a hybrid approach to their product photography. They invest more in unique photography, including 360-degree shots, for best selling products. For less popular items, they outsource the shots and skip the 360-degree views. On average, in-house product photos cost about $3 per regular image and $15 per 360-degree shot. Outsourced shots are much more affordable at about 75¢ apiece. “Our in-house production quality is also significantly higher than that of outside vendors, so it’s worth the money and effort,” says co-founder/president Bret Bonnet.

The Hussl Co.

Estimated cost per photo: $1.16
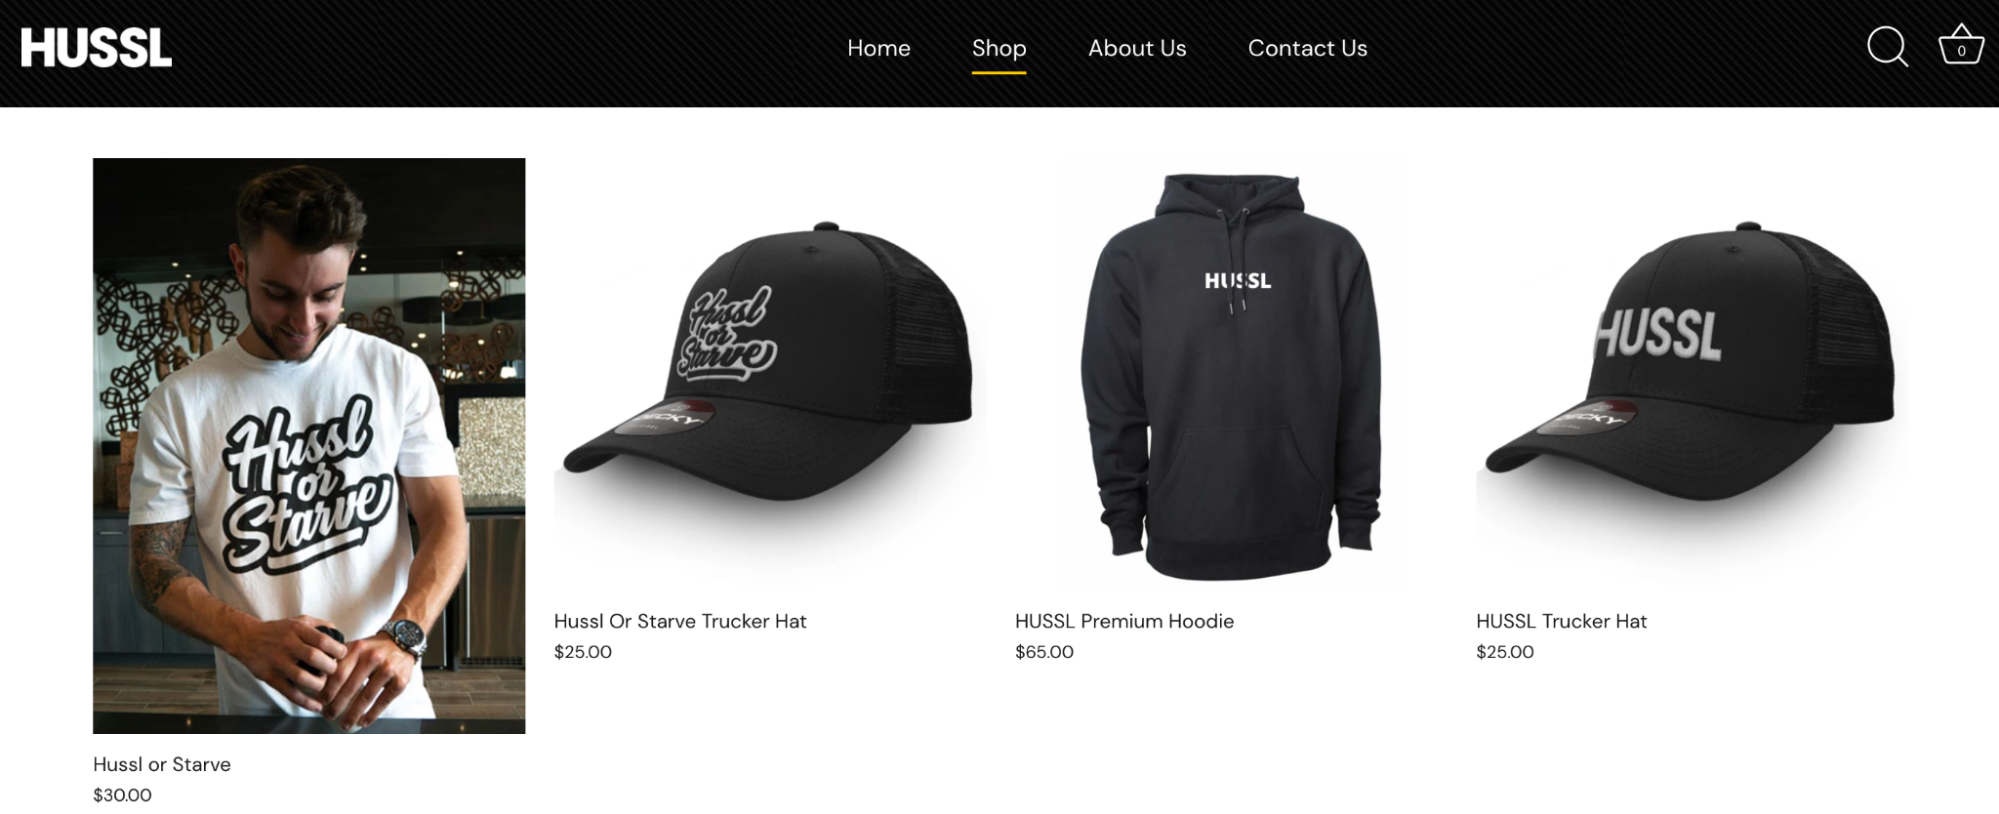
The Hussl Co. CEO Chase Scroggins hired a “skilled but amateur photographer” for $75/hour to shoot product images for his apparel company. He hired a model and also modeled the clothes himself. The photoshoot took two and a half hours (that’s $187.50 for the photographer) and he ended up with 162 usable shots, 20 of which have been useful for marketing materials and product listings.

Factors impacting product photography costs

Here are a few things you’ll want to note:

  • White background: Is this included or an extra cost?
  • Clipping path: Do they provide this with each image?
  • Worldwide Royalty Free Unlimited Use: Are there image restrictions or licensing fees?
  • File types: What is included in the base price?
  • Turnaround time: Most pros charge extra for rush projects.
  • Retouching: Do they include any basic edits?
  • Travel fees: If travel will be required, discuss those fees right away.

Choose your photographer (or photography company) depending on your needs: Take your time frame, outsourced tasks, and products into account. And you don’t want to just go with the most affordable option. Budget is, of course, something to keep in mind, but product images can make or break an ecommerce venture.

Product photography costs

A lot goes into those pretty product shots. Photography equipment and space are expensive, an assistant might be necessary, and cameras and lenses require regular cleaning and appropriate storage. On top of that, there are yearly business costs (like marketing material and a website) and costs for photo editing software.

While pro photographers probably don’t want to calculate how much they’ve invested in their business, we’re going to break it down below, so you know exactly why and how photography fees are set.

Equipment

For most product photographers, equipment will make up the bulk of their expenses. Professional-quality cameras, lenses, and lighting tools are expensive.

Camera body

Estimated cost: $3,000–$5,500

Contrary to what most consumers imagine, professional-grade cameras are sold without lenses—and they’re expensive. A decent camera body will start at about $3,000, and many cost more.

We surveyed a small group of professional product photographers and found that over 60% of them spent between $3,000 and $5,500 on their main camera body. And most professional photographers own at least two camera bodies (a main one and a backup), although the backup camera might be cheaper or older.

Pro-quality camera bodies are built with more durable materials, they’re weather-sealed, have higher burst rates, larger buffers, better autofocus capabilities, dual memory card slots, and have GPS and WiFi technologies included. They’re also compatible with a wide assortment of high-grade lenses.

Lenses

Estimated costs: $1,000–$20,000

While most photographers will have just a few camera bodies, they’ll likely have a plethora of lens options. High-quality used lenses start at around $1000 each, and new lenses start at around $1500 each (and that’s considered a rather affordable price point). Generally, the jump from mid- to high-range prices is what separates enthusiast-quality lenses from professional-quality.

It’s not unusual for new, pro-grade lenses to go for $5,000 to $12,000 or more per lens. The photographers we surveyed spent anywhere from $10,000 to over $20,000 on their collection of lenses.

More expensive lenses usually have higher-quality glass, better sensors, more features, a faster autofocus motor, more effective subject isolation, and are weather resistant. The glass elements that are used in professional lenses go through more rigorous testing and have a more rigid inspection process. They typically have faster, constant aperture lenses that produce better images in low-light situations and product images with better color quality.

Props

Estimated costs: $1,000

To keep ecommerce product shots interesting, pro photographers keep a multitude of props handy. The cost varies greatly from a few bucks (think garage sales or thrift shops) to hundreds of dollars.

Bigger or more elaborate props like backdrops, floor drops, and rugs, can add up quickly. And due to the nature of product images, having a variety of blocks and boxes to work with is a necessity. Even if those props cost under $100 each, many product photographers probably have around $1,000 dollars worth of props at their disposal.

If you want to learn more about product photography props, take a look at this great resource: How to Prop Up Products With Blocks to Create Eye-Catching Product Photos.

Lighting

Estimated costs: $15,000

Lighting might be one of the most expensive additional items that pro photographers use. Why? Getting a great product image in a studio setting requires more than a good flash. Photographers also need to have light meters, reflectors, stands, boom arms, reflectors, balancer cards, and grips. The photographers we surveyed have spent over $15,000 on lighting equipment.

Curious about how that breaks down? A cheap stand costs about $100, but many quality stands cost over $500, and boom arms can cost around $1,000. A nice flash runs around $500 to $1000—the same goes for a nice light meter. Professional-quality light reflectors will be about $100 each. And the list goes on. Plus, professional photo studios will need multiples of most of these items, so it gets expensive quickly.

Miscellaneous equipment

Estimated costs: $1,000–$10,000

Along with lighting equipment, there are a whole bunch of other necessary items. Filters ($10 to a couple of hundred dollars), at least one camera bag (around $200), a shutter remote, spare batteries, and camera and lens cleaning supplies. Compared to other costs incurred, these are small-ticket items for photographers, but they’re absolutely necessary.

“My camera bag has roughly $8,000 worth of gear in it at any given moment,” says photographer Brendan Williams. There isn’t a shortcut to becoming a professional product photographer. It takes skill and usually a hefty financial investment, not only for equipment but also for studio space, employees, business expenses, and more.

Studio fees

Estimated costs: $500–$800/day

The cost of studio space depends on whether it’s rented or owned and the photographer’s location. If you own the space, the cost will depend on your mortgage situation. The photographers that we surveyed noted that a typical studio rental fee costs about $500 to $800 per day. Studio rental fees may or may not include some equipment use.

Note: if you hire a professional photographer, they’ll likely have all this equipment. Likewise, if you’re outsourcing the whole thing (for example, shipping your products to a studio like Products on White Photography, you won’t need to pay for any of this equipment).”

People

Estimated costs: $25–$500+ per hour

When you’re paying for product photography, you’re not just paying for one photographer. The cost likely covers assistants, administrative staff, stylists, and possibly models.

One larger product photography company that participated in our survey said they regularly employ a few contractors and probably spend around $80,000 per year on their account manager, assistants, bookkeeper, etc.

Here’s an average breakdown of some of the manpower costs (just for the day of the shoot):

  • Photography assistants: $15 per hour
  • Models and talent: $50 or more per hour
  • Hair and makeup stylists: $50 or more per hour, each
  • Photo stylist: $25 or more per hour

Beyond shooting days, most businesses also have support, admin, or bookkeeping staff.

Hiring a photographer

A good photographer isn’t cheap, and hopefully, now you realize why. It’s a lot more than taking a few pretty pictures (although yes, you want to hire someone who can do that).

Interested in hiring a product photographer? Make sure you do your due diligence before making a decision: How to Hire a Product Photographer: 11 Questions You Need to Ask.

Professional photographers use different pricing systems:

  • Hourly: $100 or more
  • Day rate: $500 or more
  • Packages: varies
  • Subscription: varies
  • Per photo: $25 or more (save money by buying a package)

Thoroughly review any prospective photographer’s rates and pricing structures. You’ll want a plan that will work with your ecommerce business as-is and the option to change plans as your business grows.

Are you a photographer that wants to explore a package pricing structure? Here’s how to build, price, and sell product photography packages.

Photographers work either freelance or in-house, which can impact pricing and the amount of work they can handle. Expect the same quality no matter how a photographer has set up their business, but understand that a solo freelance photographer will only be able to handle a certain amount of work. In-house photographers usually have a team to lean on.

Regardless of whether they work for themselves or a larger company, photographers that do high-end commercial work need to have an inventory of equipment and people at their fingertips.

Business expenses

Estimated costs: $2,900–$3,700

Like other companies, photographers have regular business costs:

  • Business registration: $300–$600
  • Computer: $1,500+ or more
  • Website: $300+
  • Marketing: $300+
  • Insurance: $500–$1,000

One professional product photography company we surveyed spends over $10,000 per year on business costs. Again, this will vary depending on whether the photographer works freelance or in-house at a larger studio.

Post-processing

Estimated costs: $120–$700/year

In the grand scheme, software subscription costs are low-cost for product photographers. Photoshop, Lightroom, Canva, are all less than $700 per year each (and Canva is currently an affordable $120 a year). The real cost of post-processing is time.

Photo editing takes a skilled person and a lot of time. Of the product photographers that we surveyed, photo editing was one of the most commonly outsourced tasks—simply because of time constraints.
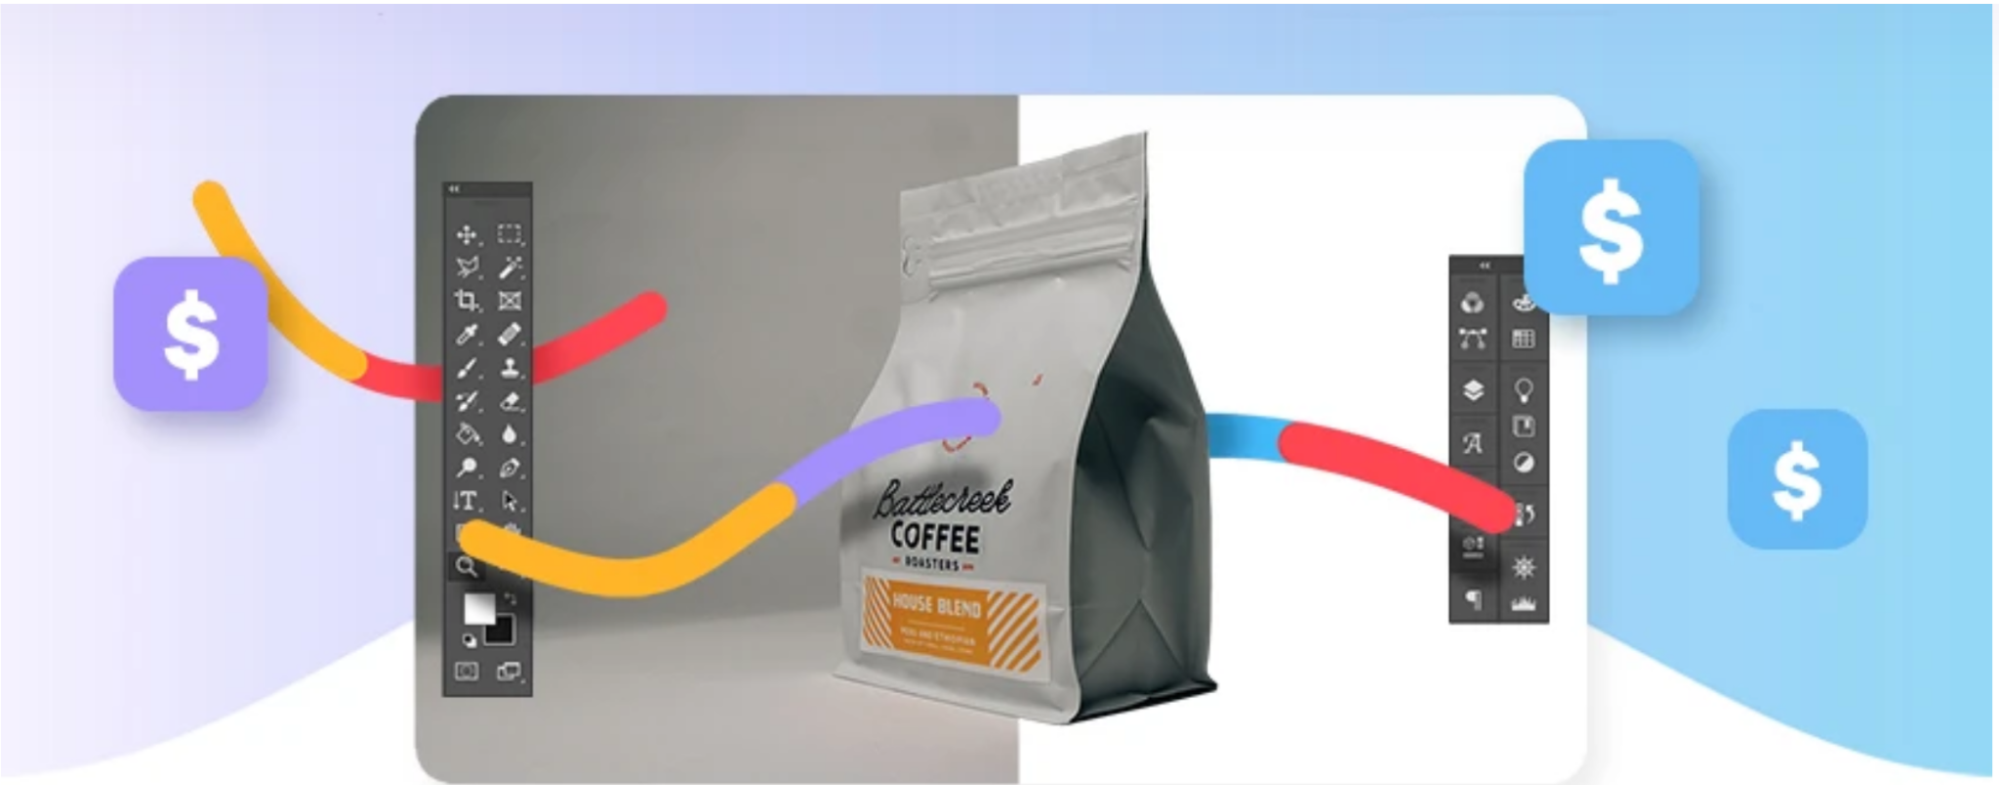

Image source

Outsourcing photo edits to a professional team like Path is a great way to keep costs down and maintain your high-quality standards. (Path pricing is transparent and straightforward with costs starting at 25¢ per image.) And outsourcing tasks such as photo editing can be especially helpful if you’re working with a freelance photographer (or you are a freelance photographer).

Storage

Since pro photographers have to maintain and share countless files, they also have to pay for image storage and organization solutions:

  • Digital asset management (DAM) system: $350+ per year (a 2018 survey found that $51,999 was the average yearly DAM cost)

[cta text=”Get tips on setting up and organizing a DAM” button=”Learn more” link=”https://pathedits.com/blogs/tips/digital-asset-management-how-to-organize-product-photography-files”]

  • Server space: $100–$300 per month for a smaller business
  • Memory cards: around $100
  • Memory card reader: around $20–$80
  • Portable storage drive: roughly $100–$800
  • Tech resources for maintenance: varies
  • Cables for image transfers: around $10–$50

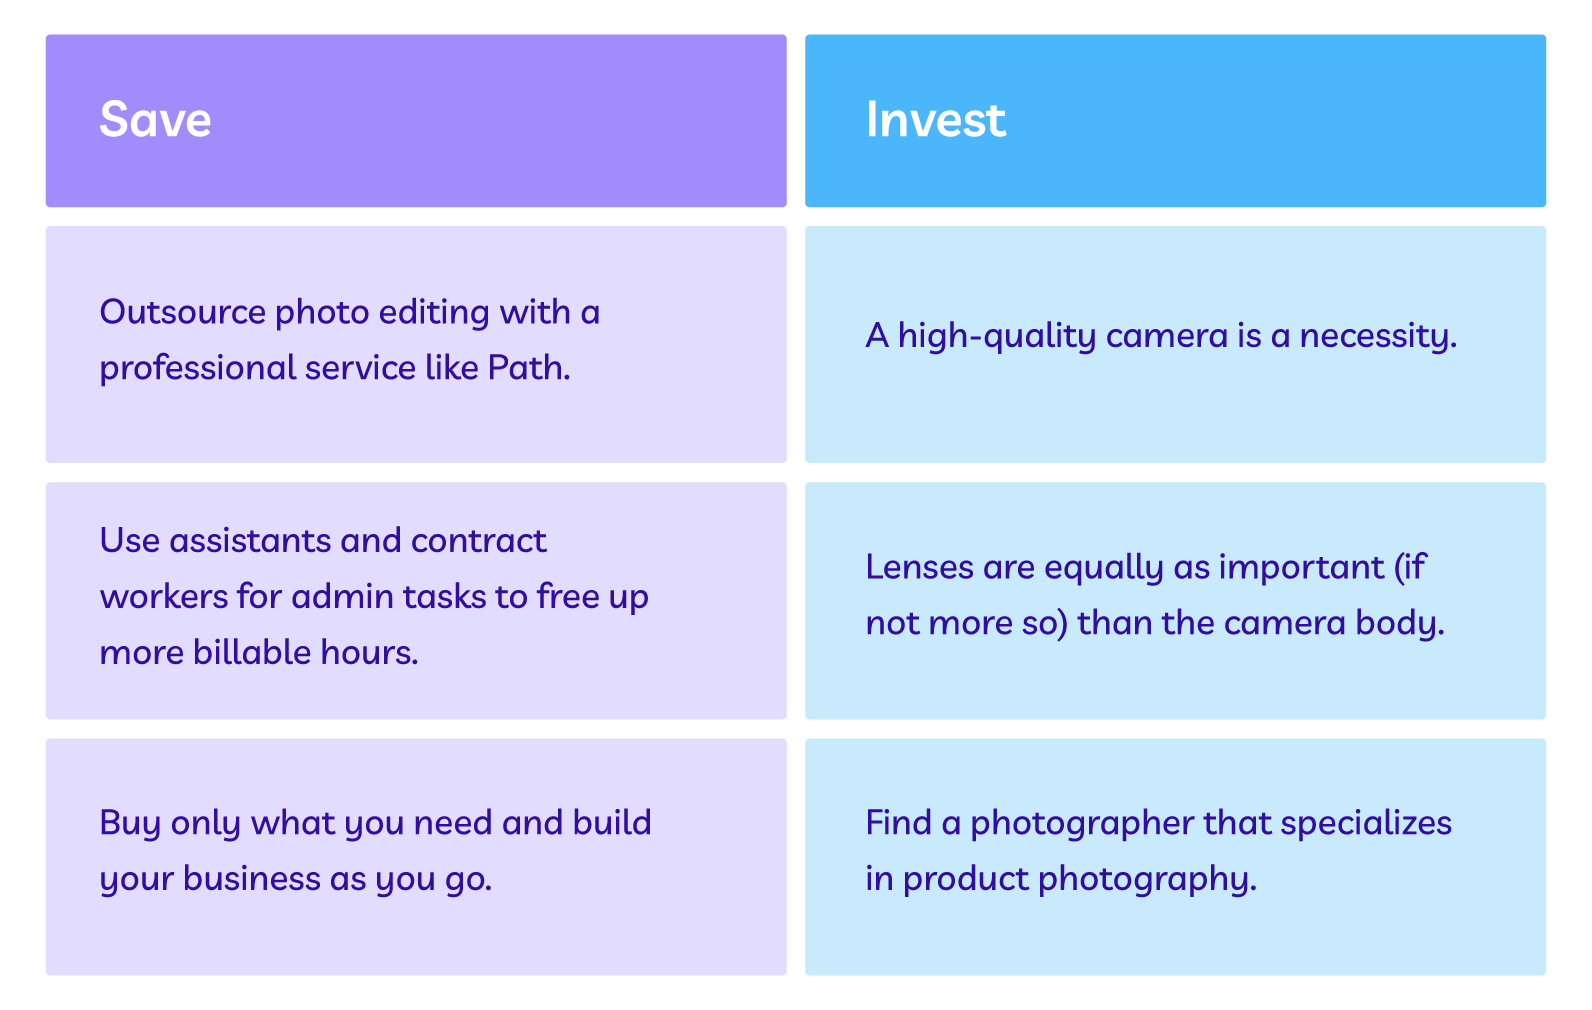
Where to save money vs. where to invest

Product photos aren’t something you want to skimp on, but there are a few ways to save a bit of money.
    Moving forward with your product photography

    That product photography quote that you received is probably looking a lot more affordable now. (Ahem, photographers, the new year would be a great time to raise your prices.)

    Producing high-quality product images is expensive, but there are plenty of reasons it’s so costly. Those images are an investment in your ecommerce company and, for photographers, they’re the result of years of experience, a vast network, and a strategically built business.
    Clipping Path Service Reviews: How to Spot the Real from the Fake

    You’ve set up your company. You have a website with products your customers want. Now it’s time to prep product photos for your site. You’ve done everything right thus far, so it’s essential that you find the right provider for clipping path services.

    While choosing your clipping path provider, you’ll likely do some research about their pricing, turnaround time, and customer reviews. But some companies participate in dishonest business practices and solicit fake clipping path service reviews—from their employees, friends and family, or even bots. So when you look up clipping path service reviews, you need a keen eye to distinguish fraudulent versus genuine customer feedback.

    In this article:

    • Why it’s important to look up clipping path reviews
    • Where to find clipping path service reviews
    • How to spot fake or biased clipping path service reviews
    • Path clipping path service reviews
    • Next steps to finding a clipping path service provider

    Why it’s important to look up clipping path reviews

    Choosing the wrong clipping path provider could seem to be a simple mishap, but worse things could happen than lost money or more work fixing the edits yourself. In some cases, untrustworthy clipping path service providers may use or even sell your images elsewhere. And if your employer owns the rights or you’ve sold them to a client, this can put you in a legal jam. Worse, you could put your bank and credit card information in the wrong hands.

    But don’t worry, there are many ways to protect yourself from these worst-case scenarios. Taking a few minutes to research clipping path service reviews can save you valuable time and alleviate potential issues.

    [cta text=”Why choosing the right clipping path partner is important” button=”Learn more” link=”https://pathedits.com/blogs/tips/how-to-choose-the-best-clipping-path-service-provider”]

    Where to find clipping path service reviews

    To avoid these worst case scenarios, put on your investigator hat and do some online sleuthing to find out whether the company is reputable. Many clipping path companies feature reviews on their own website, but for honest, unvetted reviews, you’ll want to visit third-party sites as well.

    To start, do a simple Google search for “clipping path service reviews.” You can also type the name of the company followed by the word “reviews” to see what people are saying about them on the web. Make sure to thoroughly browse the results on Google—that means going past page 1.

    Next you can check third-party sites for validated commentary. Here are a few to start with:

    • Trustpilot
    • Facebook
    • Upwork
    • Fiverr
    • G2 Crowd

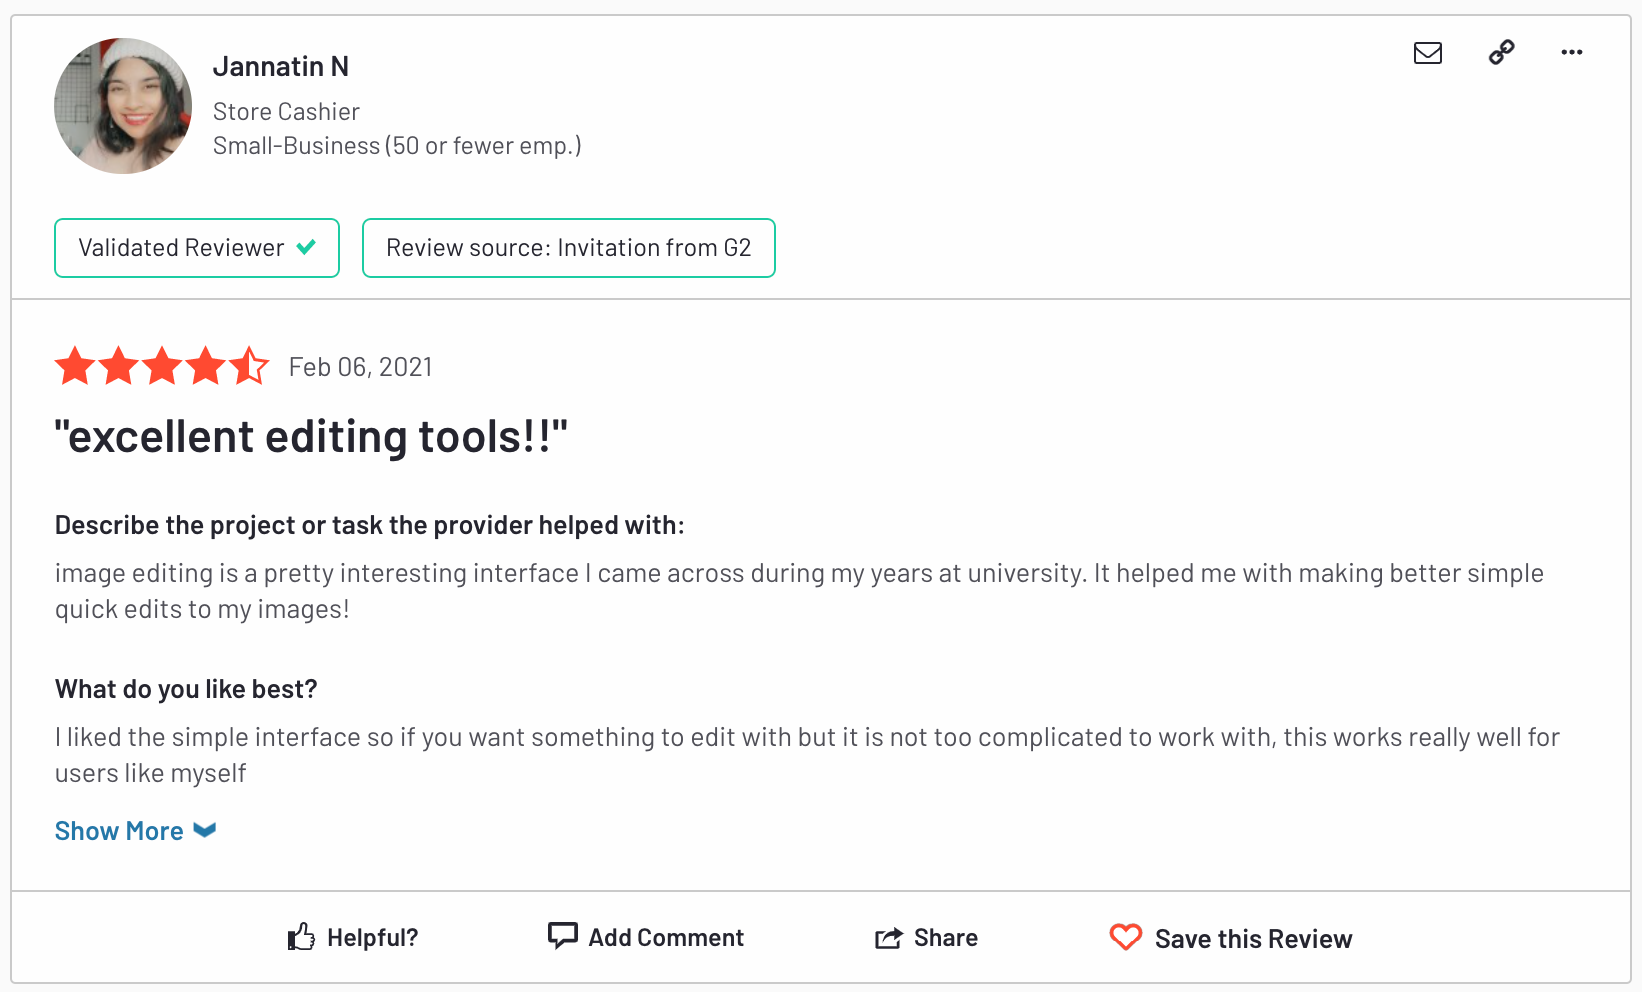
    Here’s an example of one of the clipping path service reviews on G2 Crowd for a company. It’s the only review available, so it’s best to take it with a grain of salt and validate with opinions and reviews from other sources. However, G2 has validated the reviewer, so take it as another piece of your research through this vetting process.

    Image source


    Another trick? Search the company name again, but plug in the word “scam” at the end instead of “reviews.” If you have a repeat fraudster on your hands, this should show you the truth.

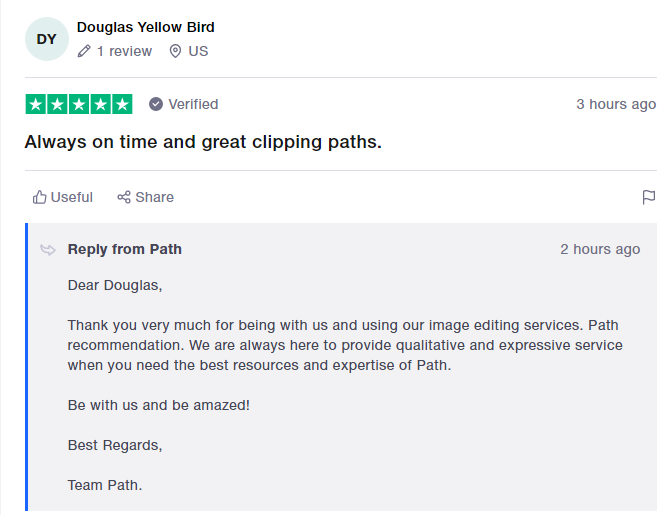
    As a bonus, taking a deep dive into a company’s reviews may not only help prove their validity but also reveal their customer service response quality. The responses from service providers to reviewers can provide insight into the company’s customer care practices and further help you in your decision process.
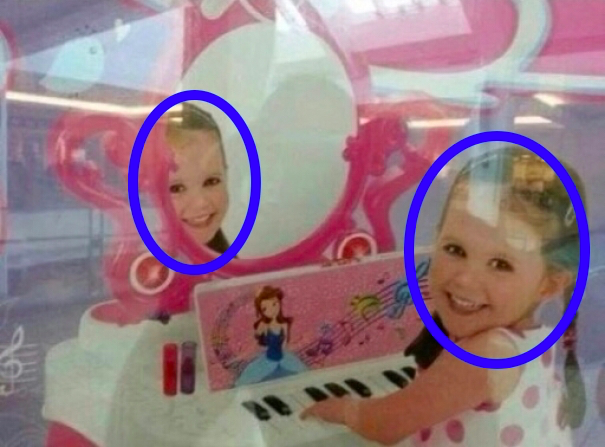
    Image source

     Pro tip: Remember to not only look at the overall review ratings, but the quantity of reviews. A company called Clipping Path Creative, for example, has a 3.8-star Trustpilot rating, but there are only tworeviews. Compare that to Path’s 5,000+ Trustpilot reviews with an average “Excellent” rating. It’s clear who is the more reliable choice.
     

    Also worth noting: Trustpilot calls out that they’re unable to verify how Clipping Path Creative has gotten their reviews. So they could all be fake.

    How to spot fake or biased clipping path service reviews

    Unfortunately, there are tons of fake clipping path service reviews out there. While third-party sites do their best to monitor and prevent fraudulent customer reviews, it’s impossible to catch all of them. That’s why it’s important to stay vigilant.

    Keep an eye out for these tells:

    Watch for reviewers with generic names like John Smith or lots of random numbers in their names.

    • A spike in the number of reviews over a short period of time can indicate a targeted campaign to boost a company’s rating.
    • Fake reviews are often over-the-top in their praise, while honest reviews tend to discuss both the good and the bad.
    • Use of more personal pronouns, like “I” and “me.” A study conducted by Cornell University found that fake reviewers use extra pronouns and fill their reviews with unnecessary details and scene-setting to sound more convincing.

    You might also find biased reviews. For example, competitors may post reviews that position their own services more favorably than their competitors. Make sure you check a variety of sources and look for common customer praise and complaints.

    Path clipping path service reviews

    We like to share our favorite customer reviews on social media, but you can check our Trustpilot page for an unfiltered view of all our reviews.


    Next steps to finding a clipping path service provider

    Now that you’ve thoroughly researched and vetted clipping path service reviews, you can move forward with the outsourcing process by gathering quotes from your chosen providers. You can sit back and feel confident about spending money on a worthwhile expense while focusing on other tasks.

    Check out these other articles to help find a high-quality yet affordable clipping path service provider:

    • How to Choose the Best Clipping Path Service Provider
    • Outsourcing Your Photo Editing? Here’s How to Find the Best Option
    • How to Know It’s Time to Outsource Photo Editing
    • Should You Outsource Photo Edits or Do Them In House?: A Complete Guide

    At Path, our team of professionally trained photo editors is ready to assist you with all your editing needs.

    [cta text=”Learn more about Path services and how we can help you get back to the work you love” button=”Learn more” link=”https://pathedits.com/pages/how-it-works”]