Korean Skincare Routine – Complete Guide

Koreans are known for their glass-like skin and beautiful body shape. You will seldom find any flaw in their skin and body. Moreover, they age very slowly as you will not be able to identify one’s age just by looking at their skin.

We live in the digital era, and recently, the secret of their flawless skin revealed by the internet. Internet surfers came around YouTube videos posted by Koreans and from there world came to know the new technique of skincare.

Korean glowing glass-like skin is not just a result of good genes, it required a bit of extra effort and time. Also, now that Korean 10-step skincare products are ubiquitous, you can also include all the steps in your daily skincare routine.

Here in this article, I am going to tell you all about the 10-step Korean skincare routine, and if you have been following my blog, you must know that I have combination skin. I have followed this routine myself, and therefore I will also share my own experience with you all.

10-Step Korean Skincare Routine

Korean skincare regime based on layering principle. Instead of applying a single cream that contains all the ingredients, Korean believed in layering products according to their consistency and nutritional value so as to achieve maximum in-depth absorption.

According to the Korean 10-step skincare routine, one must double cleanse their skin, then move on to toning followed by layering of moisturizers in the ascending order of their thickness.

So, without any further delay, let’s dive into the complete skincare routine:

1. Double Cleansing

korean skincare double cleansing

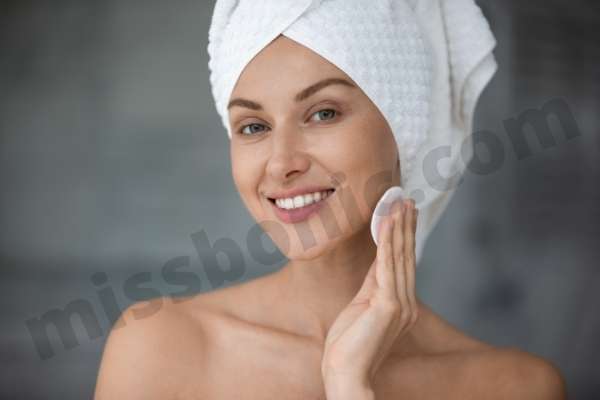
Koreans always double cleanse their skin, first by using an oil cleanser and then by using a foaming cleanser. The logic behind this is that oil attracts oil, so when you oil-cleanse your skin, it removes sebum and oily residue stuck inside the pores.

To further clean the dirt and other impurities, the oil cleansing is then followed by foaming face wash.

Buy Oil Cleanser On Amazon

One of the most important thing that Korean keep is mind while washing their face is pH.

Do you know our skin is acidic? Hence, if the pH of the skin is kept between 4.2 and 5.6, the skin remains healthy and flawless.

Most of the foaming cleansers you find in the market are alkaline in nature. Thus, you need to be really careful while selecting a facewash for you.

Buy pH Balanced Cleanser On Amazon

You can try sebamed face wash for the perfect pH balance of your skin.

2. Toner

skin toner

Now that we are done with 2 steps ( oil cleansing and foaming cleansing), its time to balance the pH of skin. Unlike in our country where toners are basically a form of astringent that cleans the remaining gunk or dirt from the skin, Korean toners are more like a thin moisturizers and pH balancers.

Buy Skin Toner On Amazon

Their toners do not rip out essential moistures from the skin, instead they provide a thin layer of moisture and balance the pH of skin.

3. Essence

skin essence

Essence is a thin fluid that is targeted toward a particular skin problem. Essence is designed in such a way that they penetrate deeply into the skin to provide the maximum benefit to you.

Essenses are mainly water based and they infuse into the skin. There are various types of essences available according to your skin requirement such as for hydrating essences that are for dehydrated skin types and brightening essences which are used for dull and tanned skin.

Buy Skin Essence On Amazon

In some ways, essences are similar to serums only the molecular weight of essence is lower than that of serum.

Read about essence here: https://www.byrdie.com/what-is-skin-essence

The addition of this product to your daily skincare routine will not take much, only 30 seconds more. These 30 seconds will give you that glass-like Korean Skin.

4. Emulsion

korean skin essence

Now to seal the effects of essence, emulsion is applied on the top. Skin emulsions are nothing but the light form of moisturizer. They are basically water based and light-weighted, so when you apply them, they quickly absorb into the skin.

Buy Face Emulsion At Amazon

Now, for oily skin people, you may be wondering that this lathering up of products will clog your pores. I have had the same thoughts, but as soon as I apply emulsion on the top of essence, it was absorbed instantly as if my skin was craving for it for long.

Since, then I have using these steps diligently and I see no adverse side effects.

5. Ampoule or Serum

korean skincare face serum

Ampoule and serum both contain super charged active ingredients that work to eliminate the skin problems. While essence has a water like consistency, serum or ampoule have cream or gel like texture.

Essence look like toners whereas serum or ampoule looks like light weighted creams. When you apply both essence and serum, it provides clear visible benefits.

Buy Face Serum At Amazon

Some considers ampoule as the higher concentration version of serum, on the other hand some find no difference between the two, and recommend either of the two.

If you are thinking that this 4th step will leave your skin greasy, then you are mistaken as all the products that you have applied till now are easily absorbable by the skin without leaving any sheen.

Now let’s move on to the next step.

6. Face Sheet Mask

face sheet mask

Face sheet mask is the another addition of the nutrition rich solution or serum. It is a face shaped sheet that is loaded with serum. There are various kinds of sheet masks according to your requirement.

For example, there is lemon sheet mask to brighten the skin, hyaluronic sheet mask to hydrate the dehydrated skin, cucumber face mask to soothe the sun burnt skin in summer, and many more.

Buy Face Sheet Mask On Amazon

With the sheet mask you have the privilege to apply different kinds of serums in less price. If you know how to choose face sheet mask for you, here is the article written by me, check it out. How To Choose Face Sheet Masks for Glowing Skin?

Take out the sheet mask from its cover and place it on the face for 15-20 minutes, then remove it and massage the serum into your skin using finger tips or jade roller.

7. Eye Cream

Under eye cream korean skincare

I know you must be overwhelmed at this stage, but there is one more minute step that is essential for the overall health of the facial skin.

This important step is the application of eye cream. Use your ring finger to apply eye cream gently around your eyes as the skin around eyes is very thin and delicate.

Buy Under Eye Cream On Amazon

You will not see sudden illumination in your appearance with eye creams, but prolong usage will show you the mark difference.

As you will age, the fine lines and crow feet will be less visible on your face. The main difference of the Korean skincare can be seen when people age, and this is the reason why a 40 year old woman in Korea look so youthful.

9. Moisturizer

skin moisturizer

You can stop at face sheet mask as did most people, but Koreans do follow this last step of concealing everything with a layer of thick moisturizer.

This last layer lock everything into the skin, allowing every previous layer to do their magic.

However, I always skip this last step as after sheet mask, my skin becomes fully saturated and further addition lead to greasiness.

But if your skin is dry, then you must complete the final step.

9. Sunscreen

Koreans never skip sunscreen during the daytime, and you should also do the same. Furthermore, you should keep the following things in mind while purchasing and using SPF:

Always purchase sunscreen with minimum SPF 30.

Reapply sunscreen after every 2-3 hours.

Buy Sunscreen On Amazon

Look for PA++ or PA+++ in the sunscreen as this indicates that your sunscreen is capable of blocking both UVA and UVB rays.

Never skip sunscreen even if it is cloudy outside.

Evenly apply sunscreen on all the exposed area.

10. Sleeping Mask

korean sleeping mask

While we sleep, our skin goes into rejuvination mode. Sleeping mask helps to revive the skin more fruitfully, and allows every product to work effectively.

I know your face is caked up now, but do try this as sleeping mask are designed to work effectively when your body is at rest.

Buy LANEIGE SLEEPING MASK On Amazon

Use sunscreen as the last step during daytime and sleeping mask as the last step during night time.

With that you have completed your 10 step korean skincare routine. This routine is very flexible as you can either add or skip any of the step according to the availability of time.

Some days when you want to extra pamper yourself, follow full steps, and during rush hour, just skip a bunch of them.

I hope you liked the article, if you have any suggesstions, please write them in the comment section below. I love to read and reply to them.

Stay safe, stay beautiful

Thank You

The post Korean Skincare Routine – Complete Guide appeared first on MissBonic | Beauty | Makeup | Home Remedies.

50+ Easy Mehndi Design for Fingers Only

Sometimes we don’t want our hands to be immersed in mehndi. According to the dress or time available, it is better sometimes to draw the mehndi design on specific parts of the hands only. One of the most alluring portions of the hand on which henna looks amazing is fingers.

In this article, I am going to present to you some of the most beautiful mehndi designs for fingers only. While some of these designs require an experienced henna designer, some are beginner-friendly and can be created by anyone. So, you can choose which one you want to draw on your hands, and bookmark them.

Moreover, all of these designs will not take much of your time and you will be ready for your party in no time.

Half Back Hand Finger Mehndi Design

Half Back Hand Finger Mehndi Design

The design is meant for people who have well versed themselves in drawing mehndi flowers. There are alternate designs on each finger combined with a leaf trail ended with flowers.

Also See: 100+ Simple Mehndi Design for Beginners

Mehndi Design With Leaves On Fingers

Mehndi design with leaves on fingers

Source: hennaforallny

Beautiful half hand mehndi design for brides to be. This is a traditional henna design which includes semi-circle drawn with dots and flowers.

Leaves Mehndi Design on Side Fingers

leaves mehndi design on side fingers

Source: hennaby_mk

If you are just a beginner then draw this leaf trail at the side of the fingers. If you struggle to draw leaves with mehndi, then first draw them using a pen then overdraw with henna.

Also See: 15+ Bridal Mehndi Design With Name

Beautiful Mehndi Design on Fingers for Bride

Beautiful mehndi design on fingers for bride

Source: hennacreationsby_iqra

This design also requires intricate details to be drawn, hence you can first draw the whole design with pen, then use mehndi over it.

Fingers Mehndi Design in Arabic Pattern

fingers mehndi design in Arabic Pattern

Source: sanas_henna_design

Arabic style minimal mehndi design. This is a very simple mehndi design with Arabic pattern and will look very elegant and simplistic on any occasion.

Also See: 25 Most Beautiful And Easy Arabic Mehndi Design

Lotus Pattern Mehndi Design for Finger Tips

Lotus pattern mehndi design for finger tips

Source: aayat_mehndi_designer

Sometimes when we are done with the mehndi design on whole hand but couldn’t find the finishing design for finger tips, then here is the perfect design for you to finish off. Just draw the outline for leaves and fill outside area with henna.

Also See: 50+ Trendy and Stylish Blouse Back Design

Very Easy Finger Mehndi Design With Bracelet Pattern

Very easy finger mehndi design with bracelet pattern

Delicate mehndi design for delicate hands. This design is simple to draw yet it looks elegant.

Also See: 10 Beautiful Full Sleeves Blouse Designs For Winters

Asymmetric Mehndi Design for Fingers

Asymmetric mehndi design for fingers

Asymmetry has its own beauty and symmetry in itself. Decorated with leaves and flower petals, this design will surely turn everyone’s head around to your hands.

Also See: 21 Latest Saree Blouse Design For Silk Saree

Very Simple Mehndi Design for Finger Tips

Very simple mehndi design for finger tips

Beautiful minimalistic design for working women. This design will not fill your whole hands so you will be ditching your office, college, or school code, instead, it is so simple and elegant that you can hide it easily the next day.

Also See: 21 Latest Saree Blouse Back Neck Designs

Leaf Pattern Finger Mehndi Design

Leaf pattern finger mehndi design

Fill you whole back hand with these leafy trails and see the beauty of nature on your hands.

Zig-Zag (Jaali Pattern) Mehndi Design on Fingers

Jaali pattern mehndi design on fingers

Love to write your name in your mehndi? then use this intricate design to accentuate your name letters inside these minicircles.

Backhand Flower Pattern Finger Mehndi Design

Backhand flower pattern finger mehndi design

This design is not beginner friendly, but is apt for the special when you have someone to draw mehndi for you. This design is perfect for bridesmaids and wedding guests, and for the other occasions such as EID, Diwali, Rakshabandhan, etc.

Beautiful Mehndi Design For Ring Finger Only

Beautiful Mehndi Design For Ring Finger Only

Wear a mehndi ring on your ring finger. Draw this beautiful mesh on the ring finger with two hearts hanging below. I am sure you would have loved this design, and planning to draw it just now. Well, you can do with black pen also. I do it all the time.

Haanthphool Pattern Mehndi Design

Haanthphool Pattern Mehndi Design

Haanthfool mehndi pattern is in trend these days. Actually, in the past, there was an ornament which was used to wear on hands, but in this era women seldom wear it. Hence, the design with haanthfool has come into the picture.

Simple Haanthphool Mehndi Design with Zig Zag Design

Simple Haanthphool Mehndi Design with Zig Zag Design

Another haanphool mehndi design for you. If you have not yet tried haanthphool as a henna design, you must try it now.

Back Hand Mehndi Design For Fingers for EID

Back Hand Mehndi Design For Fingers for EID

Bring the mithila culture in your mehndi design. This design is famous in mithila Bihar. On the outside, you will find this design to be very fine, but with proper zooming, you will be able to make this design.

Henna Design For Fingers

Henna Design For Fingers

Fill your backhand with this pretty flower mehndi design. Draw mesh on the finger and traditional design. You will absolutely love the finished design.

Beginner Friendly Henna (Mehndi Design) for Fingers

Beginner Friendly Henna (Mehndi Design) for Fingers

Perfect design for girls so they will not be scolded in their school for breaking the codes.

Jaali Pattern Mehndi Design on Fingers Only

Jaali Pattern Mehndi Design on Fingers Only

Again a beginner friendly simple mehndi design for fingers. You can also write an initial on the finger tips.

Best Mehndi Design for Bridesmaids

Best Mehndi Design for Bridesmaids

Breathtaking Minimalistic Mehndi Design Idea

Breathtaking Minimalistic Mehndi Design Idea

Leafy Pattern Mehndi Design for Fingers

Leafy Pattern Mehndi Design for Fingers

Extremely Elegant Simple Mehndi Design on Backhand Fingers

Extremely Elegant Simple Mehndi Design on Backhand Fingers

Simple and Elegant

Simple and Elegant mehndi

Finger Mehndi Design For Bridesmaids

Finger Mehndi Design For Bridesmaids

Circular Patter Mehndi Design for Finger

Circular Patter Mehndi Design for Finger

Front Hand Mehndi Design For Fingers Only

Front Hand Mehndi Design For Fingers Only

Minimalistic Yet Elegant Mehndi Design For Beginners

Minimalistic Yet Elegant Mehndi Design For Beginners

Traditional Mehndi Design Ideas

Traditional Mehndi Design Ideas

Leafy Line Finger Mehndi Design

Leafy Line Finger Mehndi Design

Spiral Leafy Mehndi Design For Fingers

Spiral Leafy Mehndi Design For Fingers

Haanthphool Backhand Mehndi Design

Haanthphool Backhand Mehndi Design

Mehndi Design Haanthphool Pattern

Mehndi Design Haanthphool Pattern

Extreme Elegant Mehndi Design for Thumb Only

Extreme Elegant Mehndi Design for Thumb Only

Zig Zag Pattern Mehndi Design

Zig Zag Pattern Mehndi Design

Straight Line Finger Mehndi Design

Straight Line Finger Mehndi Design

Mandala Mehndi Design

Mandala Mehndi Design

Mithila Mehndi Design

Mithila Mehndi Design

Beginner Mehndi Desgin on Fingers

Beginner Mehndi Desgin on Fingers

Flower Mehndi Design on One Finger Only

Flower Mehndi Design on One Finger Only

New Mehndi Design Ideas

New Mehndi Design Ideas

Detailed Finger Mehndi Design

Detailed Finger Mehndi Design

Criss-cross Pattern Finger Mehndi Design

Criss-cross Pattern Finger Mehndi Design
Source : mehndidesign2021

I hope you like the post. If you have any suggestions, please write them in the comment section below. I love to read and reply to them.

Also, I am sure that you must have bookmarked your favorite design, if have not done it yet, just bookmark it now. I will bring more such articles on my blog, so keep visiting.

Thank You.

The post 50+ Easy Mehndi Design for Fingers Only appeared first on MissBonic | Beauty | Makeup | Home Remedies.

August/September Beauty Favorites

Rounding up some long time loves + new favorites in this beauty favorites video! 

Products Featured in Video:

Marc Jacobs Beauty O!Mega Bronzer Coconut Perfect Tan in Tan-Tastic!

Charlotte Tilbury Airbrush Flawless Finish Setting Powder

Patrick Ta Major Beauty Headlines -Double Take Creme and Powder Blush in She’s That Girl

Fenty Beauty by Rihanna Match Stix Matte Contour Skinstick in Amber

Hourglass Unlocked Instant Extensions Lengthening Mascara

Charlotte Tilbury Pillow Talk Push Up Lashes Volumizing and Lengthening Mascara

Grande Cosmetics GrandPRIMER Pre-Mascara Lengethener & Thickener

ONE/SIZE by Patrick Starrr Go Off Makeup Remover Wipes

Fresh Sake Eau de Parfum

Bumble and Bumble Glow Blow Dry Accelerator

Bumble and Bumble Pret-a-Powder Post Workout Dry Shampoo Mist

Becca Under Eye Corrector in Light/Medium

Virtue Healing Oil

Virtue Create Lifting Powder

Laneige Lip Glowy Balm

Also mentioned:

Flora by Gucci – Gorgeous Gardenia

Amika Hair Blow Dryer Brush

3 Products I am Loving from Sephora

A new season is upon us, and I love transitioning my makeup from summer to fall with a few of my favorites from Sephora.

I’m no stranger to bright pink lipstick. A few of my favorites are Charlotte Tilbury Liv It Up, or Bobbi Brown Pink Cloud. But in the fall, I like to shift into more of a rosy shade for my everyday lipstick. I was browsing Sephora’s website recently, which is one of my favorite ways to kill time, and I found myself adding a handful of new items to my cart.

Make Up For Ever recently launched the Rouge Artist Lipstick and I ordered Brazen Pink and Brave Punch. They are similar but one is a little bit more on the cool side. I find myself switching off between the two pretty regularly, and the longevity of wear without it feeling dry on my lips is fantastic. If you are looking for a comfortable lipstick, I would definitely look into these!

I rely heavily on my Urban Decay All Nighter Setting Spray to keep my makeup in place during the exceptionally humid summers in North Carolina, but when the humidity goes down I find myself wanting a slightly more glowy setting spray. You can imagine how thrilled I was when I saw that Urban Decay launched a GLOWY finish to their cult-favorite All Nighter Setting Spray. I recently purchased it as well as the Ultra Glow All Nighter Primer. These two together are what glowy, long-lasting makeup dreams are made of.

There is a fine line between looking shiny or oily, and looking dewy and hydrated and the Urban Decay Ultra Glow All Nighter Setting Spray gives the prettiest finish to the skin while keeping your makeup intact.

If you like a setting powder, but also want a glow, I would highly recommend the Laura Mercier Translucent Loose Setting Powder Glow. It sets your makeup while adding a slight glow and warmth to the skin.

The last product that I keep reaching for is the Charlotte Tilbury Pillow Talk Push Up Lashes Volumizing & Lengthening Mascara. I don’t think I’ve ever used a mascara that fans out my lashes this well. It takes a few coats to build a bit of volume, but it applies very clean and leaves you with the prettiest, flirtiest lashes.

Whether you are restocking some of your favorites or looking for some new additions to your makeup bag for the new season, sign up to be a Beauty Insider first! You earn points that you can use on samples, are let in on details about promotions (and more!). It’s totally free to sign up, and it’s the easiest way to get the biggest bang for your buck when you’re already shopping at Sephora!

This post was sponsored by Sephora.

Building a Makeup Kit and Details about the Sephora Savings Event!

I love makeup. I genuinely look forward to sitting down at my vanity and doing my makeup, from quick basics (brows, concealer, blush) for a Saturday morning, to a full face of makeup using long time loves or brand new products I’m testing out.

It just thrills me. I remember playing with my mom’s makeup as a kid, specifically her bolder lipsticks. I would also raid her nail polish collection and I remember using a deep grape color on my fingernails very regularly.

The combination of my natural interest, as well as being influenced by how my mom approached beauty, led to my knowledge and experience in developing a few different makeup routines that I feel confident in!

I can imagine, with ease, how overwhelming it could feel to build a makeup kit if you don’t know how to start. Maybe you don’t really love trying new products? Or perhaps you didn’t have anyone in your life to teach you some makeup basics? While I’ve shared a slew of tutorials, demos, product testing, and beauty favorites videos on the internet for 10 years, I wanted to spend a bit of time today discussing some essential products for a makeup kit and how to build out from the basics.

Sephora, one of my very very favorite places to shop for all things beauty is running an event with savings between 8/14-8/23/2020. You have to be a Beauty Insider (it’s totally free to sign up!) and you’ll get access to $15 off of $75 OR $20 off of $100! The code is “WELCOMEBACK” which you can enter online at check out, or use in-store if your nearest Sephora store is open (click here to find a store near you and see it’s open!). The code can be used once online, and multiple times in store!

Makeup should make you feel great, it should highlight your natural beauty, and tap into your creativity as well.

The person I have in mind when writing this post is someone who is interested in makeup, enjoys the process, and is looking to have some solid foundational products off which to build a solid kit. Someone with a more minimalist approach to beauty may find this to be too many products, so know that I would approach a minimalist or “clean” kit from a completely different angle!

Essential Makeup Products for a Classic Makeup Kit:

Foundational Products: foundation, concealer, blush, mascara

Essential Additions: brow products, eyeshadow, bronzer, lip color

Extras: setting powder (or spray), contour, highlight, eyeliner, lip gloss, mascara primer

Below are a few specific recommendations for each category:

Foundation: I prefer a liquid but there are certainly plenty of options out there! From loose powders to creams, look for a foundation that gives you the coverage and final effect you desire. Generally, I prefer a medium coverage because I can apply two layers if I want more coverage, but my daily go-to choice is usually one layer to even out my skin but still allow my freckles to show through.

Concealer: Try to stick fairly close to your skin color for concealer, instead of going too light in an effort to counteract skin darkness. You’d be better off using a corrector instead of choosing a concealer color that is too light. Something with a natural finish is going to look more natural under the eyes instead of something with a matte finish.

Blush: Cream blush is my very favorite at the moment because of how natural and radiant it looks on the skin. Powder can certainly be a beautiful choice, but more often than not I’m reaching for my cream blushes.

Mascara: I like a clean finish, extra length, and a really dark black color.

Brow products: This could be anything from a clear gel to a pencil. I prefer using a pencil to fill in my brows as I have very little to work with on their own.

Eyeshadow: Like blush, I’m loving cream eyeshadow. Anything from a crayon applicator is easy to apply and can be blended in simply with your finger.

Bronzer: Using a bronzer is the quickest way to add warmth and glow to your face.

Lip color: A simple balm with a touch of color or even a fully pigmented lipstick goes a long way in your face looking complete!

Setting Powder: Either powder or a setting spray is essential to “preserving” all your hard makeup work!

Contour & Highlight: This is something that I do every day and goes a really long way in restoring the angles and variation in the planes on my face instead of it looking flattened out by foundation.

Eyeliner: Adds depth and definition to your eyes, can be used to minimize large eyes, or add definition and width to smaller eyes!

Lip Gloss: This is a product I could live without, but it’s a nice option for fuller-looking lips!

Mascara Primer: This is definitely in the extra category, but I have to say it’s slowly becoming essential for me! It helps add thickness and length to your eyelashes, and that goes a long way!

I shot a step-by-step of my go-to makeup routine lately. I thought it may be helpful to see how each of the products transforms my face! You can find links to everything at the very bottom of this post.

To begin: Here is my face with Ole Henricksen Banana Bright Vitamin C Serum, Biossance Squalane + Marine Algae Eye Cream, and Bobbi Brown Extra Repair Moisture Cream.

Next up is Laura Mercier Hydrating Foundation Primer.

I’ve been loving Giorgio Armani Luminous Silk for a medium, natural-looking foundation. I prefer to apply with a brush.

Charlotte Tilbury’s Magic Away Concealer in shade 3 is the best match, but I’m using up the rest of shade 2 in this demo.

I always set my under eye concealer with Laura Mercier Secret Brightening Powder for Under Eyes. It keeps creases at bay and prevents dark smearing from mascara or eyeliner.

I love the Anastasia Beverly Hills Brow Wiz pencil in Taupe or Blonde.

One of my favorite cream eyeshadows is Laura Mercier Caviar Stick Eyeshadow in Au Natural. I used a light hand for this application but it could easily be applied more heavily for a deeper color pay off.

For the crease, the Laura Mercier matte eyeshadow in Cashmere.

My favorite dark black eyeliner is Charlotte Tilbury Rock N’ Kohl eyeliner in Bedroom Black.

This pre-mascara Lengthener and Thickener by Grande Lash makes a huge difference in how my mascara wears! Game-changer!

I’ve been loving the impact of Hourglass’s new Unlocked Mascara. I mean, one swipe and you have thickness and length! It doesn’t smudge, and it adds some serious definition to your lashes.

For contour, I’ve been testing the Fenty Beauty Match Stix Matte Contour stick in Amber. It’s a true matte with a neutral undertone and it adds the perfect shadow under my cheekbones. I use contour sparingly and with a light hand.

A new bronzer I’m enjoying is the Marc Jacobs O!Mega Bronzer in Coconut Perfect Tan. I love that it is matte and shade 104 is a nice tan color for lighter skin tones.

The Charlotte Tilbury Airbrush Flawless Finish Setting Powder in Medium (2) is a beautiful powder to set my makeup. It blurs any imperfections before my very eyes and evens out my face nicely.

The Patrick Ta Major Beauty Headlines Double Take Creme & Powder Blush is the best of both worlds in one single compact! I love each of the products individually, but together the blush is long-lasting and the prettiest pink!

It’s hot and humid where I live so it’s vital to set my makeup with Urban Decay All Nighter Setting Spray. This spray works so well to fight against makeup smudging or melting off in extreme heat and humidity.

And finally, I finish with a pink nude lipstick by Bobbi Brown (since the blush was strong I didn’t want too pink of a color on my lips!).

This routine is my go-to for workdays or anytime I want to apply makeup “on autopilot”. I know the colors that work for me, and I know I’m going to like the final result!

Like I mentioned earlier, now is a great time to either stock up on favorites or expand your makeup kit during this Sephora event! The code is “WELCOMEBACK” in honor of some stores being open (again click here to see if yours is!) and it can be used online or in-store.

Click on any of the images below to shop the products I mentioned!

This post was sponsored by Sephora.